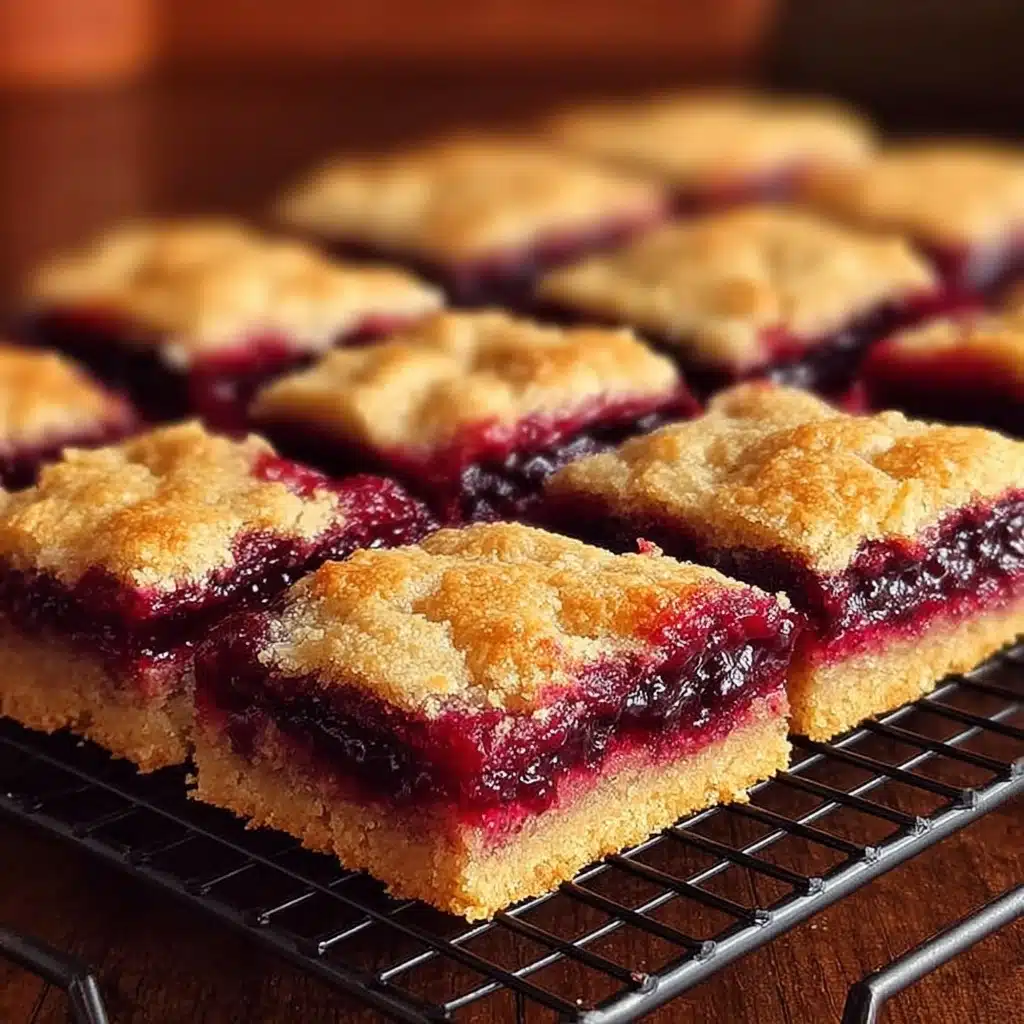
Cherry Pie Bars Recipe
If you love the classic flavors of homemade cherry pie but crave something a little more portable (and perfectly shareable), Cherry Pie Bars are about to win you over. Imagine layers of buttery, tender crust with a luscious cherry filling running through the middle, all finished with a sweet almond-vanilla glaze. Whether you’re baking for a party, cozy family night, or just because you’re craving something bright and cheerful, these bars promise to deliver that nostalgic cherry pie taste with a crave-worthy twist that’s easier to make and serve.

Ingredients You’ll Need
Each ingredient in this Cherry Pie Bars recipe is chosen not just for flavor, but also for texture and color. Having the right balance of creaminess, fluffiness, tart fruit, and just a hint of almond makes these treats truly irresistible.
- Butter (1 cup, softened): The backbone of our rich, tender crust and topping, and essential for that melt-in-your-mouth texture.
- Sugar (2 cups): Adds the perfect amount of sweetness and helps create a golden, slightly crisp edge on every bar.
- Eggs (4): Eggs add structure and richness, making each bite soft but sturdy enough to hold together.
- Vanilla Extract (1 tsp + ½ tsp for glaze): The vanilla brings warmth and aromatic sweetness to both the dough and glaze.
- Almond Extract (¼ tsp + ½ tsp for glaze): Just a touch gives the bars that irresistible, old-fashioned bakery flavor that pairs so beautifully with cherries.
- All-Purpose Flour (3 cups): The foundation that binds everything together while keeping the bars light and cake-like.
- Salt (1 tsp): Enhances every other flavor—never skip it!
- Cherry Pie Filling (2 cans, 21 oz each): Sweet, tart, and perfectly gooey filling that makes every bite of these Cherry Pie Bars a delight.
- Powdered Sugar (1 cup): The secret to a smooth, dreamy glaze that hardens into a sweet finish.
- Milk (2 tbsp): Loosens the glaze just enough for a beautiful drizzle over the cooled bars.
How to Make Cherry Pie Bars
Step 1: Prep Your Pan and Oven
Start by preheating your oven to 350°F (175°C) so it’s nice and hot when your bars go in. Spray a 15x10x1-inch pan with non-stick spray—this will make removing the bars later a breeze and help everything bake evenly.
Step 2: Cream Butter and Sugar
Using a large mixing bowl and either a hand mixer or stand mixer, cream together the softened butter and sugar until you see a fluffy, pale-yellow mixture. Don’t skimp on this step; the more you cream, the lighter your Cherry Pie Bars will be!
Step 3: Incorporate Eggs and Flavorings
Beat in your eggs one at a time, fully mixing each before adding the next. This keeps the batter from separating and helps create that beautiful, cloud-like texture. Stir in both the vanilla and almond extracts—these two extracts make the dough smell absolutely heavenly!
Step 4: Bring Together Dry Ingredients
In a separate bowl, whisk together the flour and salt. Slowly add this mixture to your wet ingredients, mixing just until everything is combined. This keeps the bars soft, not tough. You should end up with a thick, scoopable batter.
Step 5: Layer and Assemble
Spread about 3 cups of the batter over the bottom of your prepared pan, pressing gently to make an even layer. Next, spoon out both cans of cherry pie filling over the batter. Gently spread the cherries edge to edge, then top by dropping spoonfuls of the remaining batter all over. You’ll have little “islands” of dough dotting the glossy red cherries—this is exactly what you want!
Step 6: Bake to Golden Perfection
Pop your assembled bars into the oven and bake for 30 to 35 minutes. You’ll know they’re ready when a toothpick inserted in the center comes out clean or with a few moist crumbs. The edges should be golden, and the cherry filling will bubble slightly. If using a different size pan like a 9×13, keep an eye and adjust the baking time as needed.
Step 7: Cool Completely
Transfer the pan to a wire rack and let your Cherry Pie Bars cool completely. This step helps the bars set up, making them much easier to cut later. Plus, the aroma filling your kitchen while they cool is a bonus treat!
Step 8: Mix and Drizzle the Glaze
Whisk together the powdered sugar, milk, and another hint of both vanilla and almond extracts until smooth. Once the bars have cooled, drizzle the glaze generously over the top. It should set up into a glossy, fragrant finish that ties everything together.
Step 9: Slice and Savor
Let the glaze firm up, then slice into squares or rectangles. Each piece gives you a perfect cross-section of golden crust, ruby cherries, and sweet glaze—perfect for serving and, more importantly, for devouring!
How to Serve Cherry Pie Bars
Garnishes
Bring out the beauty (and flavor) with simple garnishes like a dusting of extra powdered sugar, a handful of sliced almonds, or even fresh cherries on top if they’re in season. A scoop of vanilla ice cream on the side is a decadent upgrade for dessert lovers!
Side Dishes
These Cherry Pie Bars pair like a dream with fresh berries, a fruit salad, or even a dollop of whipped cream. For gatherings, offer alongside coffee, tea, or lemonade to round out a cheerful snack table or brunch bar.
Creative Ways to Present
Stack the bars on a colorful platter for potlucks, or tuck them into decorative cupcake wrappers for grab-and-go treats. Want to make it extra special? Serve each bar on a vintage dessert plate with a sprig of mint for a bakery-worthy finish that wows every guest.
Make Ahead and Storage
Storing Leftovers
If you have any bars left (good luck keeping them around!), store them in an airtight container at room temperature for up to three days. This keeps them moist, soft, and always ready for snacking or sharing.
Freezing
Cherry Pie Bars are freezer-friendly! After baking and glazing, let them cool completely, slice, then wrap individual bars or layer them with parchment paper in a freezer-safe container. They’ll keep for up to three months and make an excellent “emergency dessert” when company pops by.
Reheating
If you’d like that just-baked warmth, pop a bar into the microwave for about 10 seconds. The crust will soften, the cherries will taste extra bright, and the glaze will gently melt for a nearly fresh-from-the-oven experience.
FAQs
Can I use homemade cherry pie filling instead of canned?
Absolutely! If you have a favorite homemade cherry pie filling recipe, use about 4 cups. It gives a fresher flavor, and you can control the sweetness and texture to your preference.
What if I don’t have almond extract?
Your Cherry Pie Bars will still taste fantastic without it. Just increase the vanilla extract a little, or try another flavor like lemon or orange for a twist. Almond does add a lovely, bakery-style aroma, but the bars work either way.
Can these be made in a different size pan?
Yes, you can use a 9×13-inch pan instead of a 15x10x1 pan. Just be aware the bars will be thicker and may require a longer baking time, so watch carefully and test for doneness with a toothpick.
Do Cherry Pie Bars need to be refrigerated?
No, they’re fine at room temperature for a couple of days. If your kitchen is especially warm, or if you like a firmer texture, popping them in the refrigerator can help them set up nicely.
Can I use another fruit filling?
Definitely! This base works beautifully with blueberry, apple, peach, or even strawberry filling. Cherry is classic, but let your cravings and the seasons inspire you!
Final Thoughts
There’s just something special about sharing Cherry Pie Bars with people you love—each bite is bright, buttery, and nostalgic in the best possible way. Don’t wait for a holiday or big occasion; whip up a batch soon and watch them disappear. Happy baking!