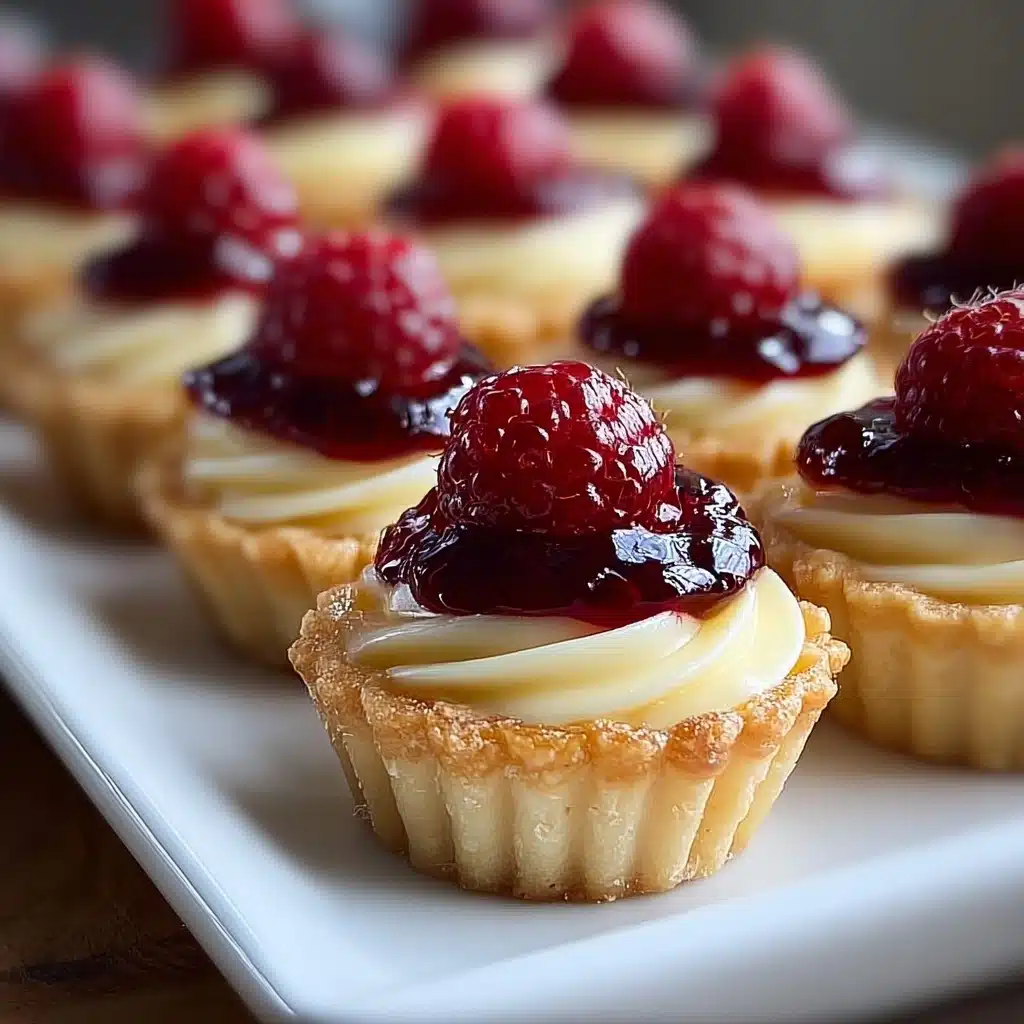
Mini Cheesecake Tarts Recipe
If you’re searching for an irresistible dessert that’s easy to make and impossible to resist, Mini Cheesecake Tarts are your answer. Creamy, luscious, and perfectly portioned, these little treats pack all the rich flavor of classic cheesecake into a bite-sized indulgence. With their crisp graham cracker crust and endless topping options, Mini Cheesecake Tarts are always the star of the dessert table—whether you’re planning a celebration, need a bite of comfort, or want something special for afternoon tea. Their versatility and make-ahead ease have made them one of my all-time favorite recipes to share with friends and family.
Ingredients You’ll Need
Simplicity is at the heart of this recipe, yet every ingredient plays a crucial role. The buttery crust, the creamy filling, and an array of tempting toppings all come together to create the ultimate Mini Cheesecake Tarts. Here’s what you’ll need—and why each one matters.
- Graham cracker crumbs: These create that signature, sweet-and-toasty base that captures everything we love about classic cheesecake crusts.
- Unsalted butter, melted: Acts as the binder for the crust and gives it a rich, buttery flavor that melts in your mouth.
- Cream cheese, softened: The star of the show—softened cream cheese ensures your tarts are smooth, tangy, and decadently creamy.
- Granulated sugar: Brings balance by adding just the right amount of sweetness to the filling.
- Large egg: Binds the filling and gives the tarts structure as they bake.
- Vanilla extract: Rounds out the filling with warm, fragrant notes that complement the cream cheese perfectly.
- Optional toppings: Think fresh berries, fruit preserves, chocolate ganache, caramel drizzle, or crushed nuts—these let you personalize every Mini Cheesecake Tart!
How to Make Mini Cheesecake Tarts
Step 1: Preheat and Prep
Set the stage for cheesecake success by preheating your oven to 325°F (165°C). Ready your muffin tin by lining it with paper liners or giving each cup a light greasing—this makes removing your Mini Cheesecake Tarts a breeze after baking, with their crusts perfectly intact.
Step 2: Prepare the Crust
In a mixing bowl, combine your graham cracker crumbs and melted butter. Stir until the mixture looks like damp sand; you want every crumb coated for the optimal buttery crunch. Spoon a heaping tablespoon into each muffin cup and press down firmly, forming a tidy, even layer that will stand up to the creamy filling.
Step 3: Make the Cheesecake Filling
Grab a new bowl and beat the softened cream cheese until it’s smooth and dreamy—no lumps allowed! Next, blend in the sugar, followed by the egg and vanilla extract. You want everything incorporated, but take care not to overmix; too much air can make the filling crack as it bakes.
Step 4: Assemble the Tarts
Now for the fun part: spoon the luscious cheesecake filling over each crust, filling the cups about three-quarters full. This ensures the tarts puff up attractively without overflowing. Smooth out the tops if you like a polished look.
Step 5: Bake
Place your prepared tin into the oven and let the magic happen. Bake for 15 to 18 minutes, just until the centers are set and slightly jiggly (they’ll firm up more as they cool). Overbaking can dry them out, so keep an eye on them!
Step 6: Cool and Chill
Once baked, give your Mini Cheesecake Tarts a 10-minute rest in the pan, then transfer to a wire rack to cool completely. Patience pays off—chill them in the fridge for at least an hour, which gives that classic, creamy texture time to develop.
Step 7: Add Your Favorite Toppings
Here’s your chance to get creative! Just before serving, crown each tart with your choice of fresh berries, a dollop of fruit preserves, glossy chocolate ganache, golden caramel, or a sprinkle of crushed nuts. Every bite will be uniquely yours!
How to Serve Mini Cheesecake Tarts

Garnishes
The right garnish can elevate your Mini Cheesecake Tarts from sweet treat to spectacular showpiece. Try vibrant mixed berries for a burst of color and freshness, a slick of fruit preserves for tangy sweetness, or a drizzle of chocolate and caramel for total decadence. I love a snowfall of toasted nuts for crunch, or a dusting of powdered sugar for a simple, elegant finish.
Side Dishes
While Mini Cheesecake Tarts are stars on their own, pairing them with something light and fresh keeps things balanced. A fruit salad bursting with citrus, a delicate herbal tea, or even a flute of sparkling wine can complement the creamy richness. Serve alongside coffee as part of a dessert platter, and watch your guests swoon!
Creative Ways to Present
Mini Cheesecake Tarts look adorable on tiered cake stands, nestled into colorful cupcake wrappers, or arranged as a dazzling centerpiece. For special occasions, try piping whipped cream in decorative swirls or adding edible flowers. At parties, create a “toppings bar” and let everyone decorate their own tart—dessert and entertainment in one!
Make Ahead and Storage
Storing Leftovers
If you’re lucky enough to have leftovers, keep your Mini Cheesecake Tarts in an airtight container in the fridge. They’ll stay velvety and delicious for up to four days, making them the ideal make-ahead dessert for busy weeks or spontaneous celebrations.
Freezing
Yes, Mini Cheesecake Tarts freeze beautifully! Simply arrange the cooled, un-topped tarts on a tray and freeze until solid. Then, transfer them to a freezer-safe bag or container for up to two months. Thaw overnight in the fridge and add your favorite toppings just before serving for bakery-fresh results.
Reheating
While these tarts are best served chilled or at room temperature, if you prefer a touch of warmth, let them sit out for 10–15 minutes before serving. Avoid microwaving, as it can affect their smooth texture, but a few minutes on the countertop brings them to the perfect creamy consistency.
FAQs
Can I use a different type of cookie for the crust?
Absolutely! Crushed vanilla wafers, chocolate cookies, or even gingersnaps make fantastic alternatives and can give your Mini Cheesecake Tarts a whole new flavor profile. Just use the same crumb-to-butter ratio for the perfect base.
Why did my cheesecakes crack on top?
Mini cheesecakes can crack if they’re overmixed, overbaked, or cooled too quickly. Mix filling until just combined, bake until just set, and let them cool gradually for the smoothest, prettiest tops. Luckily, toppings easily hide any little cracks, so don’t stress!
Can I make Mini Cheesecake Tarts ahead of time?
Yes—these tarts are made for planning ahead! They taste even better after chilling overnight, making them fantastic for parties or busy weeknights. Just hold off on adding toppings until you’re ready to serve.
Are they gluten-free?
The basic recipe isn’t, but you can easily make gluten-free Mini Cheesecake Tarts by swapping the graham crackers for a gluten-free version. The rest of the ingredients are naturally gluten-free, so everyone can join in on the fun.
What’s the best way to remove tarts from the muffin tin?
Paper liners make it extra easy—just lift them out by the edges once cooled. If you forget liners, just be sure to grease the tin well and run a thin knife around the edge before gently popping them out. Chilling helps them firm up and release cleanly.
Final Thoughts
If you’re ready to wow your friends and family or just treat yourself, Mini Cheesecake Tarts are calling your name. They’re seriously simple, deeply satisfying, and endlessly customizable—what’s not to love? Give them a try, have fun with your favorite toppings, and let every creamy bite remind you why homemade desserts are always the best.