Oreo Layered Halloween Brownies Recipe
Prepare to wow your friends and family with these unforgettable Oreo Layered Halloween Brownies. This recipe transforms a simple brownie mix into a spectacular treat, making every bite a hauntingly delicious experience. Imagine gooey, fudgy brownies melding with orange creme-filled Oreos, all topped with rich chocolate and vibrantly orange frosting. Not only are they eye-catching, but the combination of decadent layers and festive colors will make any Halloween party or spooky movie night extra memorable. Get ready to indulge in a dessert worthy of the holiday spotlight!

Ingredients You’ll Need
The ingredient list for Oreo Layered Halloween Brownies is short but mighty! Each component brings something special—richness from the brownies, a fun crunch and pop of color from the Oreos, and eye-popping hues from the colored frostings. Here’s what you’ll need and why:
- Brownie mix: The base for your brownies—go for your favorite box or homemade blend for fudgy goodness.
- Eggs: Essential for binding everything together and adding that irresistible chew.
- Oil: Gives the brownies moisture and a rich, velvety crumb.
- Milk: Adds extra creaminess and ensures a soft, tender texture in each bite.
- Oreo cookies with orange filling: The star of the show, providing both a visual wow factor and a surprise crunch in every layer.
- Milk chocolate frosting: Adds an indulgent topping and luxurious finish to the brownies.
- White or vanilla frosting: The perfect base for vibrant orange color, bringing your Halloween brownies to life.
- Orange food coloring gel: Just a few drops transform plain frosting into a festive orange swirl that screams Halloween.
How to Make Oreo Layered Halloween Brownies
Step 1: Prepare the Brownie Batter
Start by preheating your oven according to the brownie mix instructions—usually around 350°F (175°C). In a large mixing bowl, combine the brownie mix, eggs, oil, and milk. Stir everything together until your batter is smooth and glossy. This step sets the rich, chocolatey stage for all the layers to come!
Step 2: Layer the Brownies and Oreos
Grease your baking pan well, then spread half of the brownie batter evenly on the bottom. Next comes the magic: arrange Oreo cookies with their vibrant orange centers in a neat single layer over the batter. Don’t be stingy—the more, the merrier! Pour the rest of your batter right over the top, smoothing it out to cover all the cookies. You’ll have perfectly hidden layers that make every sliced bar a showstopper.
Step 3: Bake the Brownies
Bake your Oreo Layered Halloween Brownies according to package directions, which is usually about 30 minutes. To test doneness, insert a toothpick in the center; it should come out mostly clean with just a few moist crumbs. Let the brownies cool completely so they set up nicely—you want neat, tidy slices for that layered wow factor!
Step 4: Prepare and Color Frostings
While your brownies are cooling, divide the milk chocolate and white or vanilla frostings into separate bowls. To make your orange drizzle, add a drop or two of orange food coloring to the white frosting and mix thoroughly. You can always add more for extra oomph—think vibrant pumpkin or jack-o-lantern magic. No Halloween treat is complete without that bold hue!
Step 5: Decorate
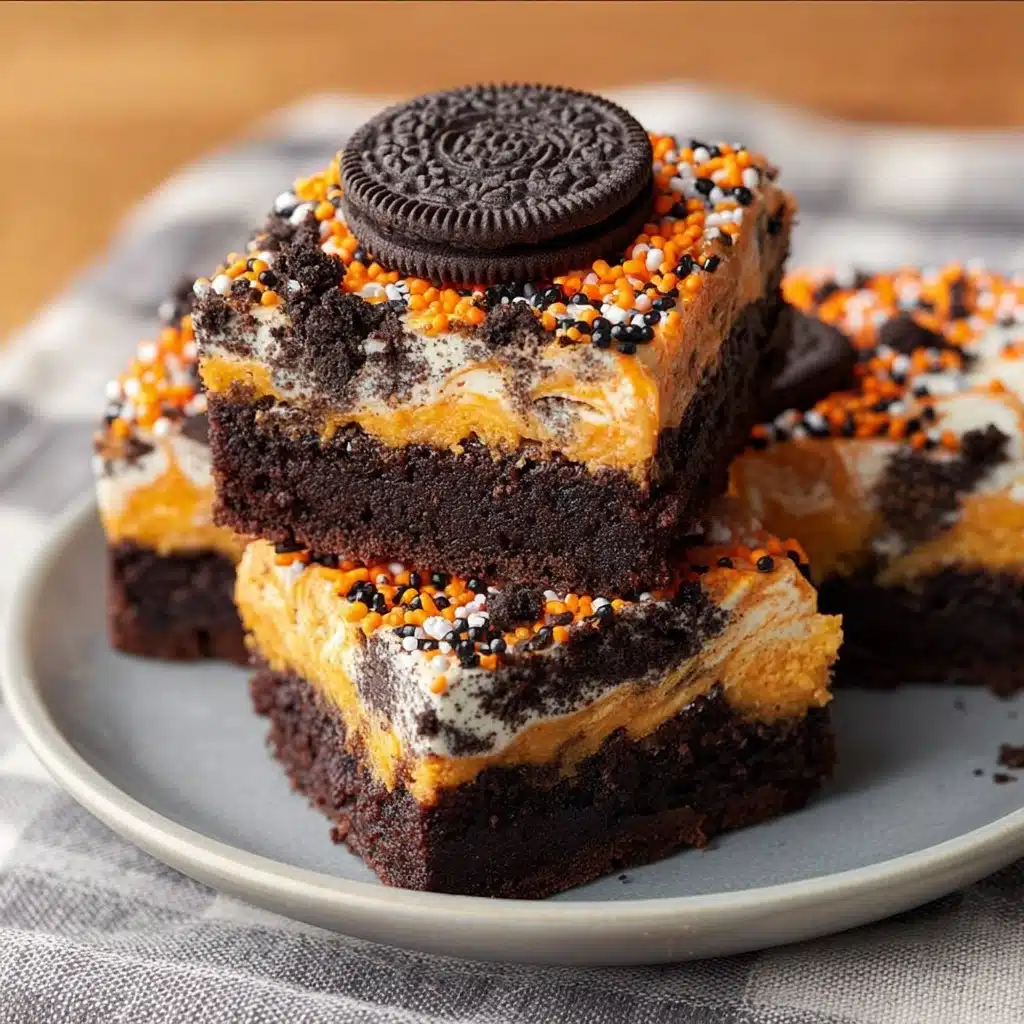
Once your Oreo Layered Halloween Brownies are cool, slather the surface with the milk chocolate frosting for a glossy, decadent coating. Next, get creative piping or drizzling your orange frosting—zigzags, swirls, or even little pumpkin faces if you’re feeling artsy. This playful decoration is your invitation to go wild and truly embrace the Halloween spirit!
How to Serve Oreo Layered Halloween Brownies
Garnishes
Take these brownies over the top by adding edible glitter, Halloween-themed sprinkles, or even crushed Oreos as finishing touches. The garnish not only adds sparkle and crunch, but also makes your tray of Oreo Layered Halloween Brownies the centerpiece of any spooky spread. Kids and adults alike won’t be able to resist reaching for one!
Side Dishes
Compliment these rich, chocolatey treats with something light and refreshing. A bowl of fresh orange fruit salad or a scoop of vanilla bean ice cream balances out the decadence. If you’re serving for a party, offer milk or hot cocoa on the side—perfect for dunking these brownies on a chilly October night!
Creative Ways to Present
For maximum Halloween impact, serve your Oreo Layered Halloween Brownies on a black or orange platter, scattered with extra candy corn, gummy worms, or mini pumpkins. You can also cut them into fun Halloween shapes with cookie cutters or wrap individual bars in cellophane bags with spooky stickers for party favors. It’s all about the festive atmosphere!
Make Ahead and Storage
Storing Leftovers
If you’re lucky enough to have leftovers, stash your brownies in an airtight container at room temperature—they’ll stay fresh and moist for up to four days. The frosted top might firm up a little, but the Oreo crunch inside is still unbeatable. Separate layers with parchment paper to avoid sticking.
Freezing
These brownies freeze beautifully! Just cut them into bars and wrap each one tightly in plastic wrap, then pop them into a freezer-safe bag or container. They’ll keep for up to two months. Thaw at room temperature for about an hour before serving for the perfect texture every time.
Reheating
Want that just-baked warmth? You can gently reheat individual brownies in the microwave for 10–15 seconds. This softens the frosting and makes the middle extra gooey. Just be careful—don’t overheat, or the icing may melt too much!
FAQs
Can I use homemade brownie mix instead of a boxed one?
Absolutely! Any rich, fudgy brownie recipe will work beautifully. Just make sure to scale your recipe to fit the pan and continue layering as instructed to get that classic Oreo Layered Halloween Brownies effect.
What’s the best pan size for these brownies?
An 8×8-inch or 9×9-inch square pan gives you thick, bakery-style brownies. For larger crowds, you can double the recipe and use a 9×13-inch pan—just watch your baking time and check for doneness.
Can I swap the orange Oreos for regular ones if I can’t find them?
Yes! Regular Oreos will still taste great, but the orange filling gives these Oreo Layered Halloween Brownies their festive pop. If you love the look, you might even separate the cookies and tint the filling with a bit of orange food coloring.
Is there a way to make these brownies even more “Halloween-y”?
Totally! Try adding a handful of candy corn or mini chocolate chips on top of the frosting, or use Halloween-shaped sprinkles for even more spooky fun. You can also swirl black and green food coloring into the frosting for a creepier vibe.
How do I make neat slices with all those layers?
For professional-looking squares, chill the frosted brownies before slicing and use a sharp knife wiped clean between cuts. This helps you see those gorgeous Oreo layers and keeps the frosting crisp.
Final Thoughts
Whether you’re baking for a costume bash or just craving a sweet seasonal treat, these Oreo Layered Halloween Brownies promise smiles (and maybe a few goblins) with every bite. They’re eye-catching, wickedly delicious, and so much fun to make and eat—so go ahead, gather your ingredients, and let the Halloween magic begin!