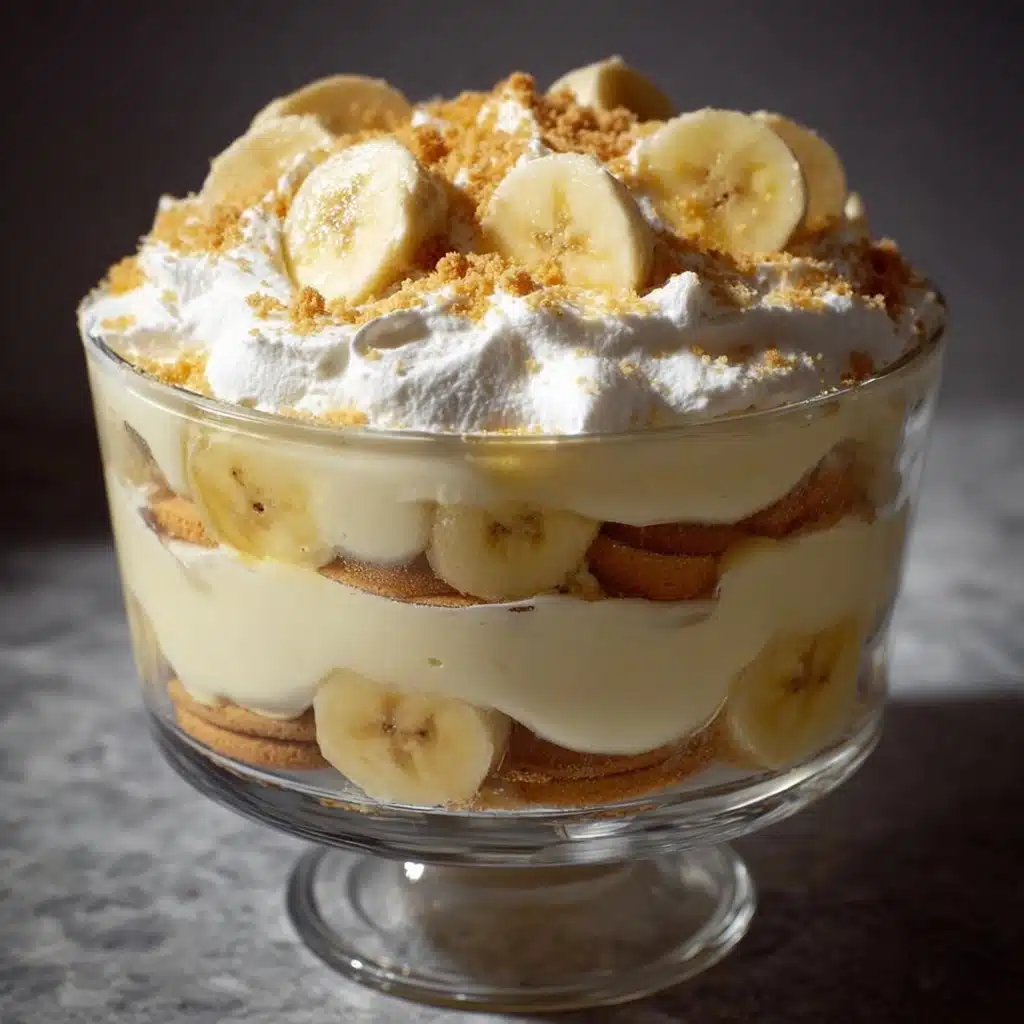
Homemade Banana Pudding Recipe
If you’re searching for the ultimate nostalgic dessert, look no further than this Homemade Banana Pudding. Creamy, layered, and loaded with fresh bananas and vanilla wafers, this classic treat brings together everything you love about old-fashioned comfort food. Each bite is cool, smooth, and just a touch whimsical, putting a smile on faces young and old. Whether you’re heading to a potluck or simply craving something sweet and comforting, Homemade Banana Pudding delivers on taste, texture, and that unforgettable homemade goodness.

Ingredients You’ll Need
The beauty of Homemade Banana Pudding lies in its simple, familiar ingredients. Each one is indispensable, contributing to the creamy pudding, rich banana flavor, and gorgeous layers that make this dessert so special.
- Bananas (4 ripe, sliced): The star of the show! Use fully ripe bananas for maximum sweetness and classic flavor.
- Vanilla wafers (1 box): These add irresistible layers of crunch and soak up the luscious pudding.
- Large eggs (3): Essential for thickening the pudding and providing a luxurious, custardy texture.
- Milk (2 cups): Use whole or 2% for creamiest results; this forms the base of your pudding.
- Sugar (¾ cup): Balances out the bananas’ natural sweetness and gives the pudding its delightful dessert quality.
- All-purpose flour (⅓ cup): This is your thickening agent, ensuring the pudding sets up nice and velvety.
- Pinch of salt: Just a small amount enhances all the other flavors and perks up the pudding.
- Vanilla extract (1 tsp): Adds a lovely depth of aroma and rounds out the flavor profile.
- Whipped topping: For those signature creamy layers and a fluffy finishing flourish on top.
How to Make Homemade Banana Pudding
Step 1: Prepare the Pudding Base
Start by whisking together the sugar, flour, and a pinch of salt in a medium saucepan. This simple step ensures your dry ingredients are evenly distributed, preventing any lumpy surprises later on.
Step 2: Bring It Together with Milk
Gradually add the milk to your dry mixture, whisking constantly to avoid any clumps. Place the saucepan over medium heat and keep stirring—patience here pays off! The mixture should begin to thicken after several minutes, transforming into a luscious, spoon-coating pudding.
Step 3: Temper the Eggs
Now it’s time to add the eggs, but don’t rush it. Whisk the eggs in a separate bowl, then slowly pour in a bit of the hot pudding mixture while stirring constantly. This tempers the eggs, preventing them from scrambling. Return this mixture to the saucepan and cook for two more minutes, letting it bubble gently for a gorgeous, creamy finish.
Step 4: Add Vanilla and Cool Slightly
Remove the pudding from the heat and stir in your vanilla extract. This is when the heavenly aroma really starts to shine through. Give the pudding five minutes to cool slightly; you want it warm but not piping hot for layering.
Step 5: Layer It Up
In your favorite serving dish, begin with a layer of vanilla wafers, followed by a generous scattering of banana slices. Pour a third of the warm pudding over the top, spreading it gently to cover. Repeat the layers until all your ingredients are used, finishing with pudding on top.
Step 6: Top and Chill
Smooth a fluffy layer of whipped topping across the pudding, or pipe it on for a fancier look. Garnish with a few more banana slices or crushed wafers, then cover and refrigerate for at least 2 hours. The chilling time is crucial—it lets the flavors marry and the wafers soften into sweet, cakey perfection.
How to Serve Homemade Banana Pudding
Garnishes
A truly great Homemade Banana Pudding deserves an irresistible finish! Sprinkle extra crushed vanilla wafers or arrange banana coins on top just before serving. For a fun twist, try chocolate curls, a dusting of cinnamon, or even toasted coconut flakes—each adds a little wow factor to your dessert table.
Side Dishes
Pair your pudding with a light spring salad, a cup of hot coffee, or a glass of iced tea for a well-rounded Southern experience. If you’re serving a crowd, set out little bowls of fresh berries for a lovely color and freshness alongside the pudding.
Creative Ways to Present
You don’t have to stick to a big trifle dish! Layer your Homemade Banana Pudding in mason jars for picnic-perfect desserts, or make mini puddings in pretty glasses for individual servings at a party. For a retro vibe, try a classic casserole dish to spark childhood memories.
Make Ahead and Storage
Storing Leftovers
Cover any leftover Homemade Banana Pudding tightly with plastic wrap and refrigerate for up to three days. The flavors deepen over time, but keep in mind the bananas may start to brown a bit—the taste will still be absolutely fantastic.
Freezing
While freezing is not ideal due to the delicate layers and bananas, you can freeze the pudding base (without bananas or wafers) in an airtight container for up to a month. When ready to serve, thaw overnight in the fridge and assemble fresh layers for the best texture.
Reheating
Homemade Banana Pudding is traditionally served chilled, but if you’d like to recreate that just-made warmth, scoop out a portion and gently reheat in the microwave for 10-15 seconds. Don’t over-microwave, or the custard may break—just a bit of warmth is all you need!
FAQs
Can I use instant pudding mix instead of homemade?
Instant pudding is certainly convenient, but making Homemade Banana Pudding from scratch gives you that unbeatable creamy texture and old-fashioned flavor you just can’t replicate with a box.
Will the bananas turn brown?
A bit, yes—especially after a couple of days. To minimize this, slice bananas just before layering and fully cover them with pudding and whipped topping to limit exposure to air.
What type of milk works best?
Whole or 2% milk produces the creamiest results, but you can use a non-dairy milk in a pinch (almond or oat milk work well if you’re dairy free).
Can I make this the night before?
Absolutely! In fact, letting the pudding chill overnight helps the wafers soften to cake-like perfection and the flavors to meld beautifully.
Is Homemade Banana Pudding gluten-free?
As written, this recipe is not gluten-free due to the flour and classic vanilla wafers. For a gluten-free version, use your favorite GF flour blend and gluten-free vanilla cookies.
Final Thoughts
If you love classic desserts that never go out of style, Homemade Banana Pudding has to be at the top of your must-try list! It’s comfort in a bowl and the kind of recipe everyone asks for after just one bite. Gather your loved ones, whip up a batch, and make new memories around this timeless treat. Don’t be surprised if it disappears faster than you can say “seconds please!”