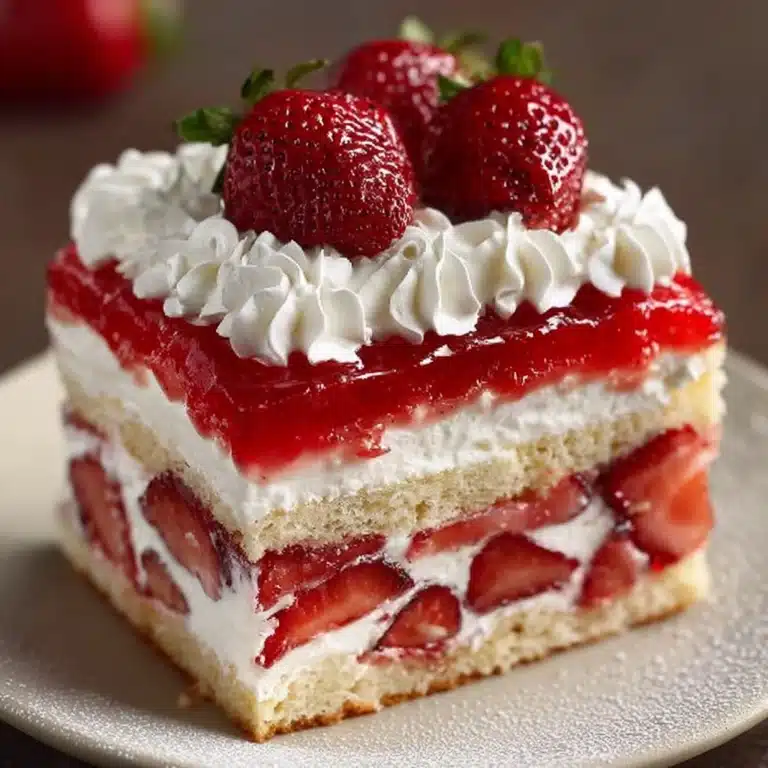
Strawberries & Cream Cheesecake Recipe
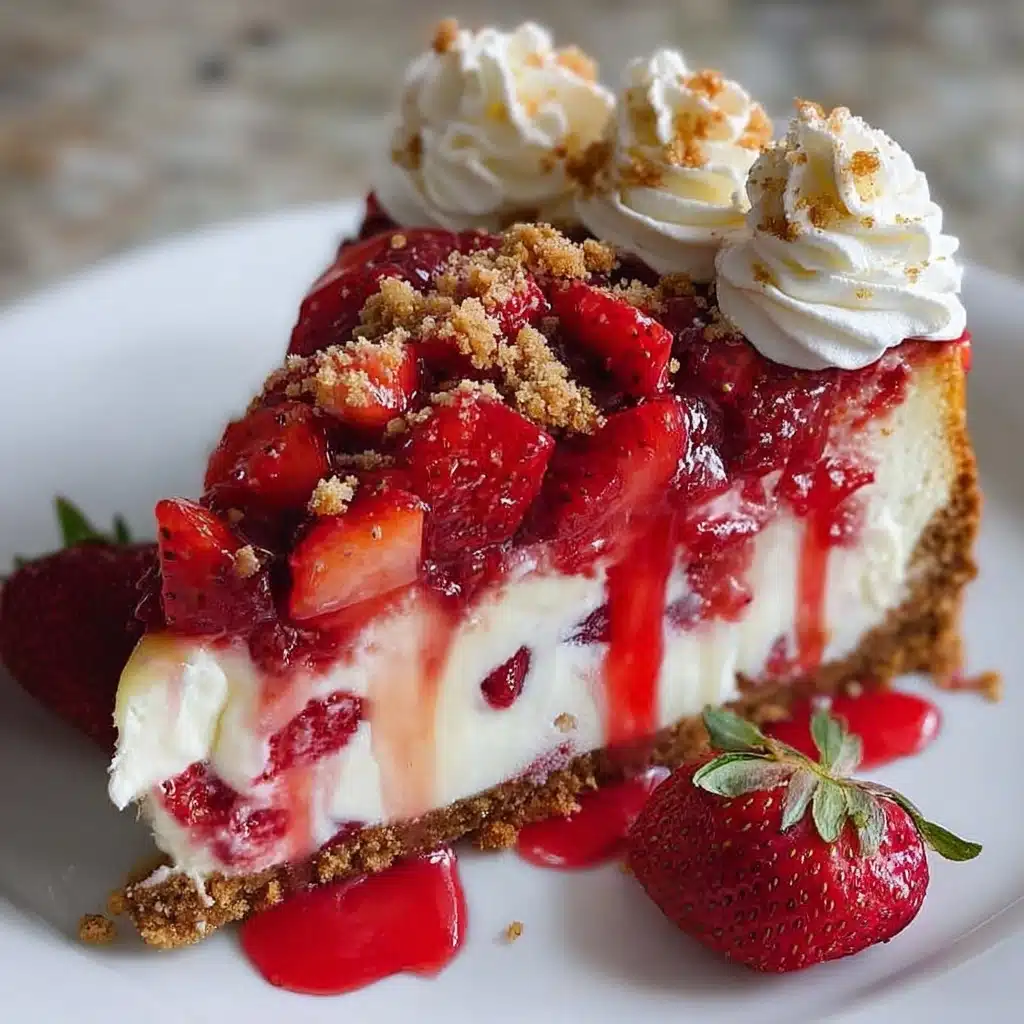
If you’re dreaming of a dessert that dazzles both the eyes and taste buds, look no further than this Strawberries & Cream Cheesecake. Imagine a buttery, golden crust cradling a velvety cream cheese center, all crowned with glossy, homemade strawberry glaze and pillow-soft whipped cream. Each bite of this lush treat is the perfect harmony of creamy, fruity, and delicately sweet flavors — a true showstopper for any springtime celebration or special occasion. Get ready to fall head-over-heels for a slice of pure bliss!
Ingredients You’ll Need
What’s so delightful about Strawberries & Cream Cheesecake is how each ingredient is thoughtfully chosen for its role: creamy richness, zesty brightness, or just the right crunch. Gather these simple staples and let each one work its magic in the finished dessert.
- Digestive biscuits or graham crackers: These create a crumbly, buttery base that adds a subtle nutty flavor and just enough structure.
- Sugar: Used in both the crust and the filling, sugar sweetens and perfectly balances the tangy cream cheese and strawberries.
- Unsalted butter: Melted butter binds the crust together and adds a rich, decadent taste that plays off the creamy filling.
- Cream cheese: The heart of the cheesecake — make sure it’s at room temperature for the smoothest, dreamiest texture.
- Eggs: Essential for helping the filling set while giving the cheesecake its characteristic silkiness.
- Vanilla extract: A splash of vanilla brings a gentle warmth and depth to the flavors.
- Sour cream: Adds just the right amount of tang and creamy consistency to the filling.
- Heavy cream: Delivers extra creaminess and softens the overall texture of the filling.
- Fresh strawberries: Vibrant and juicy, these are the star of the topping as well as the glaze.
- Cornstarch: When combined with water, this thickens the homemade strawberry glaze to glossy perfection.
- Lemon juice: Just a bit brightens the strawberry flavor and sharpens the overall taste.
- Fresh whipped cream (optional): Swirls or dollops of whipped cream make the final presentation irresistible.
How to Make Strawberries & Cream Cheesecake
Step 1: Make the Crust
Kick things off by preheating your oven to 325°F (160°C). In a bowl, blend your biscuit or graham cracker crumbs with sugar and melted butter until the mixture looks sandy but holds together when pressed between your fingers. Pour it into a 9-inch springform pan and press down firmly — you want a tight, even base. Pop it into the oven to bake for ten minutes, then set aside to cool. This step is key for that ultra-satisfying, lightly crisp foundation every great Strawberries & Cream Cheesecake needs.
Step 2: Prepare the Filling
While your crust cools, beat the cream cheese and sugar together until absolutely smooth. Take your time here — any lumps now could carry over into the finished cake! Add the eggs one at a time, mixing just until combined after each addition. Stir in vanilla, then gently fold in the sour cream and heavy cream. What you’re aiming for is a luxuriously silky mixture that almost glows. Pour it over the cooled crust and gently tap the pan on the counter to remove any air bubbles.
Step 3: Bake the Cheesecake
Bake the cheesecake for 55 to 65 minutes. You’ll know it’s ready when the edges are set but the center still gives a slight jiggle if nudged. Don’t worry, it will firm up beautifully as it chills. Let the cheesecake cool at room temperature for an hour, then refrigerate it for at least four hours, though overnight is even better. This step is where the magic happens and the flavors meld perfectly.
Step 4: Prepare the Strawberry Glaze
For the most glorious finish, cook fresh strawberries, sugar, and lemon juice together in a saucepan until the berries start to release their juices. Stir in a cornstarch slurry to thicken — you’ll see it transform into a glossy, ruby-red glaze. Let it cool fully before you spread it over the chilled cheesecake, so it sets up just right instead of running off the sides.
Step 5: Assemble and Serve
Gently spread the cooled strawberry glaze over the cheesecake, then arrange even more fresh strawberries on top for a pop of brightness and color. Finish with swirls or dollops of fresh whipped cream for a presentation that’s as irresistible as the cake itself. Slice with a hot, clean knife for picture-perfect servings, and enjoy every blissful forkful!
How to Serve Strawberries & Cream Cheesecake

Garnishes
This Strawberries & Cream Cheesecake truly shines with thoughtful, simple garnishes. Plump, halved strawberries on top provide extra freshness and color, while fluffy whipped cream swirls create a bakery-worthy finish. For a boost of sparkle, a dusting of powdered sugar or a few mint sprigs add a pretty, aromatic touch that wows every guest.
Side Dishes
Pair this cheesecake with light, celebratory sides to balance its richness. Think a bowl of mixed berries for extra brightness, or delicate almond biscotti for textural contrast. For brunches, a glass of chilled prosecco or a cup of freshly brewed coffee both hit the spot alongside your Strawberries & Cream Cheesecake.
Creative Ways to Present
Have fun with presentation! Make mini cheesecakes using muffin tins, or serve generous wedges on chilled dessert plates drizzled with extra glaze. If you’re feeling playful, pipe whipped cream rosettes between strawberry halves for a vintage touch, or dust the crust with chocolate shavings for a dramatic twist on your Strawberries & Cream Cheesecake centerpiece.
Make Ahead and Storage
Storing Leftovers
Leftover Strawberries & Cream Cheesecake keeps beautifully in the fridge. Cover the pan or transfer slices to an airtight container; it should stay fresh, creamy, and flavorful for up to five days. For best taste, let the cheesecake come to room temperature for about 20 minutes before serving again.
Freezing
If you want to enjoy your cheesecake at a later date, freezing is absolutely possible. Place slices or the whole unsliced cheesecake (without fresh toppings) in the freezer, tightly wrapped in cling film and foil. It will keep for up to two months — just be sure to thaw it slowly in the refrigerator overnight before topping with fresh strawberry glaze and whipped cream.
Reheating
Cheesecake is best enjoyed chilled, though you can take the chill off by resting it at room temperature for a short while. Avoid microwaving, as it can affect texture. Instead, let your Strawberries & Cream Cheesecake sit on the counter for 30 minutes if you prefer a softer, creamier bite.
FAQs
Can I use frozen strawberries instead of fresh?
Absolutely! Frozen strawberries work well for the glaze, especially when fresh aren’t in season. Thaw them first and proceed as directed for a delicious, fruity result.
Why does my cheesecake crack?
Cracking often happens from overbaking or if the cake cools too quickly. Be sure to bake until just set and let it cool gradually. If a crack does appear, don’t fret — your strawberry glaze will cover it beautifully!
Can I make Strawberries & Cream Cheesecake ahead of time?
This cheesecake is the ultimate make-ahead dessert. Prepare and chill it up to two days ahead, then add the strawberry glaze and toppings just before serving for maximum freshness and visual appeal.
Do I need a water bath?
While a water bath (bain-marie) isn’t strictly needed for this recipe, it can help the cheesecake bake even more gently and avoid deep cracks. If you’re after perfect smoothness, try wrapping your pan in foil and setting it in a larger roasting pan with hot water while baking.
How do I know when the cheesecake is done baking?
The edges should look set and slightly puffed, while the center should jiggle like set custard when you gently shake the pan. Remember, it will firm up as it cools. Don’t overbake, or you’ll lose that lush, velvety texture that makes Strawberries & Cream Cheesecake so irresistible!
Final Thoughts
There’s just something magical about making, sharing, and savoring a homemade Strawberries & Cream Cheesecake. From the juicy strawberry crown to the rich, satiny filling and cookie-like crust, each element comes together for a celebration of flavor and texture. Give this recipe a try — your friends and family (and your own sweet tooth) will thank you!