Grilled Cheese Burrito with Seasoned Beef Recipe
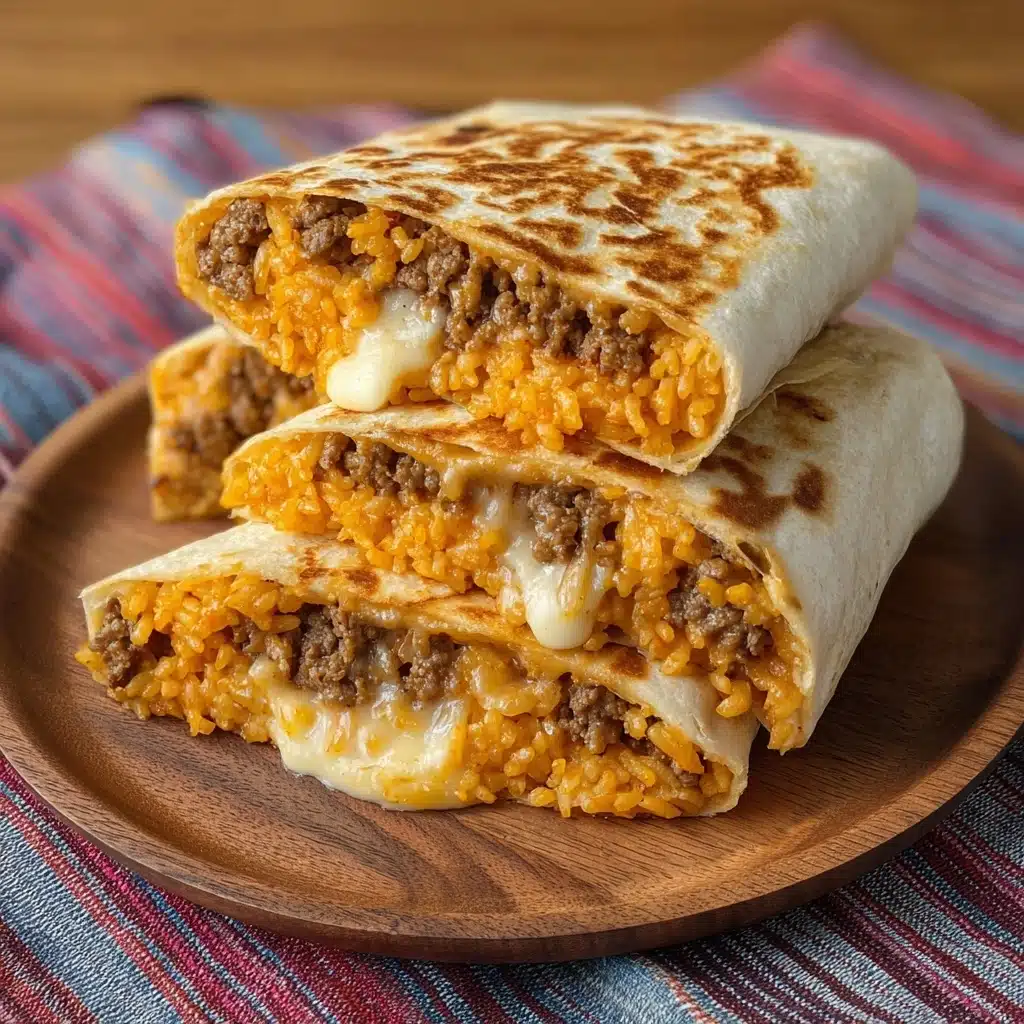
The Grilled Cheese Burrito with Seasoned Beef is everything a comfort food lover dreams of: hearty, cheesy, savory, and delightfully crunchy on the outside, with a molten, beefy filling inside. Imagine all your favorite taco night flavors tucked into a single burrito, kissed with a golden, crispy cheese crust. This is not your run-of-the-mill burrito—it’s a Tex-Mex mashup that delivers an explosion of bold flavors and textures, making it perfect for a crowd-pleasing weeknight dinner or a fun weekend treat.
Ingredients You’ll Need

Ingredients You’ll Need
You only need a handful of well-chosen ingredients to create this sensational Grilled Cheese Burrito with Seasoned Beef. Each element shines, building layers of taste and bite, from the spiced beef to that irresistible cheesy crust outside. Here’s what you’ll need and why:
- Ground Beef (85% lean): The rich, juicy foundation—85% is ideal for flavor and moisture.
- Olive Oil: Brings out the beef’s flavor and gets your skillet sizzling.
- Taco Seasoning: Infuses the beef with zesty, Southwestern aroma; use a packet or mix your own.
- Water: Helps the seasoning cling and creates a saucy base for the beef.
- Cooked Fried Rice (day-old): Adds texture and a toasty edge; leftover rice works best.
- Diced Onions: Sautéed for sweetness and depth in the fried rice.
- Nacho Cheese Sauce (warm): Creamy, gooey decadence swirled in every bite.
- Shredded Cheddar Cheese (filling): Melts beautifully, amplifying that cheesy comfort inside.
- Shredded Cheddar or Mexican Blend Cheese (tortilla crust): For forming the glorious, crispy exterior.
- Flour Tortillas (10-inch): Large, soft tortillas that can hold all the magic without tearing.
- Crunchy Tortilla Chips (slightly crushed): Give that epic surprise crunch you’ll crave each bite.
- Optional Toppings (sour cream, salsa, jalapeños, cilantro): Let everyone add their own finishing touch.
How to Make Grilled Cheese Burrito with Seasoned Beef
Step 1: Cook the Seasoned Beef
Start by heating a skillet over medium heat with a swirl of olive oil. Add the ground beef, breaking it up with a spoon or spatula as it browns. Once all the pink is gone, drain off excess fat. Sprinkle in your taco seasoning and pour in the water, stirring to evenly coat the beef. Let this simmer for 3 to 4 minutes—your kitchen will smell amazing as the flavors mingle—until the mixture thickens up into a saucy, aromatic filling.
Step 2: Fry the Rice
In a second pan, heat a drizzle of oil and toss in your diced onions. Sauté for a couple of minutes until they’re soft and translucent, then add your leftover rice. Stir-fry, pressing gently, until the rice is hot and a little crispy on the edges. This step unlocks a subtle smoky crunch that takes your Grilled Cheese Burrito with Seasoned Beef to the next level.
Step 3: Assemble the Burritos
Lay each tortilla flat and start building. Begin with a bed of fried rice, then add a generous scoop of seasoned beef. Spoon on warm nacho cheese sauce, sprinkle with shredded cheddar, and finish with a handful of crushed tortilla chips for that signature crunch. Be sure to keep your layers basketed in the center so you’ll be able to fold up your burritos tight.
Step 4: Roll the Burritos
To roll, fold the sides of the tortilla towards the center, then roll tightly from the bottom up to fully encase your filling. Take your time here—neatly rolled burritos are easier to handle in the skillet and look gorgeous when served.
Step 5: Make the Cheese Crust
Now it’s time for the showstopper: the grilled cheese crust. In a nonstick skillet over medium-low heat, sprinkle a circle of shredded cheese a bit wider than your burrito. Place the rolled burrito, seam-side up, right over the cheese, and let it sizzle. In 2 to 3 minutes, the cheese will melt and crisp into a beautifully golden crust. Carefully flip to heat through for another minute or two—the smell is pure heaven!
Step 6: Serve Hot
Immediately transfer your Grilled Cheese Burrito with Seasoned Beef to a plate, crust-side up. Top with dollops of sour cream, salsa, fresh jalapeños, or a sprinkle of chopped cilantro. Serve piping hot to catch that melty cheese at its absolute best.
How to Serve Grilled Cheese Burrito with Seasoned Beef
Garnishes
Go wild with your toppings! Cool sour cream and tangy salsa are classics, while sliced jalapeños add fire and chopped cilantro brings a burst of color and freshness. You might even love a squeeze of lime or a sprinkle of diced tomato for extra brightness on your Grilled Cheese Burrito with Seasoned Beef.
Side Dishes
This burrito is hearty on its own, but a few tasty sides really round out the meal. Try serving it with crisp romaine salad, elote-style corn, or a chilled pico de gallo. A handful of extra tortilla chips with guacamole is also a crowd-pleaser and perfect for scooping up any cheesy bits left behind.
Creative Ways to Present
Slice your Grilled Cheese Burrito with Seasoned Beef in halves or thick rounds and fan them out on a platter with little dipping bowls of extra nacho cheese or salsa. For a fun twist, cut into mini sections and secure with toothpicks for party-ready burrito bites that impress. For taco night, let everyone customize their burrito fillings and add-ins at the table for a build-your-own feast.
Make Ahead and Storage
Storing Leftovers
If you end up with leftover Grilled Cheese Burrito with Seasoned Beef, simply wrap each cooled burrito tightly in foil or plastic wrap, then store in an airtight container in the fridge. They’ll keep well for up to 3 days, making for delicious, fuss-free lunches or quick dinners later in the week.
Freezing
To freeze, assemble your burritos but skip the cheese crust step. Wrap individual burritos tightly in foil and place in a freezer bag. Freeze for up to 2 months. When ready to eat, thaw overnight in the fridge, then follow the directions to reheat and add the cheese crust for that fresh-from-the-skillet magic.
Reheating
For best results, reheat leftover burritos in a skillet over low heat to help the cheese crust crisp back up. If reheating from frozen, microwave wrapped in a damp paper towel until hot, then add the outside cheese crust in a skillet. Avoid the microwave alone, as it can make the tortillas rubbery and lessen that beautiful crunch.
FAQs
Can I use ground turkey or chicken instead of beef?
Absolutely! Ground turkey or chicken make great lighter alternatives in your Grilled Cheese Burrito with Seasoned Beef. Just make sure to season generously and don’t overcook so your filling stays juicy and flavorful.
How do I keep my burrito from falling apart?
Roll your burritos tightly, tucking the sides in before rolling from the bottom up. Using large tortillas and keeping fillings centered helps. A little melted cheese at the seam can even act as a “glue” while grilling—so handy!
What’s the best way to get a perfectly crispy cheese crust?
Use a good nonstick skillet and medium-low heat. Sprinkle cheese evenly in a circle, then let it melt and cook undisturbed until golden before flipping. Resist the urge to move the burrito too soon for maximum crunch!
Can I make these burritos ahead for a party?
Definitely—you can assemble the Grilled Cheese Burrito with Seasoned Beef ahead of time and store them chilled. Add the cheese crust just before serving so it’s fresh, melty, and crispy for your guests.
Do I have to use nacho cheese sauce?
Nope! While nacho cheese adds that gooey, bold flavor, you can swap in Monterey Jack, pepper jack, or even a homemade queso if you’d like. Just be sure it’s melty for the full effect.
Final Thoughts
If there’s one dinner that guarantees smiles and second helpings, it’s this Grilled Cheese Burrito with Seasoned Beef. Whether you’re making a cozy night in extra special or feeding a hungry crowd, this twist on classic Tex-Mex never disappoints. Give it a try and enjoy all those stretchy-cheesy, beef-filled, crunchy bites!