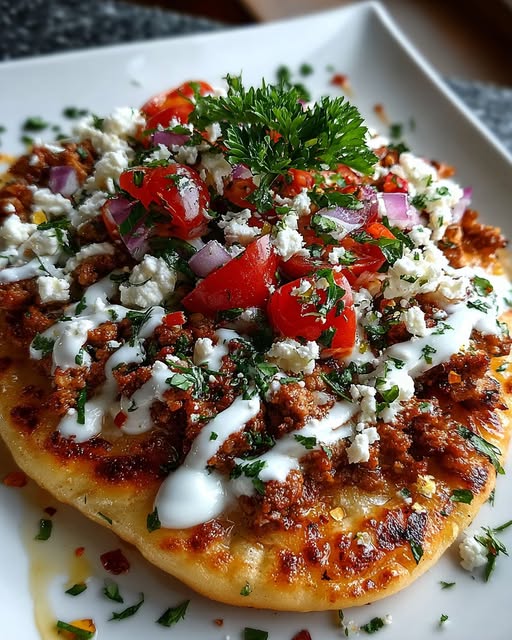
Loaded Taco Pizza Bombs with Queso Drizzle Recipe
If you’re looking for the ultimate handheld party treat, it doesn’t get much more irresistible than these Loaded Taco Pizza Bombs with Queso Drizzle. Imagine your favorite taco flavors—spiced beef, melty cheeses, and fresh veggies—all tucked inside soft, golden pizza dough, and then finished with a luscious warm queso drizzle. Each bite is a savory explosion that will turn weeknight dinners, game days, or casual gatherings into a flavor-packed fiesta!
Ingredients You’ll Need
The beauty of Loaded Taco Pizza Bombs with Queso Drizzle is how simple ingredients come together for maximum impact. Each component adds a unique flavor, texture, or fresh pop of color, creating mouthwatering layers you’ll want to sink your teeth into.
- Refrigerated pizza dough: The foundation for these pizza bombs—soft, fluffy, and super convenient!
- Ground beef: Juicy and hearty; use lean for less grease or 80/20 for richer flavor.
- Taco seasoning: Choose your preferred brand, or make your own for extra depth and smoky nuance.
- Shredded cheddar cheese: Adds sharpness and a classic melt that melds perfectly with the other fillings.
- Shredded mozzarella cheese: For that glorious cheese pull and milky creaminess in every bite.
- Diced tomatoes: Adds freshness and a subtle tang—use ripe, firm tomatoes for less moisture.
- Diced onions: Offers crunch and a mellow, savory kick—you can use red or white.
- Sliced black olives: Salty, briny notes that balance the richness of the filling.
- Sliced jalapeños: Brings heat; leave seeds in for more spice or use less for milder bombs.
- Queso cheese sauce (warm): The all-important drizzle—rich, velvety, and the ultimate finish.
- Fresh cilantro (for garnish): A bright herbal sprinkle to wake up every bite just before serving.
How to Make Loaded Taco Pizza Bombs with Queso Drizzle
Step 1: Preheat Your Oven
Start by preheating your oven to 375°F (190°C). Taking this extra minute ensures that when your pizza bombs go in, they’ll puff and brown beautifully right away for maximum flavor and crispness.
Step 2: Cook the Taco Beef
Heat a skillet over medium and add your ground beef. Break it up into small crumbles as it cooks for the best texture. Once it’s browned and no longer pink, drain any excess fat—this will keep your bombs from getting soggy—then stir in the taco seasoning according to package directions. This turns the beef into the juicy, spiced heart of every bomb.
Step 3: Prepare the Dough
Roll out your refrigerated pizza dough on a floured work surface to prevent sticking. Use a sharp knife or pizza cutter to slice the dough into roughly 4-inch squares; don’t worry about perfect shapes, as they’ll get pinched and sealed. Each square is your blank canvas for piling on those flavorful fillings.
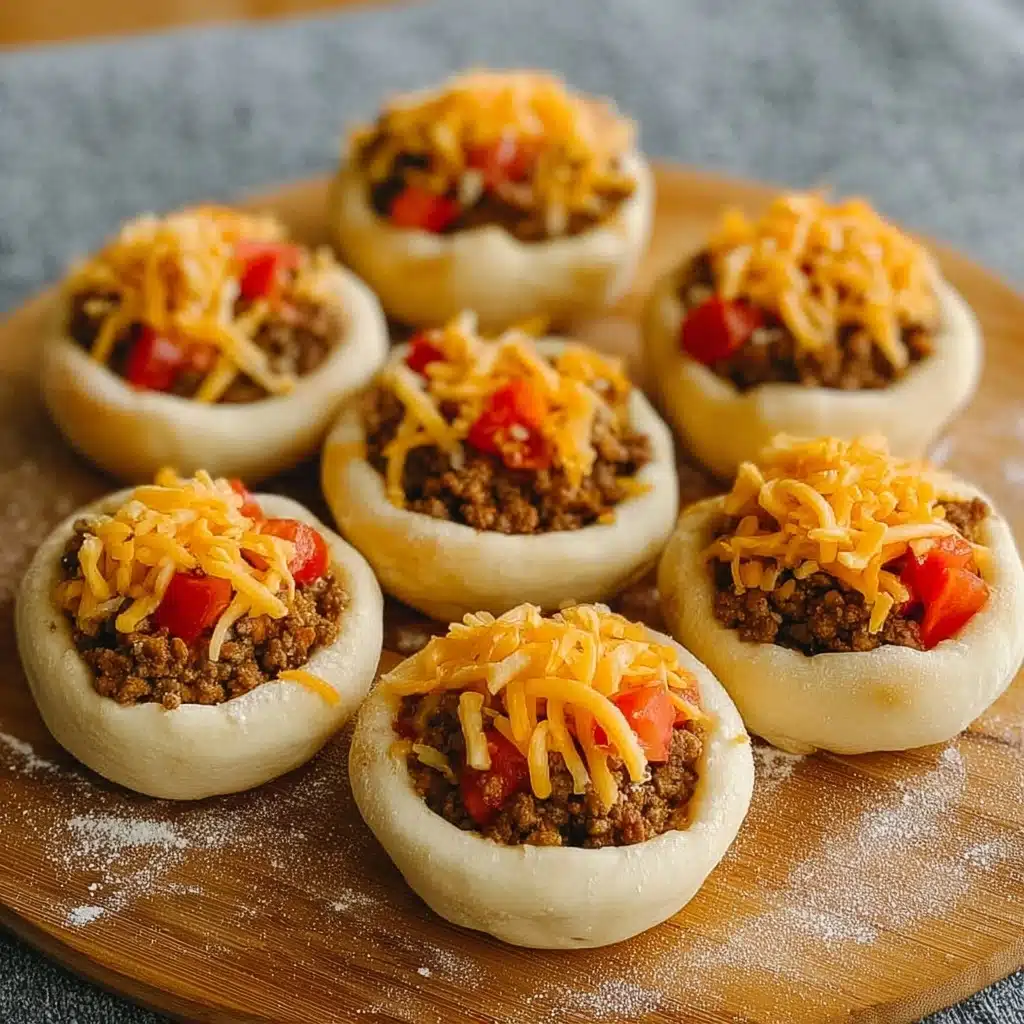
Step 4: Fill Your Pizza Bombs
This is where the magic happens: Spoon some taco beef into the center of each square. Top with a sprinkle of cheddar, a sprinkle of mozzarella, and then a little mound of tomatoes, onions, olives, and a couple of jalapeño slices. Don’t overfill! Leave a border to make sealing easier and prevent any deliciousness from escaping in the oven.
Step 5: Seal the Bombs
Fold each dough square over the filling, pinching the edges closed. Work your fingers around the seams to create a tight seal so everything stays inside while baking. For a neater look, flip them seam-side down on your baking sheet—this trick keeps them looking tidy and professional once baked.
Step 6: Bake to Golden Perfection
Arrange your loaded bombs on a parchment-lined or lightly greased baking sheet, leaving an inch or so between each to allow even cooking. Slide them into the oven and bake for 15–20 minutes, or until gorgeously golden and puffed. The aroma in your kitchen will be absolute heaven!
Step 7: Queso Drizzle Time
While the bombs bake, warm your queso cheese sauce so it’s luscious and pourable. As soon as the pizza bombs come out of the oven, transfer them to your serving platter and generously drizzle the warm queso over the top. This is the Loaded Taco Pizza Bombs with Queso Drizzle signature move—it takes them from great to showstopping!
Step 8: Garnish and Serve
Shower with freshly chopped cilantro for a burst of color and bright, herby flavor just before serving. These Loaded Taco Pizza Bombs with Queso Drizzle are best enjoyed warm so that gooey cheese and spiced beef are at their ooziest.
How to Serve Loaded Taco Pizza Bombs with Queso Drizzle

Garnishes
Don’t be shy with the toppings! Besides the queso drizzle and cilantro, you can add sliced green onions, extra jalapeños, or a squeeze of lime over the platter for a lively, color-packed presentation. Each garnish adds a fresh note, so everyone gets a slightly different taste in every bite.
Side Dishes
For a full meal, serve your Loaded Taco Pizza Pizza Bombs with Queso Drizzle alongside classics like Mexican rice, refried beans, a crisp green salad, or even a bowl of tortilla chips. These sides help balance the rich, cheesy filling and keep your table spread feeling bright and festive.
Creative Ways to Present
Set up a DIY taco bar: pile your pizza bombs on a platter, and put out little bowls of sour cream, extra salsa, guacamole, and hot sauce for dipping. Or, skewer a few pizza bombs on bamboo picks and arrange them as party-ready appetizers. There are so many ways to let your creativity shine with Loaded Taco Pizza Bombs with Queso Drizzle!
Make Ahead and Storage
Storing Leftovers
If you find yourself with extra Loaded Taco Pizza Bombs with Queso Drizzle (lucky you!), pop them in an airtight container and refrigerate for up to three days. They’ll stay soft, and all that cheesy, taco-spiced filling will still be dreamy the next day.
Freezing
To freeze, let the baked pizza bombs cool completely, then wrap individually in plastic wrap or foil. Place them all in a freezer bag or airtight container. They’ll keep for 2–3 months—perfect for quick snacks or last-minute lunches that taste like they took hours to make!
Reheating
For best results, reheat Loaded Taco Pizza Bombs with Queso Drizzle in a preheated oven at 350°F for 8–10 minutes to restore their crisp edges and melty centers. If you’re short on time, a microwave works too; cover with a damp paper towel and heat in 30-second bursts until hot throughout.
FAQs
Can I use ground turkey or chicken instead of beef?
Absolutely! Ground turkey or chicken is a great substitute if you want something lighter. Just make sure to adjust the seasoning—since these meats are milder, you may want to add a pinch of extra taco spice or a little salsa when mixing.
Can I make Loaded Taco Pizza Bombs with Queso Drizzle dairy-free?
You can! Swap in your favorite plant-based cheeses and use dairy-free queso. The results are every bit as melty and crave-worthy, so everyone can enjoy.
How do I keep the bottoms from getting soggy?
Line your baking sheet with parchment, and avoid overfilling—which can cause leaks. Draining the beef well and patting ingredients like tomatoes dry will also keep your pizza bombs soft rather than soggy.
Could I prepare these ahead for a party?
Yes! Assemble and seal the pizza bombs a day in advance, then refrigerate covered until ready to bake. Wait to add the queso drizzle and garnishes until just before serving for the freshest effect.
What’s the best way to reheat a big batch?
Spread them in a single layer on a baking sheet (not touching), cover loosely with foil, and rewarm in a 350°F oven until hot—about 10 minutes. This keeps them crisp outside and gooey inside, even for a crowd.
Final Thoughts
If you’re ready for a flavor-packed adventure that’s as fun to make as it is to eat, fire up your oven for these Loaded Taco Pizza Bombs with Queso Drizzle. They’re perfect for sharing, endlessly customizable, and certain to disappear fast! Don’t wait—invite a friend or your family into the kitchen and make taco night extra special.