Cookie Butter Cheesecake Cups Recipe
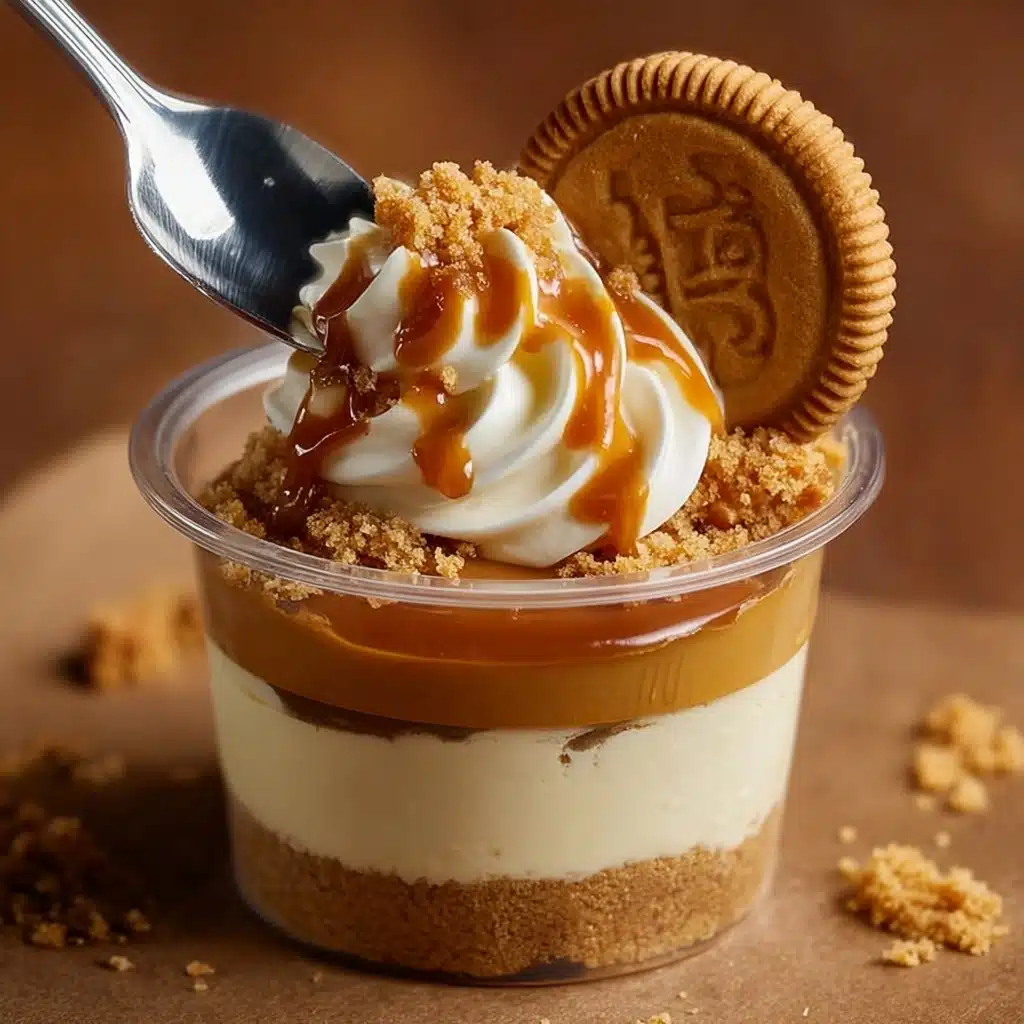
If you’re searching for a dessert that checks all the boxes—easy, crowd-pleasing, and absolutely decadent—let me introduce you to Cookie Butter Cheesecake Cups. These creamy treats layer smooth cheesecake mousse with crunchy Biscoff cookies and a luscious caramel drizzle. The result? Pure magic in a cup! Whether you’re hosting friends or just want something delightful after dinner, these Cookie Butter Cheesecake Cups deliver both flavor and fun in every spoonful.
Ingredients You’ll Need
This recipe comes together quickly with a handful of simple ingredients, each playing a key role in building those irresistible layers. Every element adds to the taste, texture, or appearance of your Cookie Butter Cheesecake Cups, making each bite memorable.
- Cream Cheese: The base of our cheesecake filling, it creates a silky-smooth, tangy foundation.
- Cookie Butter (Biscoff Spread): Rich and spiced, it gives the cheesecake layers that unmistakable speculoos flavor.
- Powdered Sugar: Brings just the right amount of sweetness and blends easily for a lump-free mousse.
- Heavy Cream: Whipped until soft peaks form, it makes the filling airy and light.
- Vanilla Extract: A splash of vanilla rounds out the flavors with warmth and depth.
- Biscoff Cookies: Crushed for both layers and topping, these cookies add addictive crunch and spiced notes.
- Caramel Sauce: For that extra touch of indulgence, a generous drizzle brings everything together.
How to Make Cookie Butter Cheesecake Cups
Step 1: Prepare the Cheesecake Filling
Start by beating softened cream cheese, cookie butter, powdered sugar, and vanilla extract together in a bowl. Mix until the ingredients are completely smooth and creamy—no lumps allowed! Next, gently fold in your freshly whipped heavy cream, being careful not to deflate the mixture. This step ensures your filling is incredibly light yet rich and luxurious.
Step 2: Layer the Dessert
Now comes the fun part. Spoon a layer of crushed Biscoff cookies into the bottom of each cup to serve as a sweet, crunchy base. Add a generous dollop of your cheesecake filling on top, then repeat with another layer of cookie crumbles and more cheesecake. This creates gorgeous, Instagram-worthy layers and makes each cup special.
Step 3: Top and Drizzle
Finish by sprinkling more crushed Biscoff cookies on the very top. For a final flourish, drizzle plenty of caramel sauce over each Cookie Butter Cheesecake Cup. The caramel not only looks stunning, it also adds a rich, buttery sweetness that ties all the flavors together beautifully.
Step 4: Chill and Serve
Pop your finished cups into the refrigerator for at least one hour. This step is crucial for achieving that cool, creamy texture that makes these Cookie Butter Cheesecake Cups irresistible. They’re best enjoyed cold, so don’t rush—let all those flavors meld together!
How to Serve Cookie Butter Cheesecake Cups

Garnishes
Take your Cookie Butter Cheesecake Cups to the next level by adding a dollop of fresh whipped cream and a final sprinkle of Biscoff cookie crumbs. If you’re feeling extra fancy, a tiny cookie tucked into the top or a dusting of cinnamon makes for a delightful finishing touch.
Side Dishes
Pair these cheesecake cups with some fresh berries or a small bowl of mixed fruit for a refreshing counterpoint to their creamy richness. A pot of coffee or a cup of strong tea also makes an excellent match, balancing sweet with a hint of bitterness.
Creative Ways to Present
Serve your Cookie Butter Cheesecake Cups in pretty jars, wine glasses, or even espresso cups for a whimsical twist. For a party, swap regular cups for mini shot glasses and set up a DIY toppings bar with caramel, cookie pieces, and extra whipped cream so everyone can customize their own dessert.
Make Ahead and Storage
Storing Leftovers
If you somehow end up with leftovers, keep your Cookie Butter Cheesecake Cups covered in the refrigerator. They’ll stay wonderfully fresh for up to three days, though the cookie layers may soften slightly (which only adds to their charm, if you ask me!).
Freezing
Want to save some for later? You can absolutely freeze these cheesecake cups! Wrap them well and store for up to a month. Just remember to thaw them overnight in the fridge before serving, which helps maintain their creamy texture.
Reheating
No reheating required! These are meant to be served chilled, straight from the fridge. If frozen, just let them thaw gradually. Enjoy them cold, and you’ll be rewarded with optimal flavor and the perfect consistency.
FAQs
Can I use another type of cookie instead of Biscoff?
Absolutely! While Biscoff cookies provide that unique spiced flavor, graham crackers or vanilla wafers also work beautifully if you want a slightly different twist.
What if I don’t have cookie butter?
If you can’t find cookie butter, you can use a mild spiced spread or even peanut butter for a completely new take—just know the flavor will be different but still delicious.
Can I make these Cookie Butter Cheesecake Cups ahead of time?
Yes and they’re even better when made ahead! Prepare them up to a day before your event and keep them covered in the fridge until ready to serve.
Is this recipe gluten-free?
Biscoff cookies and cookie butter contain wheat, so these cups aren’t gluten-free by default, but you can use gluten-free cookie options and spreads available at most grocery stores for a delicious alternative.
Can I double this recipe for a larger crowd?
Of course! This recipe scales up beautifully—just multiply the ingredients by the number of guests, and layer in a bigger dish or keep the individual servings for a pretty presentation.
Final Thoughts
Whether you’re new to no-bake desserts or already a big fan, these Cookie Butter Cheesecake Cups are bound to become your next go-to treat. Creamy, crunchy, and bursting with flavor, they’re a true celebration in every bite. Give them a try, and get ready for rave reviews!