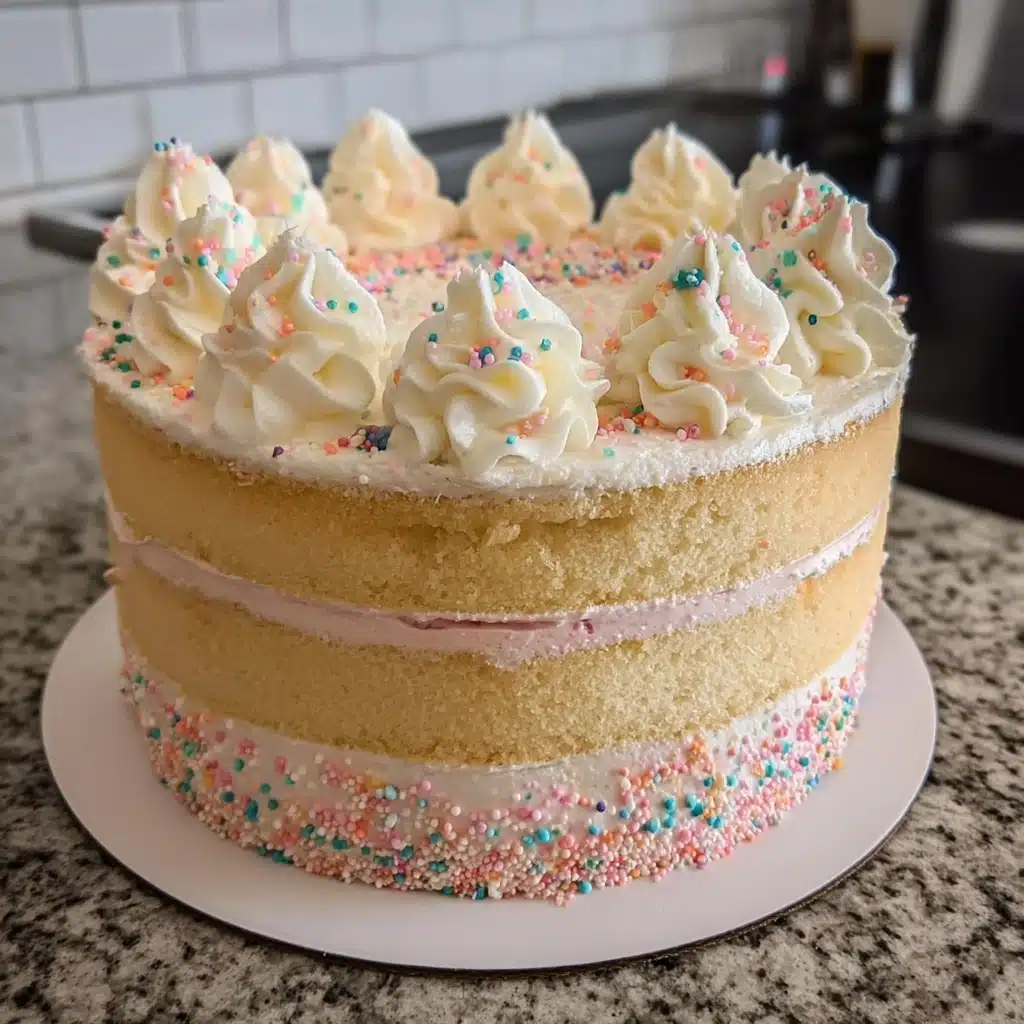
Vanilla Sky Layers – Light & Airy Recipe
If you have ever dreamed of a cake that feels as delicate as a breath of fresh air, the Vanilla Sky Layers – Light & Airy is here to make that dream come true. With pillowy soft layers of vanilla-infused cake paired with a luxuriously creamy frosting, this dessert is like biting into a sun-kissed cloud. Every slice offers a tender crumb and just the right touch of sweetness, making it a standout choice for everything from springtime birthdays to intimate gatherings. The combination of simplicity and elegance creates a show-stopping treat that feels both familiar and refined.
Ingredients You’ll Need
Getting started on your Vanilla Sky Layers – Light & Airy is a breeze thanks to the straightforward but essential ingredients. Each one plays a vital role in building the perfect texture, flavor, and appearance for this dreamy cake.
- Unsalted butter: Using softened butter ensures a smooth, creamy batter and rich cake crumb.
- Granulated sugar: Sweetens evenly to enhance the vanilla notes without overpowering.
- Large eggs: Provide structure and moisture, essential for tender layers.
- All-purpose flour: The backbone of the cake, offering just enough protein for lightness without toughness.
- Baking powder: A leavening agent that lifts the cake to fluffy perfection.
- Salt: Balances sweetness and deepens the overall flavor complexity.
- Whole milk: Adds moisture and helps dissolve sugar, creating a velvety batter.
- Vanilla extract: The star flavor, infusing the cake with warm, aromatic sweetness.
- Cream cheese: Provides tangy richness to the frosting for a dreamy contrast.
- Powdered sugar: Ensures a silky, smooth frosting texture that’s easy to spread.
- Milk or cream: Adjusts frosting consistency to perfect cloud-like swirls.
- Optional garnishes: Edible silver dust or fresh berries add a whimsical, beautiful finishing touch.
How to Make Vanilla Sky Layers – Light & Airy
Step 1: Prepare Your Pans and Preheat the Oven
Begin by preheating your oven to 350°F (175°C). Grease and flour three 8-inch round cake pans or line them with parchment paper. This step ensures your Vanilla Sky Layers will release easily and bake evenly, setting the stage for beautiful, uniform cakes.
Step 2: Cream Butter and Sugar Until Fluffy
In a large mixing bowl, beat the softened butter and granulated sugar together until the mixture is light and fluffy. This isn’t just about mixing; it’s about incorporating air to help the cake rise with that signature light texture.
Step 3: Incorporate Eggs One at a Time
Add the eggs one by one, fully beating each in before adding the next. This slow method guarantees a smooth batter without curdling, which is key for the delicate crumb of the Vanilla Sky Layers – Light & Airy.
Step 4: Combine Your Dry Ingredients Separately
Whisk together the flour, baking powder, and salt in another bowl. Mixing these dry ingredients evenly ensures each bite has balanced flavor and consistent texture from edge to center.
Step 5: Alternate Adding Dry Ingredients and Milk
Gradually add the dry ingredients and whole milk to the butter mixture, starting and ending with the flour mixture. Mix just until combined to avoid developing too much gluten, keeping the layers tender and cloud-like. Stir in the vanilla extract last for that wonderful fragrant bloom.
Step 6: Bake Until Golden and a Toothpick Comes Out Clean
Divide the batter evenly among the three prepared pans. Bake for 22 to 26 minutes, until the cakes are a golden shade and a toothpick inserted in the center comes out clean. This perfect bake time ensures each layer remains moist and airy.
Step 7: Cool the Cake Layers Thoroughly
Allow the cakes to cool in their pans for 10 minutes before transferring them to wire racks. Cooling completely prevents your frosting from melting when assembled, which is essential to achieving those soft, ethereal swirls on top of your Vanilla Sky Layers – Light & Airy.
Step 8: Whip Up the Cream Cheese Frosting
Beat together the softened cream cheese and butter until smooth and creamy. Gradually add the powdered sugar, vanilla, and milk, mixing well until the frosting reaches a spreadable, luscious consistency.
Step 9: Assemble Your Layers and Frost Generously
Stack your cooled cake layers with frosting spread between each, then cover the entire cake with more frosting. Use a spatula to create soft, cloud-like swirls that mimic the airy delight this cake promises with every bite.
How to Serve Vanilla Sky Layers – Light & Airy

Garnishes
Adding a touch of edible silver dust or pastel sprinkles can transform your Vanilla Sky Layers – Light & Airy into a whimsical centerpiece. Fresh berries like blueberries or raspberries lend a pop of color and a subtle tartness that beautifully complements the smooth sweetness of the cake.
Side Dishes
A light herb-infused fruit salad or a simple bowl of whipped cream makes for excellent companions. Their freshness balances the rich cake and keeps the overall dessert experience bright and uplifting.
Creative Ways to Present
Try serving individual slices on delicate glass plates with a dusting of powdered sugar or a drizzle of homemade berry coulis. For parties, mini layered versions in clear cups allow guests to see those gorgeous layers and enjoy the cake in a fun, bite-sized way. Presentation can truly elevate the dreamy feel of the Vanilla Sky Layers – Light & Airy.
Make Ahead and Storage
Storing Leftovers
Store any leftover cake covered tightly with plastic wrap or in an airtight container in the refrigerator. This prevents the layers from drying out while preserving the freshness and creaminess of the frosting for up to 3 days.
Freezing
You can freeze individual, unfrosted cake layers wrapped tightly in plastic wrap and then foil for up to 2 months. Thaw them overnight in the refrigerator before frosting and assembling, so you can enjoy the Vanilla Sky Layers – Light & Airy fresh whenever you like.
Reheating
Since this is a chilled and delicate cake, avoid reheating after assembly as it could melt the frosting and alter the texture. Instead, bring slices to room temperature before serving to fully appreciate the tender layers and creamy frosting.
FAQs
Can I substitute the cream cheese frosting for buttercream?
Absolutely! While the cream cheese frosting offers a tangy contrast to the sweet cake, a classic buttercream can also complement the Vanilla Sky Layers – Light & Airy wonderfully, just be sure it’s whipped to a soft, spreadable consistency.
Is it possible to make this cake gluten-free?
Yes, you can substitute the all-purpose flour with a gluten-free blend designed for baking. Keep in mind textures may vary slightly, but the cake will retain its lightness and delicious vanilla flavor.
How do I prevent the cake from sticking to the pans?
Greasing and flouring the pans or lining them with parchment paper is essential. This simple step makes sure your Vanilla Sky Layers come out cleanly without breaking apart, keeping the layers intact for beautiful stacking.
Can I add food coloring to make this cake more festive?
Of course! Adding a few drops of pastel food coloring to the batter before baking can create lovely tinted layers that are perfect for celebrations, while maintaining the light and airy texture.
What’s the best way to get those soft, cloud-like frosting swirls?
Use a spatula to gently spread and then curl the frosting in sweeping motions over the cake surface. The key is to keep the frosting cold enough to hold shape but soft enough to swirl effortlessly — just like painting clouds on your Vanilla Sky Layers – Light & Airy.
Final Thoughts
Creating the Vanilla Sky Layers – Light & Airy is like inviting a little bit of magic into your kitchen—a dessert that’s as delightful to make as it is to eat. Its tender crumb, cozy vanilla flavor, and creamy frosting come together to celebrate the joy of sharing a truly special cake with the ones you love. Give it a try; I promise it will brighten any day with its soft, cloud-like charm.