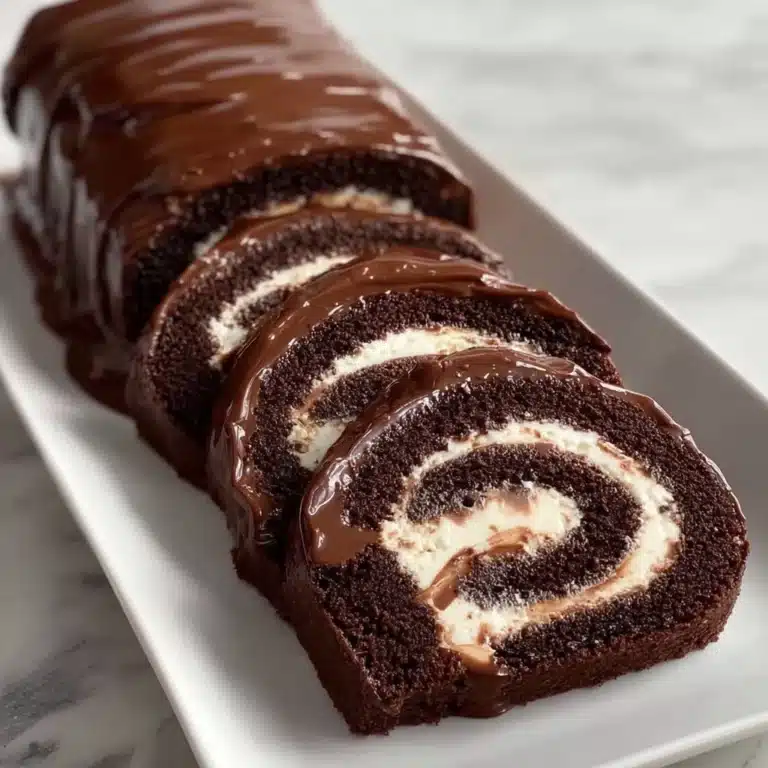
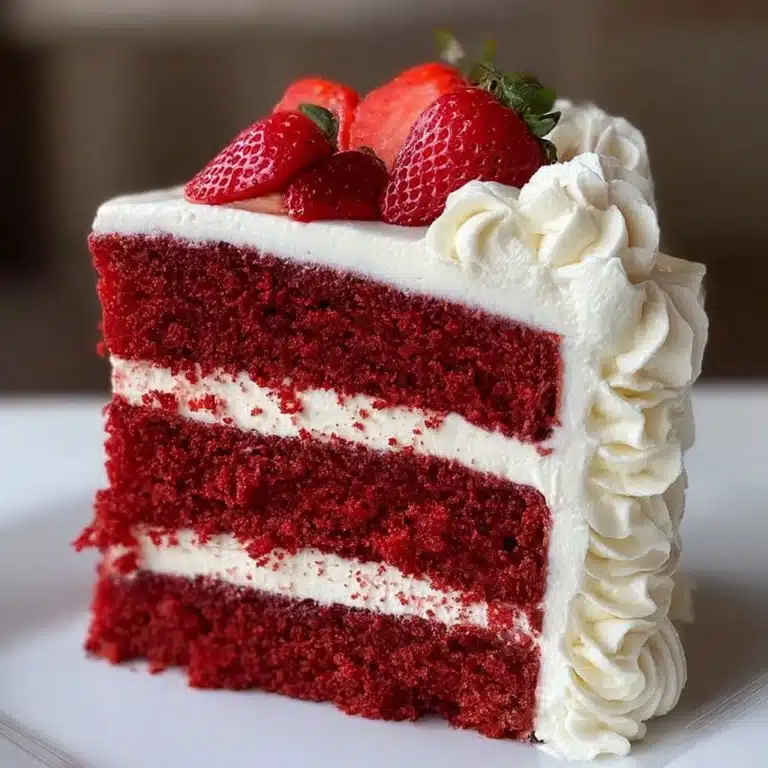
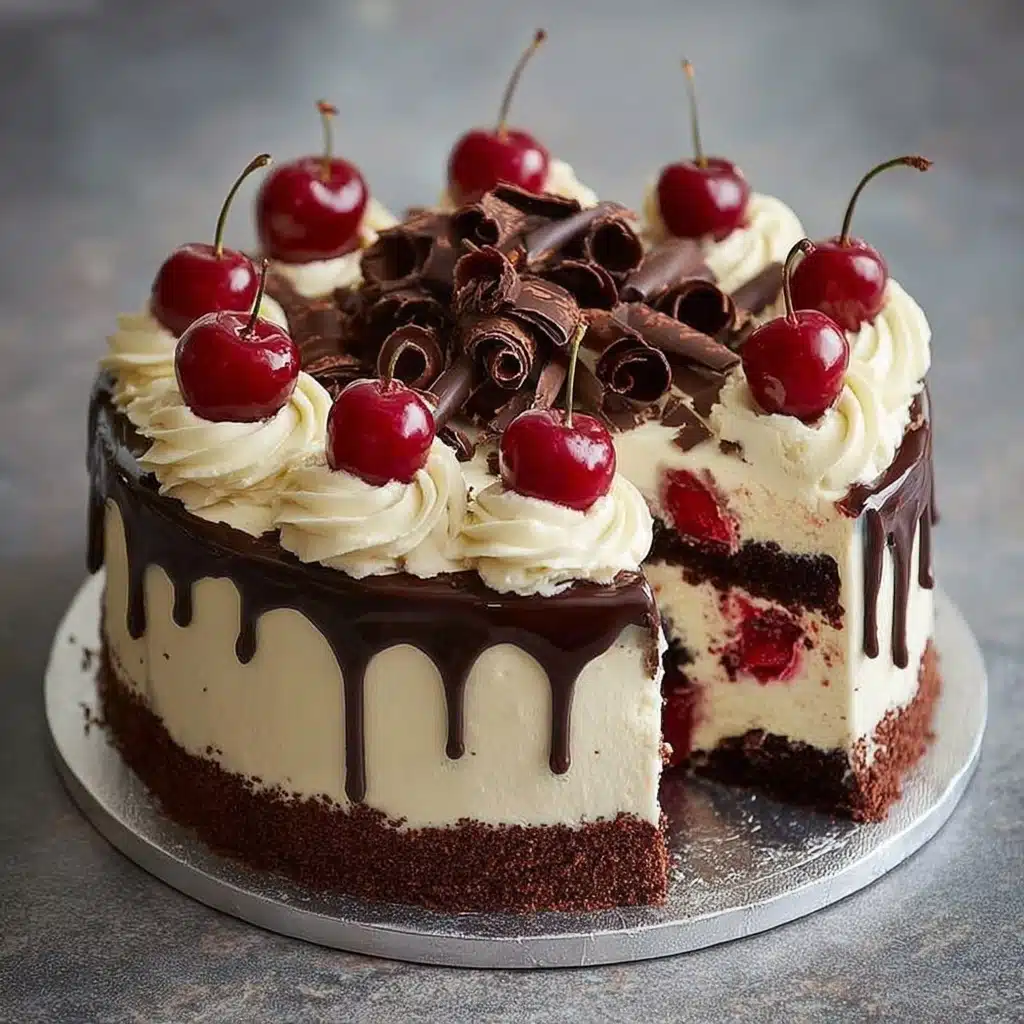
Black Forest Cake** Recipe
There’s something downright magical about a homemade Black Forest Cake** — it’s a towering, decadent classic that brings together rich chocolate sponge, luscious cherry filling, fluffy whipped cream, and glossy ganache all in one glorious bite. Imagine slicing through those perfectly defined layers, each one more tempting than the last, and serving it up at your next celebration or just because you want to treat yourself (and maybe a lucky friend or two). This dessert isn’t just a cake; it’s an experience, one that’ll win you heartfelt “wow”s every time it graces your table.

Ingredients You’ll Need
Black Forest Cake** is all about bold flavors and beautiful textures, and, best of all, each ingredient plays a vital role in crafting the perfect finished dessert. With a short but mighty list, you’ll create a cake that looks stunning and tastes even better—just don’t be surprised if your kitchen starts smelling like a European patisserie!
- All-purpose flour: This is your cake’s sturdy foundation, giving it just the right amount of structure so every slice holds together beautifully.
- Granulated sugar: Brings a gentle sweetness to balance the dark cocoa and tart cherries, making every bite harmonious.
- Unsweetened cocoa powder: Choose a high-quality variety for deep, authentic chocolate flavor that sings through each layer.
- Baking soda & baking powder: These essentials make your cake rise sky-high and stay light and tender.
- Salt: Just a pinch sharpens up every flavor profile, enhancing both the chocolate and cherry goodness.
- Buttermilk: Its slight tang keeps the cake extra moist with a nice hint of complexity.
- Hot strong brewed coffee: Unlocks and deepens the chocolate flavor—don’t worry, it won’t taste like coffee!
- Vegetable oil: Adds unbeatable moisture, making sure your sponge is melt-in-your-mouth tender.
- Large eggs: Room temperature eggs ensure a silky-smooth batter and a cohesive crumb.
- Vanilla extract: Adds warmth and rounds out both the cake and the cream.
- Cherry pie filling: For that signature sweet-tart cherry punch in the middle—nothing says Black Forest Cake** like it.
- Cornstarch: Thickens up the cherry filling to keep it perfectly spreadable and not runny.
- Cherry brandy (Kirsch), optional: A traditional flourish that adds authentic German flair and amplifies the cherry flavor, if you like.
- Heavy whipping cream: The secret to billowy, cloud-like whipped frosting that’s pure luxury.
- Powdered sugar: Sweetens and stabilizes your whipped cream without any gritty texture.
- Semi-sweet chocolate, chopped: A ganache drip adds elegance, with rich chocolate shine and a professional finish.
- Maraschino or fresh cherries and chocolate shavings/curls: For that show-stopping final touch—never skip the garnish!
How to Make Black Forest Cake**
Step 1: Prepare the Cake Pans and Dry Ingredients
Start by preheating your oven to 350°F (175°C) and greasing two 9-inch round cake pans. Give them a dusting of flour too—this little step helps those beautiful chocolate layers release perfectly every time. In a large bowl, whisk together your flour, sugar, cocoa powder, baking soda, baking powder, and salt. This ensures everything is evenly distributed and there are no rogue lumps in sight.
Step 2: Mix Wet Ingredients
In a separate bowl, whisk up the buttermilk, hot coffee, vegetable oil, eggs, and vanilla extract. The coffee may seem like a curveball, but trust me, it’s the secret weapon for super-chocolatey flavor. Make sure the eggs and buttermilk are at room temperature to help everything blend smoothly.
Step 3: Combine and Bake
Pour your wet mixture into the bowl of dry ingredients. Mix just until you have a silky, lump-free batter—overmixing can make the cake less tender. Divide the batter evenly between the two prepared cake pans, smoothing out the tops. Bake for 30 to 35 minutes, or until a toothpick inserted into the center comes out clean. Let the cakes cool completely before moving on to assembly—the anticipation will be worth it!
Step 4: Make the Cherry Filling
While your cakes cool, it’s cherry time! Pour the cherry pie filling and cornstarch into a saucepan and stir together over medium heat. As it warms, the mixture will thicken beautifully. Stir in the cherry brandy (if using) once you pull it from the heat. Set aside to cool—to keep the Black Forest Cake** layers from turning soggy, this filling should be completely cool before assembly.
Step 5: Whip Up the Cream
Grab your cold heavy cream and add it to a large bowl with powdered sugar and vanilla extract. Beat the mixture at high speed with a stand mixer or hand mixer until stiff peaks form. You’re looking for swirls that stand tall but still look dreamy and soft—nothing beats freshly whipped cream on Black Forest Cake**!
Step 6: Make the Ganache Drip
Place the chopped chocolate into a small heatproof bowl. In a saucepan, heat up the heavy cream just until it starts to gently simmer. Pour the hot cream over the chocolate and let it hang out for five minutes—the chocolate will soften and melt. Whisk until you have a glossy, smooth ganache that’s perfect for drizzling.
Step 7: Assemble the Layers
Carefully set one cake layer on your serving plate. Pipe a generous ring of whipped cream around the edge—think of it as a cozy dam to hold in your cherry filling. Spread the cherry filling inside that ring, making sure it stays contained. Top with the second cake layer and gently press down to secure.
Step 8: Frost and Decorate
Spoil your cake with a fluffy blanket of whipped cream, smoothing it all around the sides and top. Pour your luscious ganache on top, letting it casually drip down the sides for that signature look. Before the ganache sets, swirl on more whipped cream, pile cherries high, and finish off with chocolate shavings for true Black Forest Cake** flair.
How to Serve Black Forest Cake**
Garnishes
No Black Forest Cake** is complete without a generous crown: swirl on extra whipped cream, nestle a cherry on each swirl, and scatter chocolate curls or shavings like confetti for an irresistible, bakery-worthy finish.
Side Dishes
While this cake is truly the star, you can pair it with a scoop of vanilla bean ice cream or a cup of rich coffee to complement the deep chocolate and tart cherry flavors. A sparkling Kirsch cocktail or a glass of cold milk also make absolutely dreamy companions.
Creative Ways to Present
To really impress, try slicing the cake into petite squares for Black Forest Cake** bites, or use a trifle bowl and layer the components parfait-style. Fresh flowers or edible gold leaf can take the presentation to dazzling new heights if you’re celebrating something extra special.
Make Ahead and Storage
Storing Leftovers
To keep Black Forest Cake** looking and tasting its best, store leftovers in the refrigerator, covered with plastic wrap or an airtight cake container. The whipped cream will stay lovely for up to 3 days, though the cake is always best within the first day or two for maximum freshness.
Freezing
If you need to make your cake in advance, you can freeze individual slices of this masterpiece. Wrap slices tightly in both plastic wrap and foil before freezing for up to 1 month. Thaw overnight in the fridge—just be aware that the texture of the whipped cream can soften a bit once frozen and thawed.
Reheating
Because of the whipped cream and cherry filling, Black Forest Cake** is best enjoyed chilled or at room temperature—no reheating required! If your slice is very cold after storage, let it sit out for 15 to 20 minutes before serving.
FAQs
Can I make Black Forest Cake** without alcohol?
Absolutely! The cherry brandy is entirely optional. You’ll still get loads of cherry flavor even if you skip it—just use the cherry pie filling as directed.
Can I use fresh cherries instead of canned pie filling?
Yes! If cherries are in season, pit and chop them, then cook with sugar and a splash of water until soft and juicy. Add cornstarch to thicken, and follow the same directions as you would for canned filling.
Why is coffee used in the cake?
Coffee acts as a flavor enhancer for the chocolate, making the cake taste richer and more intense. The final cake won’t taste like coffee, promise—it’s just there to make the chocolate shine!
My whipped cream keeps deflating—help!
Be sure your cream is very cold and that you whip it until stiff peaks form. If you’re working in a warm kitchen, chill your bowl and beaters ahead of time for extra insurance.
Is it possible to make this cake gluten-free?
Yes! Swap the all-purpose flour for your favorite gluten-free baking blend (just make sure it contains a binder like xanthan gum). The rest of the recipe stays the same, so you can enjoy Black Forest Cake** even if you’re avoiding gluten.
Final Thoughts
If there’s ever a time to go all-out, it’s with Black Forest Cake**. The layers are a total showstopper, but the flavor is what wins everyone over. I can’t recommend this recipe enough—so go on, gather your ingredients, and whip up a treat you and your loved ones won’t soon forget!