Chocolate Cake Roll Recipe
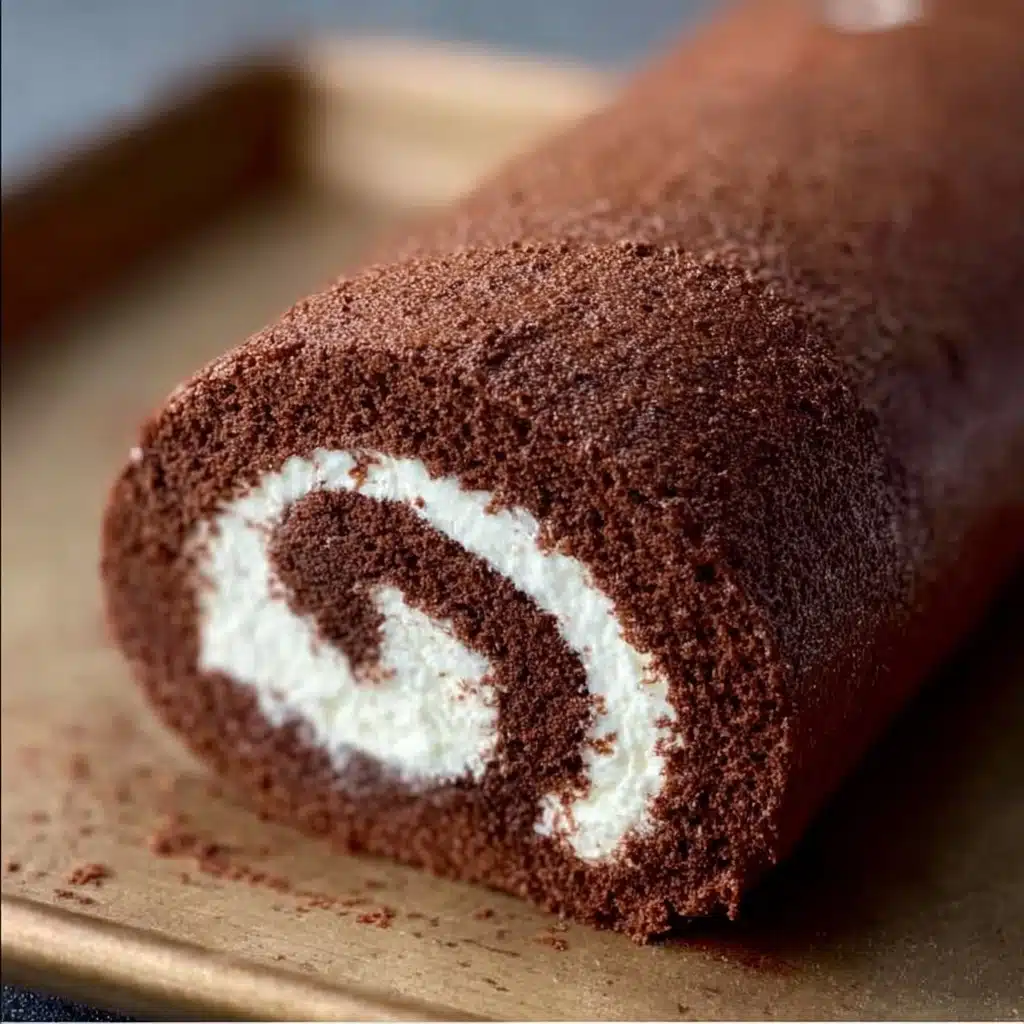
Get ready to fall in love with the showstopper of all desserts: the Chocolate Cake Roll. If ever there was a dessert to instantly transport you to your happiest memories, this is it! With its swirl of light-as-air chocolate sponge wrapped around fluffy whipped cream filling, every bite feels celebratory yet comforting. It’s a dessert that looks as stunning as it tastes, with a luscious chocolatey flavor and an irresistible creamy center. Whether you’re baking for a gathering or simply craving a homemade treat, this Chocolate Cake Roll is the sweet indulgence you’ve been searching for.

Ingredients You’ll Need
Let’s break down what goes into this Chocolate Cake Roll—good news, you probably have most on hand already! Each ingredient is chosen to create a delicate sponge, decadent filling, and that signature chocolatey color and flavor. Here’s why each one matters:
- All-purpose flour: This is the structure-builder, keeping the cake tender but able to hold its rolled shape.
- Unsweetened cocoa powder: The heart of the chocolate flavor—choose a good-quality cocoa for deep richness.
- Baking powder: Adds just the right lift to keep your sponge airy, not dense.
- Salt: Enhances the chocolate, bringing out every nuance of flavor.
- Large eggs, at room temperature: Whipped eggs provide structure and a light, flexible texture that makes rolling a breeze.
- Sugar: Sweetens and keeps the cake moist—beating it with eggs also gives a lovely volume.
- Vegetable oil: Adds moisture for a soft, supple cake that won’t crack.
- Vanilla extract: Lends a warm aroma that pairs perfectly with chocolate.
- Milk: Makes the cake tender and smooths out the batter.
- Heavy cream, cold: The base for our dreamy whipped cream filling.
- Powdered sugar: Sweetens the filling without grittiness.
- Extra vanilla extract: For a fragrant, classic whipped cream.
- (Optional): Try chocolate buttercream or whipped ganache for a richer twist on the traditional filling!
How to Make Chocolate Cake Roll
Step 1: Prep the Pan and Oven
Begin by preheating your oven to 180°C (350°F) and prepping your 10×15-inch jelly roll pan. Grease it well and line with parchment paper—this is crucial for easy release. A lined pan ensures your cake slides out effortlessly and makes rolling up later much less intimidating.
Step 2: Mix Dry and Wet Ingredients
In a medium bowl, whisk together your flour, cocoa powder, baking powder, and salt. In a separate large bowl, beat the eggs and sugar on high speed for about 4 to 5 minutes, until the mixture is thick, pale, and doubled in volume—it should look silky and airy. Then, gently fold in your vegetable oil, vanilla extract, and milk. This step keeps the batter delicate while ensuring it stays moist and flavorful.
Step 3: Combine and Pour the Batter
Sift the dry ingredients right over the wet mixture; this keeps lumps at bay and ensures the cocoa disperses evenly. Gently fold everything together just until combined—don’t overmix, as you want to keep all that lovely air! Pour the batter into your lined pan, spreading it out evenly.
Step 4: Bake the Sponge Cake
Slide the pan into your oven and bake for 10–12 minutes. You’ll know it’s done when the cake is springy and the top bounces back when you lightly touch it. Be careful not to overbake; a dry cake will be tough to roll without cracking.
Step 5: Roll the Cake (While Hot!)
This part might seem intimidating, but take a deep breath—the secret is rolling while still warm. Lay out a clean kitchen towel and dust with cocoa powder. Flip the hot cake onto the towel, peel away the parchment, and immediately roll it up from the short end, towel included. This trick sets the spiral shape and prevents sticking or big cracks. Let it cool fully, rolled up.
Step 6: Whip the Cream and Fill
In a chilled bowl, whip your heavy cream, powdered sugar, and vanilla until you get beautiful stiff peaks. This makes for a filling that’s luxuriously creamy and thick enough to spread easily. If you’d like to experiment, chocolate buttercream or whipped ganache work wonders, especially for chocolate-lovers!
Step 7: Assemble and Chill
Carefully unroll your cooled cake—it might crack a touch, but the filling will hide it! Spread the whipped cream evenly over the surface, then roll it back up (this time, without the towel). Give it a gentle pat into shape and chill for at least an hour to let the flavors mingle and the cake set up.
Step 8: Finishing Touches
Just before serving, dust the Chocolate Cake Roll with powdered sugar for a snowy effect or drizzle with ganache for extra decadence. Each swirl is a visual delight, promising a perfect slice every time!
How to Serve Chocolate Cake Roll
Garnishes
The beauty of this dessert is its versatility. A light dusting of powdered sugar gives it a festive, snow-kissed look, while a drizzle of chocolate ganache ramps up the indulgence. You can also dot the plate with extra whipped cream, chocolate shavings, or even a handful of fresh berries for a pop of color and freshness.
Side Dishes
Most of the time, Chocolate Cake Roll is the main attraction, but it pairs beautifully with simple sides. A scoop of vanilla or coffee ice cream, a spoonful of raspberry compote, or a cup of strong espresso brings out the richness of the cake and balances the sweetness of the filling wonderfully.
Creative Ways to Present
Let your inner artist shine! Slice and serve on a platter dusted with cocoa, or present individual slices on plates swirled with raspberry or caramel sauce. For holidays, decorate with sugared cranberries, mint leaves, or chocolate curls to turn your Chocolate Cake Roll into a jaw-dropping centerpiece.
Make Ahead and Storage
Storing Leftovers
To keep your Chocolate Cake Roll fresh and moist, wrap any leftover slices tightly in plastic wrap and store in the fridge. It will stay delicious for up to three days—though let’s be honest, it often disappears long before then!
Freezing
Yes, you can freeze your Chocolate Cake Roll! Once it’s fully assembled and chilled, wrap it tightly in both plastic wrap and foil. It’ll keep well in the freezer for up to two months. When ready to serve, just thaw in the fridge overnight for best results.
Reheating
No need to reheat this cake; it’s meant to be enjoyed cold or at room temperature so the whipped cream stays light and fluffy. If you like, leave a slice out for 15 minutes before serving to take the chill off and enhance the flavors.
FAQs
My cake cracked when I rolled it. How can I prevent this?
The trick is to roll the cake while it’s still hot and flexible, right out of the oven. Dusting the towel with cocoa powder also helps prevent sticking and tearing. If you see small cracks, don’t worry—the filling and a final dusting of powdered sugar will hide most imperfections!
Can I use a different filling besides whipped cream?
Absolutely! Chocolate buttercream, whipped ganache, or even a fruity jam layer can take your Chocolate Cake Roll in a fun new direction. Just make sure the filling is spreadable and not too runny.
How do I keep the cake from sticking to the pan?
Greasing your jelly roll pan and lining it with parchment paper are crucial steps. Be sure to leave an overhang of paper for easy lifting once the cake has baked. This ensures your cake comes out smoothly and in one piece.
Can I make this recipe gluten-free?
You can swap the all-purpose flour for a gluten-free 1:1 baking blend with great results. The rest of the ingredients are already gluten-free, so it’s an easy adapt for those with dietary restrictions.
Is a jelly roll pan different from a baking sheet?
Yes—a jelly roll pan is smaller and has higher sides than a standard baking sheet (about 10×15 inches), making it perfect for the thin, flexible sponge needed for a Chocolate Cake Roll. Using the correct pan size ensures even baking and easy rolling.
Final Thoughts
If you’ve never baked a Chocolate Cake Roll before, now is the perfect time to give it a try! It’s as much fun to make as it is to eat, and the results are bound to impress. So gather your ingredients, invite someone you love to help swirl, and create not just a dessert, but a memory worth savoring!