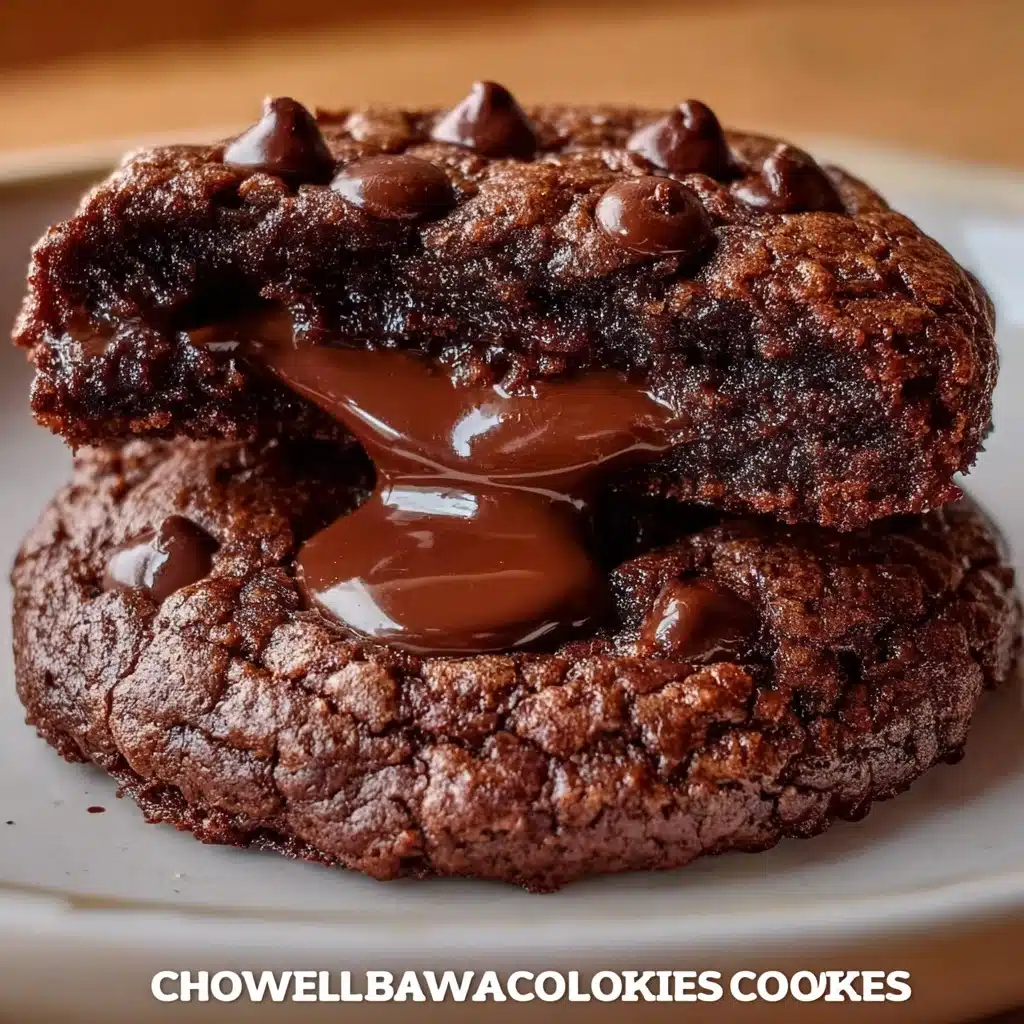
Chocolate Lava Brownie Cookies Recipe
If you love the irresistible combination of fudgy brownies and gooey chocolate centers, you are going to fall head over heels for these Chocolate Lava Brownie Cookies. Picture biting into a cookie with a slightly crisp, crackly top giving way to a molten, chocolate lava core that oozes out in the most decadent way. These treats strike the perfect balance between a classic chewy brownie and a soft cookie, making them an unforgettable dessert or snack that feels just as special as a homemade gift. Trust me, once you make these, you’ll want to bake them over and over again to share with friends or keep all to yourself.

Ingredients You’ll Need
These ingredients are pantry essentials but come together to create the magic that is Chocolate Lava Brownie Cookies. Each one plays a key role from adding moisture and richness to building that gooey, chocolatey lava center that sets this recipe apart.
- Unsalted butter: Provides creamy richness and helps achieve the perfect chewy texture.
- Bittersweet chocolate: Adds deep, intense chocolate flavor and smoothness when melted.
- Granulated sugar: Sweetens while helping the cookies crisp slightly on the edges.
- Light brown sugar: Infuses moisture and a touch of caramel flavor, enhancing the cookie’s chewiness.
- Eggs: Bind everything together and add richness.
- Vanilla extract: A little boost of warmth and depth to the chocolate notes.
- All-purpose flour: Supplies structure to hold the cookies together just right.
- Unsweetened cocoa powder: Gives a bold chocolate punch and dark color without extra sweetness.
- Salt: Balances the sweetness and enhances all the chocolate flavors.
- Semisweet chocolate chips: For pockets of melting chocolate throughout each cookie bite.
- Caramel sauce (optional): The secret to that luscious lava center if you want an extra special surprise inside.
How to Make Chocolate Lava Brownie Cookies
Step 1: Prepare Your Oven and Pan
Start by preheating your oven to 350°F (175°C) to ensure it’s at the perfect temperature when you’re ready to bake. Line a baking sheet with parchment paper, which prevents sticking and makes for easier cleanup — a true win in every kitchen!
Step 2: Melt Butter and Chocolate
Gently melt the unsalted butter and chopped bittersweet chocolate together in a medium saucepan over low heat. Stir frequently until the mixture is completely smooth and glossy. This step sets the foundation for those silky, rich brownies you will soon enjoy.
Step 3: Mix Sugars, Eggs, and Vanilla
In a large bowl, whisk together granulated sugar and light brown sugar. Adding the eggs one at a time along with the vanilla keeps the batter smooth and fluffy. This mixture will soon hug the chocolate base, creating a harmonious blend of flavors.
Step 4: Combine Chocolate with Sugar Mixture
Slowly pour the warm, melted chocolate butter mixture into the sugar and egg bowl, stirring continuously to blend everything evenly. This makes the batter luscious and ready for the next essential step.
Step 5: Add Dry Ingredients
Sift the all-purpose flour, unsweetened cocoa powder, and salt together, then gently fold them into the wet chocolate mixture. Be careful not to overmix — you want to retain a tender crumb that melts in your mouth.
Step 6: Stir in Chocolate Chips
Fold in the semisweet chocolate chips to add delightful bursts of melty chocolate inside each cookie once baked. This little addition elevates the texture and flavor immensely.
Step 7: Shape the Cookies with Optional Lava Center
Scoop out 2-tablespoon portions of dough and flatten them slightly with your fingers or the back of a spoon. If you love that molten lava center, add a small spoonful of caramel sauce on top of one dough portion, then place another flattened dough portion over it. Seal the edges tightly to keep that gooey surprise inside.
Step 8: Bake to Perfection
Arrange your cookies spaced about 2 inches apart on your prepared baking sheet. Bake for 10 to 12 minutes until the edges are set but the centers remain soft. This timing is crucial—it allows the centers to stay molten without overbaking the cookies.
Step 9: Cool and Enjoy
Allow the cookies to cool on the baking sheet for 5 minutes before transferring to a wire rack to cool slightly. These cookies are best enjoyed warm while the lava core is still oozy and indulgent—trust me, it is pure chocolate heaven.
How to Serve Chocolate Lava Brownie Cookies
Garnishes
Elevate your Chocolate Lava Brownie Cookies by dusting them lightly with powdered sugar or serving them with a sprinkle of flaky sea salt on top to highlight the rich chocolate notes. Fresh raspberries or a dollop of whipped cream also complement these cookies beautifully.
Side Dishes
Pair these decadent cookies with a scoop of vanilla ice cream or a drizzle of salted caramel sauce on the side for a truly indulgent dessert experience. A hot cup of coffee or rich hot chocolate makes the perfect beverage match to balance the sweet and bitter chocolate flavors.
Creative Ways to Present
Consider stacking a few cookies with a small scoop of ice cream between them for a cookie sandwich that bursts with molten chocolate with every bite. You can also serve them on a stylish platter with fresh fruit and edible flowers for a stunning party dessert display.
Make Ahead and Storage
Storing Leftovers
Leftover Chocolate Lava Brownie Cookies keep wonderfully in an airtight container at room temperature for up to three days. Store them well to maintain their soft texture and rich flavor.
Freezing
For longer storage, freeze your baked cookies in a single layer on a tray first, then transfer them to a freezer-safe container. They can be frozen for up to one month. Just defrost at room temperature when ready to enjoy.
Reheating
To bring back that molten texture, warm the cookies in the microwave for about 15 to 20 seconds or pop them in a warm oven for a few minutes. This little reheating trick will revive the gooey lava center and soften the cookie edges perfectly.
FAQs
Can I make these cookies gluten-free?
Absolutely! Substitute the all-purpose flour with a gluten-free flour blend that measures cup-for-cup. Make sure it contains xanthan gum for the best texture.
Is it necessary to add caramel sauce for the lava center?
Nope! The cookies themselves are fudgy and rich enough, but adding caramel sauce or even chocolate ganache inside takes the lava experience to an extra decadent level if you want to get fancy.
Can I use milk chocolate instead of bittersweet chocolate?
You can, but bittersweet chocolate offers more intense, balanced flavors and less sweetness, which is ideal for the deep chocolate taste in these cookies.
How long do these cookies stay fresh?
When stored in an airtight container at room temperature, they stay fresh for about three days, maintaining that chewy and molten texture.
Can I prepare the dough ahead of time?
Yes! Feel free to make the dough the day before and refrigerate it. Just bring it to room temperature briefly before shaping and baking for best results.
Final Thoughts
There is something truly special about Chocolate Lava Brownie Cookies—they are the perfect balance of gooey, fudgy, and sweet comfort all in one bite. Whether you bake them for a casual treat or a special occasion, these cookies never fail to impress and delight. Don’t hesitate—grab your ingredients and start baking today. Your friends, family, and that sweet tooth of yours will thank you endlessly!