Chocolate Orange Indulgence Cake Recipe
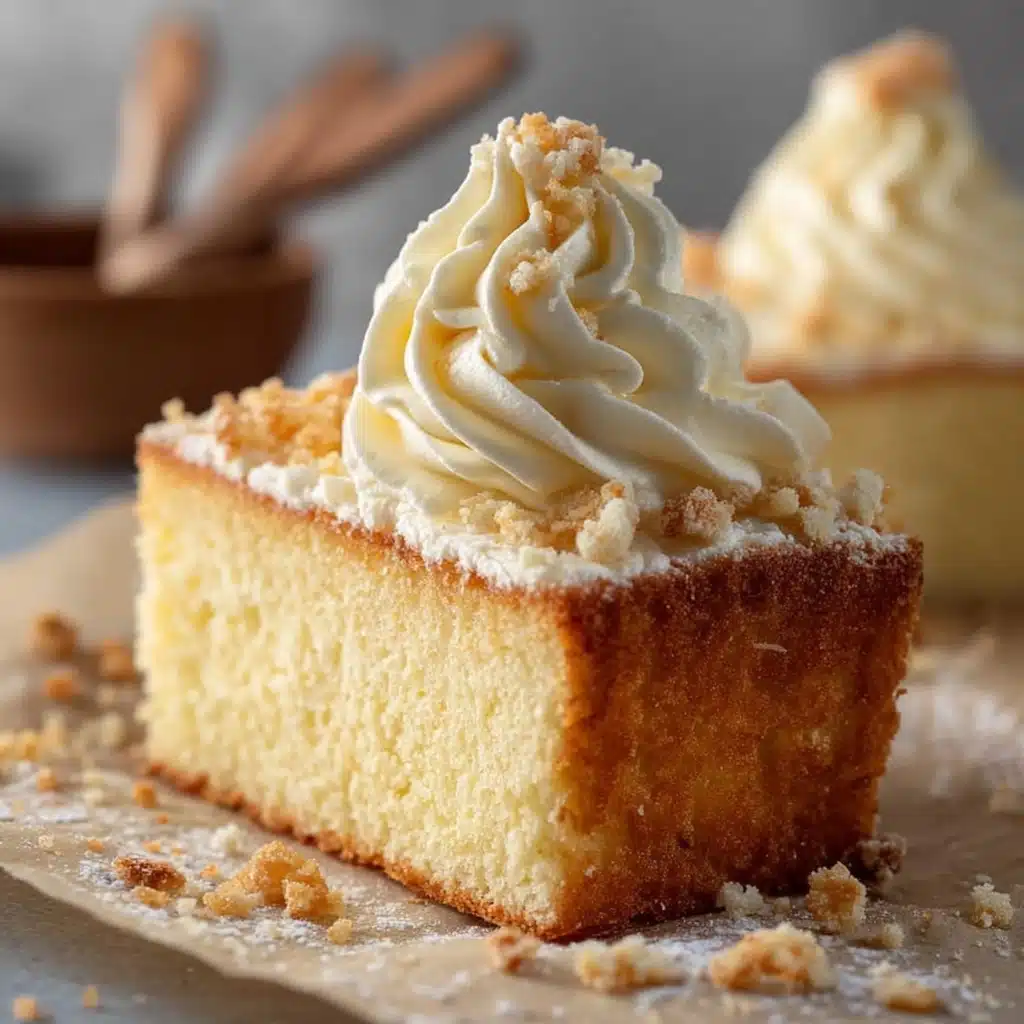
If you have a sweet tooth that craves something utterly delightful yet comfortingly familiar, you’re going to adore the Creamy Vanilla Bliss Cake. This cake is the perfect companion for cozy afternoons or celebratory moments, where every bite promises a soft, moist crumb paired with a luscious, creamy topping that feels like a warm hug. The magic lies in its simplicity—classic vanilla flavors enhanced by a dreamy whipped cream layer and a satisfying crunch from crushed nuts. Once you try this Creamy Vanilla Bliss Cake, it’s hard not to fall in love with its tender charm and inviting aroma.

Ingredients You’ll Need
Gathering the right ingredients is the first step to nailing this cake’s perfect balance of flavor and texture. Each component plays a vital role—from the fluffy all-purpose flour lending structure to the rich unsalted butter creating depth and moistness. Let’s take a look at what you’ll need:
- 2 cups all-purpose flour: The foundation of the cake, providing a tender crumb with just the right texture.
- 1 ½ cups granulated sugar: Sweetens the batter and helps achieve that golden crust.
- ½ cup unsalted butter, softened: Adds richness and moisture, ensuring the cake stays soft.
- 4 large eggs: Bind everything together and contribute to the cake’s fluffy rise.
- 1 cup whole milk: Keeps the batter smooth and adds extra richness.
- 2 teaspoons vanilla extract: The key flavor that infuses the cake with its signature sweet aroma.
- 2 teaspoons baking powder: Helps the cake rise beautifully and become light and airy.
- ½ teaspoon salt: Balances the sweetness and enhances all the flavors.
- 1 cup whipped cream: The luscious, creamy topping that turns this cake into pure bliss.
- ¼ cup crushed nuts: Adds a delightful crunch and a nutty finish to contrast the smooth cream.
How to Make Creamy Vanilla Bliss Cake
Step 1: Prepare Your Pan and Oven
Start by preheating your oven to 350 degrees Fahrenheit (175 degrees Celsius). Grease a 9-inch square baking pan thoroughly—this prevents the cake from sticking and ensures an easy release after baking.
Step 2: Cream Butter and Sugar
In a large mixing bowl, use a hand mixer or stand mixer to cream the softened butter and granulated sugar together until the mixture turns light, fluffy, and pale. This step is essential because it incorporates air, contributing to a tender texture in the finished cake.
Step 3: Add Eggs and Vanilla
Beat in the eggs one at a time, making sure each is fully incorporated before adding the next. Then, mix in the vanilla extract. This gradual process helps the batter stay smooth and prevents it from curdling.
Step 4: Combine Dry Ingredients and Alternate with Milk
In a separate bowl, whisk together the all-purpose flour, baking powder, and salt. Now, slowly add the dry ingredients to the butter mixture in parts, alternating with milk. Start and end with the dry ingredients to maintain a silky, well-balanced batter. Mix just until combined; overmixing can make the cake dense.
Step 5: Bake to Perfection
Pour the smooth batter into your prepared baking pan, smoothing the top with a spatula. Place it in your preheated oven and bake for 30 to 35 minutes. You’ll know it’s done when a toothpick inserted in the center comes out clean and the edges pull slightly away from the pan.
Step 6: Add Whipped Cream and Nuts
Allow the cake to cool completely in the pan—this step is crucial before topping. Once cool, spread a generous layer of whipped cream over the cake’s surface, then sprinkle the crushed nuts on top for a satisfying crunch that perfectly complements the creamy texture.
How to Serve Creamy Vanilla Bliss Cake
Garnishes
While crushed nuts are classic, you can get creative with garnishes. Fresh berries like raspberries or blueberries add a pop of color and a slight tartness that pairs beautifully with the sweet cream. A dusting of cinnamon or a drizzle of caramel sauce can also elevate the presentation and flavor profile.
Side Dishes
Serving this cake alongside a fresh fruit salad or a scoop of vanilla bean ice cream can turn it into an unforgettable dessert experience. The fruity freshness or cold creaminess complements the Creamy Vanilla Bliss Cake’s texture and flavor without overpowering it.
Creative Ways to Present
For parties, turn this cake into elegant individual servings by slicing it into squares and layering them in small glass jars with extra whipped cream and berries. Alternatively, cut it into cubes and serve on skewers as mini cake pops with a light dusting of powdered sugar for a fun twist.
Make Ahead and Storage
Storing Leftovers
If you’re lucky enough to have leftovers, store the cake in an airtight container in the refrigerator. The whipped cream topping makes it best enjoyed within 2 to 3 days to keep it fresh and maintain its creamy texture.
Freezing
While the cake can be frozen without the topping, it’s best to save whipped cream for fresh application after thawing. Wrap the cake tightly in plastic wrap and aluminum foil to prevent freezer burn. It can keep well for up to 2 months. Thaw overnight in the refrigerator before adding the whipped cream and nuts.
Reheating
This cake is delightful served chilled or at room temperature. If you prefer warmth, gently reheat slices in the microwave for about 10 to 15 seconds, but avoid heating the whipped cream topping. Reapply fresh whipped cream after warming for that perfect creamy bite.
FAQs
Can I use low-fat milk instead of whole milk?
Yes, you can substitute low-fat milk, but whole milk helps keep the cake moist and rich, which contributes significantly to the Creamy Vanilla Bliss Cake’s decadent texture.
What kind of nuts work best for the topping?
Crushed almonds, walnuts, or pecans are all excellent choices. Pick your favorite or mix a few to add a delightful crunch and nutty depth that balances the creamy topping beautifully.
Can I make this cake gluten-free?
Absolutely! Substitute the all-purpose flour with a gluten-free flour blend. Just ensure your baking powder is gluten-free, too. The texture might be slightly different but still wonderfully tasty.
Is it okay to use store-bought whipped cream?
Store-bought whipped cream works fine in a pinch, but whipping your own gives a fresher taste and creamier texture that truly complements the Vanilla Bliss Cake.
How do I know when the cake is fully baked?
The cake is done when a toothpick or cake tester inserted in the center comes out clean or with just a few moist crumbs. The edges should start pulling slightly from the pan, and the top will have a light golden color.
Final Thoughts
Making the Creamy Vanilla Bliss Cake is like creating a little moment of happiness wrapped in vanilla-scented warmth and creamy delight. Whether it’s a casual treat with friends or a special dessert centerpiece, this cake never fails to impress with its simple yet indulgent flavor. Give it a try and see how easily it becomes a beloved favorite in your baking repertoire.