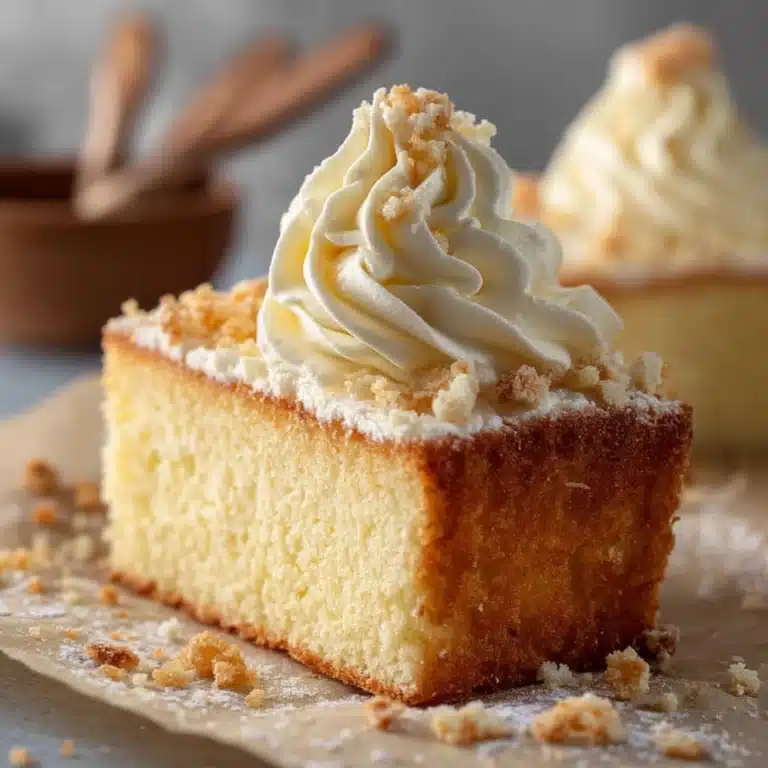
Creamy Vanilla Dream Cake Recipe
If you have a soft spot for desserts that feel like a warm hug, then wait until you try this Creamy Vanilla Dream Cake. It’s a luscious, melt-in-your-mouth treat that combines the gentle sweetness of vanilla with the airy lightness of whipped cream, making every bite a pure delight. This cake is charmingly simple yet irresistibly delightful, perfect for any occasion where you want to impress without fuss. The Creamy Vanilla Dream Cake balances moist texture with creamy topping, making it a standout favorite in my baking repertoire that I know you’ll adore just as much!

Ingredients You’ll Need
Gathering your ingredients is the first step toward creating this dreamy cake, and each one is an absolute star in its own right. From the fluffy flour to the creamy butter, every component plays a vital role in bringing this cake’s texture, flavor, and appearance to life.
- All-purpose flour: Provides the perfect structure for a tender crumb, ensuring the cake is soft but stable.
- Granulated sugar: Sweetens the cake evenly and helps create a delightful golden color during baking.
- Baking powder: Acts as the leavening agent to give your cake that light rise and fluffy texture.
- Salt: Enhances all the flavors, balancing the sweetness beautifully.
- Whole milk: Adds moisture and richness for a smooth, tender crumb.
- Unsalted butter, softened: Brings luscious creaminess and richness to the cake’s texture and flavor.
- Large egg whites: Whipped lightly, they help keep the cake airy and light without heaviness.
- Vanilla extract: The star flavor that infuses the cake with its dreamy aroma and taste.
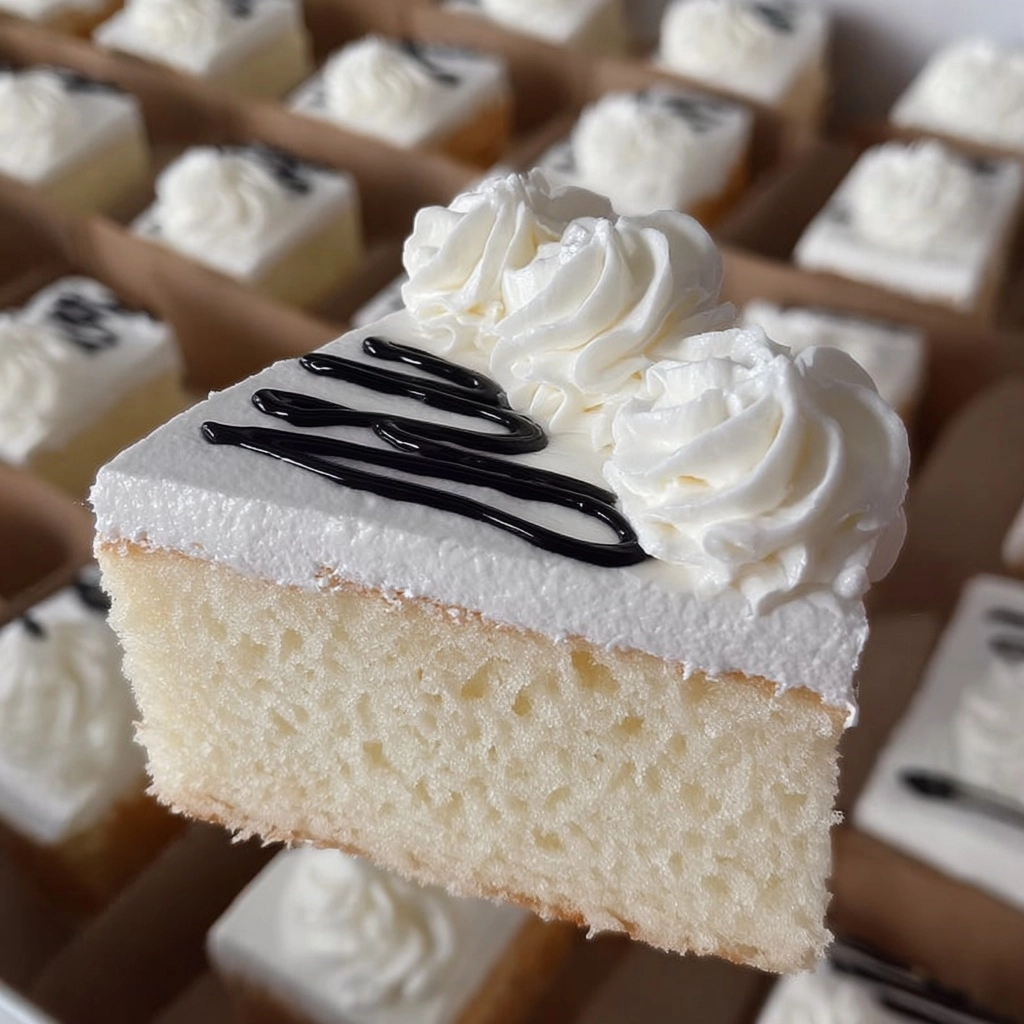
- Whipped cream: A fluffy, cloud-like topping that adds a silky finish.
- Chocolate syrup: Provides a decadent drizzle that adds contrast and a touch of indulgence.
- Powdered sugar: Perfect for dusting, adding a snow-like elegance and a hint more sweetness.
How to Make Creamy Vanilla Dream Cake
Step 1: Prepare Your Pan and Oven
First, preheat your oven to a cozy 350°F (175°C), which ensures it’s ready to bake your cake evenly. Grease and flour a 9×13-inch baking pan to create a non-stick surface, so your Creamy Vanilla Dream Cake comes out effortlessly without any mess or broken edges.
Step 2: Mix the Dry Ingredients
In a large bowl, combine the all-purpose flour, granulated sugar, baking powder, and salt. Mixing these thoroughly at this stage distributes the leavening and flavors evenly throughout the batter, setting the foundation for a perfectly balanced cake.
Step 3: Add the Wet Ingredients
Now it’s time to add the whole milk, softened unsalted butter, egg whites, and vanilla extract to the dry ingredients. Beat everything together until the batter is smooth and creamy without any lumps. This step is crucial because it creates a uniform texture that will bake into that dreamy softness we want in the Creamy Vanilla Dream Cake.
Step 4: Bake to Perfection
Pour the luscious batter into your prepared pan and pop it into the oven. Bake for about 25-30 minutes until the cake is golden on top and a toothpick inserted in the center comes out clean. This baking time helps achieve a delicate crumb that’s moist but sturdy enough to hold the beautiful whipped cream topping.
Step 5: Cool and Top
Once baked, let the cake cool completely in the pan. Cooling is key here because it prevents the whipped cream topping from melting. Spread the whipped cream evenly over the cake, drizzle generously with chocolate syrup, and finish with a dusting of powdered sugar. Add decorative swirls of cream for that elegant, inviting look.
How to Serve Creamy Vanilla Dream Cake
Garnishes
To elevate the Creamy Vanilla Dream Cake even further, embellish it with fresh berries like raspberries or strawberries for a pop of tartness and color. A sprinkle of toasted almond slices or a few vanilla bean seeds can also add subtle texture and aroma, making every bite feel special and thoughtfully crafted.
Side Dishes
This cake pairs wonderfully with a light cup of tea or freshly brewed coffee—the gentle bitterness of the brew perfectly balances the creamy sweetness. For a more indulgent side, try serving with a scoop of vanilla ice cream or a drizzle of warm caramel sauce to create a dessert duo that will wow your guests.
Creative Ways to Present
For a show-stopping presentation, slice the Creamy Vanilla Dream Cake into elegant rectangles and serve on a fine china plate with a touch of chocolate syrup artfully drizzled around it. Alternatively, cut it into petite squares and place them on skewers with fresh fruit for a fun, party-friendly treat that looks as wonderful as it tastes.
Make Ahead and Storage
Storing Leftovers
If you find yourself lucky enough to have leftovers, store the cake covered tightly in the refrigerator to maintain the whipped cream’s freshness. This method keeps the Creamy Vanilla Dream Cake moist and prevents it from absorbing any odors, so it tastes just as heavenly the next day.
Freezing
You can freeze the cake before adding the whipped cream topping. Wrap it securely in plastic wrap and foil to avoid freezer burn. When you’re ready to serve, thaw it overnight in the fridge and add fresh whipped cream and garnishes just before serving for that perfect dreamy texture.
Reheating
This cake is best enjoyed chilled, but if you prefer it slightly warm, allow it to come to room temperature before gently warming individual slices in the microwave for just 10-15 seconds. Avoid overheating to keep the cream topping intact and creamy.
FAQs
Can I use whole eggs instead of egg whites?
While the recipe calls for egg whites to keep the cake light and airy, you can use whole eggs but expect a slightly denser texture. For the airy quality of the Creamy Vanilla Dream Cake, stick with the egg whites if possible.
Is there a dairy-free alternative for the milk and butter?
Absolutely! You can substitute whole milk with almond or oat milk and replace butter with a dairy-free margarine or coconut oil. Keep in mind that these swaps might subtly change the flavor and texture but will still yield a delightful Creamy Vanilla Dream Cake.
How do I get the whipped cream to stay stable on the cake?
For a more stable whipped cream topping, whip it until soft peaks form and consider adding a little powdered sugar or a spoonful of mascarpone. This helps the cream hold its shape longer without weeping, especially in warmer environments.
Can I make this cake gluten-free?
You can try using a 1:1 gluten-free baking flour blend. It’s best to follow blends that contain xanthan gum to mimic the structure that regular flour provides, ensuring your Creamy Vanilla Dream Cake stays tender but holds together well.
What’s the secret to that perfect vanilla flavor?
Using real vanilla extract makes all the difference, but for an extra special touch, you can add vanilla bean paste or scrape seeds from a vanilla pod. These add a deeper, richer vanilla flavor that makes the cake truly unforgettable.
Final Thoughts
I can’t recommend the Creamy Vanilla Dream Cake enough if you want a dessert that feels both timeless and indulgent without complicated steps. Its delicate balance of fluffy cake and silky cream topping is a guaranteed crowd-pleaser that will become your go-to favorite. So, grab those simple ingredients, dive in, and treat yourself and your loved ones to this dreamy slice of vanilla heaven!