Gooey Peanut Butter Lava Cupcakes Recipe
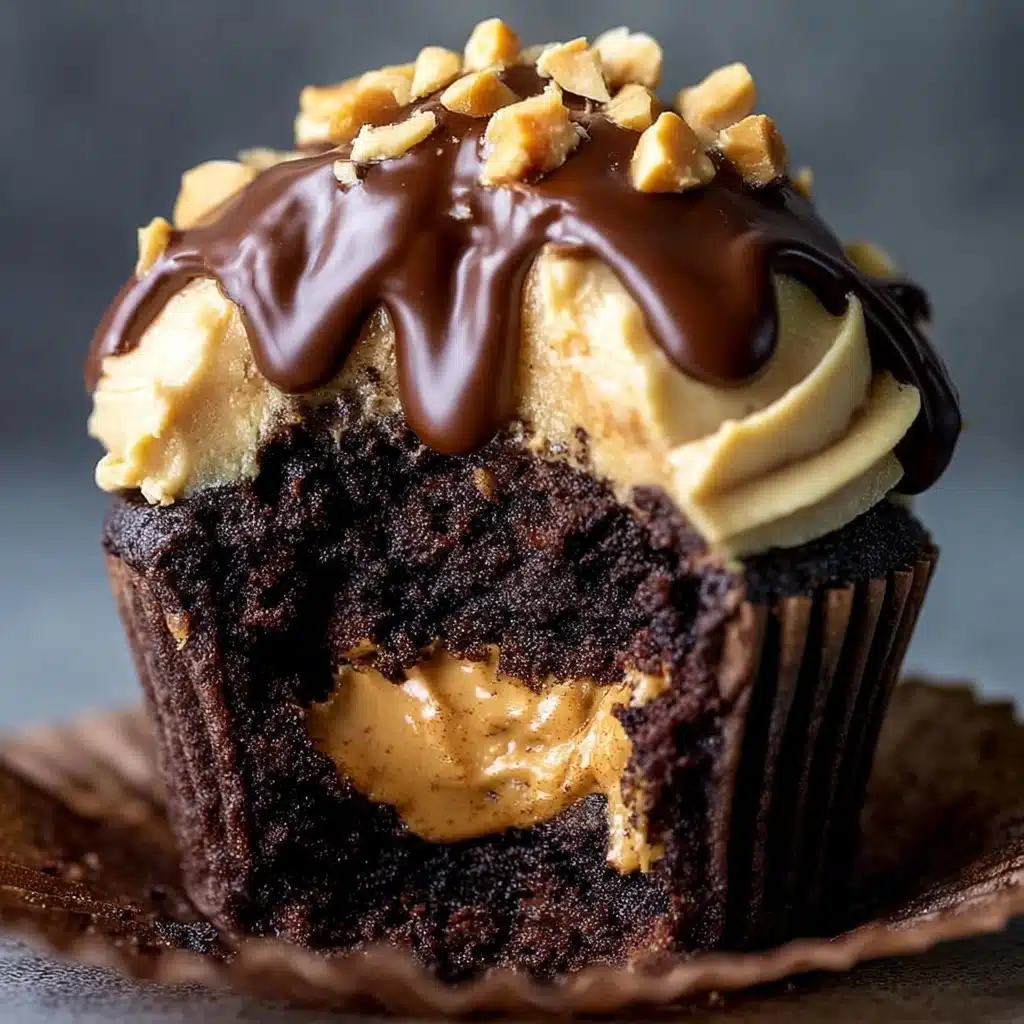
If you’ve been searching for the ultimate dessert that marries gooey indulgence with classic comfort, these Gooey Peanut Butter Lava Cupcakes are about to be your new favorite obsession. Imagine a tender, moist cake that gives way to a molten, rich peanut butter center with every bite—pure bliss for both peanut butter devotees and cupcake lovers alike. These cupcakes deliver everything you want in a treat: warmth, decadence, and just the right amount of nostalgia. They’re delightfully easy to pull off yet fancy enough to impress, which makes them just as perfect for casual weeknight cravings as for special celebrations.
Ingredients You’ll Need
Let’s keep things simple, but never boring. Every ingredient in these Gooey Peanut Butter Lava Cupcakes serves a big purpose, impacting the dreamy texture, flavor, and that signature “lava” moment—so don’t skip a thing. Here’s what you’ll need and why:
- All-purpose flour: The backbone that gives your cupcakes their tender, soft structure.
- Baking powder: Just enough lift for a light, fluffy crumb that won’t weigh you down.
- Salt: A pinch brings out the peanut butter’s rich nuttiness and balances every bite.
- Unsalted butter, softened: Adds luscious moisture for that melt-in-your-mouth feel.
- Granulated sugar: Sweetens things up and helps achieve a delicate, even crumb.
- Brown sugar, packed: Deepens the flavor with caramel undertones and extra moisture.
- Large eggs: Bind everything together and contribute to the cupcakes’ richness.
- Vanilla extract: Just a splash elevates all the other flavors and adds warmth.
- Creamy peanut butter: The star of the show, both in the batter and for that molten lava core.
- Whole milk: Keeps things light and adds additional creaminess for a soft crumb.
- Peanut butter chips: Scattered throughout for bursts of even more peanut butter bliss.
- Chocolate chips (optional, for topping): A handful on top brings a touch of gooey chocolate magic if you’re feeling indulgent.
How to Make Gooey Peanut Butter Lava Cupcakes
Step 1: Prep the Oven and Muffin Tin
Begin by preheating your oven to 350°F (175°C). Grab your trusty muffin tin and line it with paper cupcake liners. Not only does this make cleanup easier, it also ensures the cupcakes keep their gorgeous shape and are easy to serve. You’re already one step closer to peanut butter heaven!
Step 2: Whisk the Dry Ingredients
In a small bowl, whisk together the flour, baking powder, and salt. This helps evenly distribute the leavening so every cupcake rises just right. Making sure there are no big clumps also prevents any surprise pockets of flour later on.
Step 3: Cream Together the Butter and Sugars
In a large mixing bowl, beat the softened butter, granulated sugar, and brown sugar until light, fluffy, and beautifully creamy—this takes about 2-3 minutes with a mixer. Blending well at this stage ensures every bite is tender and sweet.
Step 4: Add the Eggs, Vanilla, and Peanut Butter
Crack in those eggs one at a time, beating well after each. Then, stir in the vanilla extract and that glorious creamy peanut butter. Your batter should now have an irresistible aroma and creamy texture—try not to sneak a spoonful just yet!
Step 5: Combine Wet and Dry Ingredients with Milk
Gradually add the dry ingredients to the peanut butter mixture, alternating with the milk. Start and end with the dry ingredients for the best consistency. Mix until just combined; over-mixing can lead to dense cupcakes, and we want them cloud-like!
Step 6: Fold in Peanut Butter Chips
With a gentle hand, fold the peanut butter chips into the batter. This guarantees creamy, gooey pockets in every bite—seriously, don’t skip this part.
Step 7: Fill and Lava-ify the Cupcakes
Spoon the batter into your cupcake liners, aiming for about 2/3 full. Here comes the best part: press a small spoonful of creamy peanut butter right into the center of each cupcake, then cover it with more batter. That secret core is what makes your Gooey Peanut Butter Lava Cupcakes so unforgettable!
Step 8: Bake and Top (if Desired)
Pop the tin into the oven and bake for 18-22 minutes. To check for doneness, insert a toothpick near the edge—it should come out mostly clean. A little gooeyness in the center is perfect for that lava effect! While they’re hot, sprinkle a few chocolate chips on top for a melty, decadent finish.
Step 9: Cool Briefly and Serve
Let your cupcakes cool in the pan for just a few minutes. They’re best enjoyed warm while the centers are molten and gooey—so try to resist devouring them straight away (but we won’t judge if you can’t!).
How to Serve Gooey Peanut Butter Lava Cupcakes
Garnishes
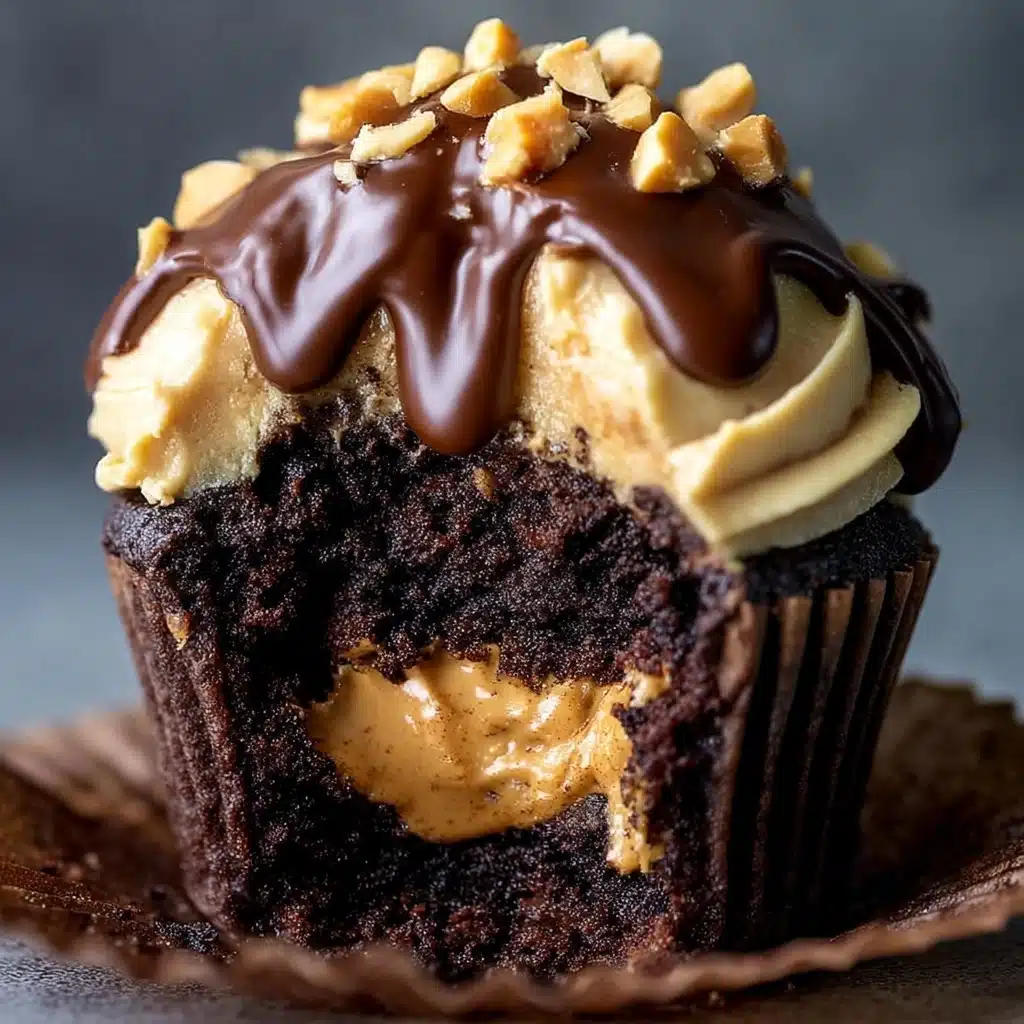
For an extra-special touch, top your Gooey Peanut Butter Lava Cupcakes with a drizzle of melted chocolate, a dusting of powdered sugar, or a dollop of fresh whipped cream. A few crushed peanuts sprinkled on top bring a lovely crunch and hint at what’s hiding inside.
Side Dishes
Pair these cupcakes with a tall glass of icy cold milk for nostalgia-in-a-glass, or serve alongside fresh berries for a little brightness that balances all that lusciousness. A scoop of vanilla ice cream on the side will turn dessert into a showstopper finale at any meal.
Creative Ways to Present
Turn your Gooey Peanut Butter Lava Cupcakes into a mini-dessert flight by baking them in mini muffin tins, or serve them in teacups for a whimsical twist. You can also stack them on a cake stand with cascading ribbons of peanut butter and chocolate sauce—guaranteed to wow at any party!
Make Ahead and Storage
Storing Leftovers
If you have leftovers (which is never a guarantee!), place cooled cupcakes in an airtight container and store at room temperature for up to two days. If you need to keep them fresh a bit longer, the fridge works too—just bring them to room temp before serving for the best gooey experience.
Freezing
Gooey Peanut Butter Lava Cupcakes are surprisingly freezer-friendly. Wrap each cupcake tightly in plastic wrap and place in a freezer-safe bag or container. They’ll keep for up to two months. Simply thaw overnight in the fridge, then warm gently before serving to revive that molten core.
Reheating
To restore the gooey lava magic, microwave cupcakes on a microwave-safe plate for about 15-20 seconds. Be careful not to overheat or you’ll lose that liquid center. Alternatively, a quick warm-up in a low oven does the trick for larger batches.
FAQs
Can I use crunchy peanut butter instead of creamy?
Absolutely! Crunchy peanut butter will give your Gooey Peanut Butter Lava Cupcakes an extra nutty texture and delightful crunch in every bite. Just be aware that the lava center might have more texture and less runniness, which some people love.
Is it possible to make these gluten-free?
Yes, simply swap the all-purpose flour for your favorite one-to-one gluten-free baking flour blend. The other ingredients are naturally gluten-free, so this adjustment will work well for anyone who avoids gluten.
What’s the best way to ensure my lava center stays molten?
The secret is not to overbake! Check your cupcakes right at the 18-minute mark and remove from the oven when a toothpick at the edge comes out clean, but the middle is still tender. Also, enjoy them warm for the ultimate lava effect.
Can I make these cupcakes without a mixer?
Definitely. While a mixer helps make the butter and sugar extra fluffy, you can still get great results mixing by hand—just be sure your butter is very soft and give it a good stir so everything comes together smoothly.
Can I double the recipe for a crowd?
No problem! Just double every ingredient and bake in two muffin tins or in batches. Keep an eye on bake times, as sometimes a slightly fuller oven can change the timing by a minute or two.
Final Thoughts
There’s something wonderfully nostalgic and decadent about Gooey Peanut Butter Lava Cupcakes that just makes people smile. Whether you’re baking for yourself or to impress your favorite folks, these cupcakes always deliver that wow factor. Go ahead—give them a try and savor the melty, peanut buttery goodness. I can’t wait for you to discover what makes this recipe such a cherished favorite!

