here is a Recipe
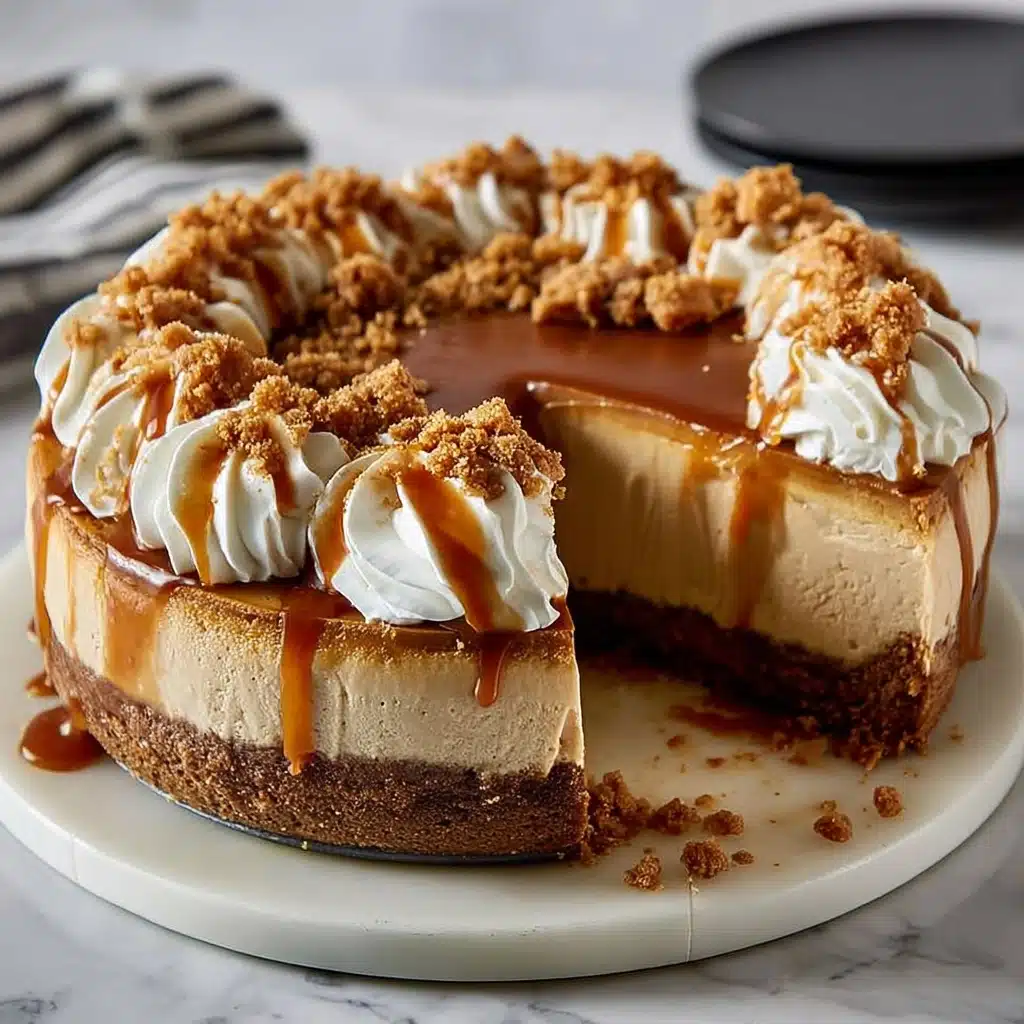
If you want a dessert that feels like pure comfort in every bite, here is a Biscoff cheesecake that will absolutely win you (and everyone you serve it to!) over. This heavenly treat combines a buttery, spicy Biscoff cookie crust with an ultra-creamy, cookie butter-infused filling, then crowns it all with lush whipped cream and cookie crumbles. Each layer pays homage to the classic Biscoff flavor, making this cheesecake a guaranteed showstopper for gatherings or a well-deserved indulgence just for you.
Ingredients You’ll Need
The magic of this cheesecake lies in how simple the ingredients are, yet each is essential for that signature flavor and luscious texture. Together, they create a dessert that’s both eye-catching and incredibly craveable.
- Biscoff cookies: These beloved spiced cookies are the backbone of the crust and bring the unmistakable flavor to every slice.
- Unsalted butter: Melted butter binds the crumb crust and adds just the right amount of richness and moisture.
- Full-fat cream cheese: Make sure it’s softened to room temperature for a super-smooth, creamy filling.
- Granulated sugar: Sweetens and balances out the tang of the cream cheese.
- Light brown sugar: Adds subtle caramel notes that pair perfectly with the cookies.
- Large eggs: They set the filling and help create that impossibly rich, dense-but-fluffy cheesecake texture.
- Biscoff cookie butter spread: The secret to maximum Biscoff flavor, in both the filling and the stunning topping drizzle.
- Vanilla extract: Heightens all the flavors without overpowering the Biscoff.
- Salt: Just a touch sharpens every other flavor, so don’t skip it!
- Heavy whipping cream: For pillowy-soft whipped cream to finish the cheesecake with flair.
- Powdered sugar: Lightly sweetens the homemade whipped cream just enough.
- Crushed Biscoff cookies: A sprinkle on top for extra crunch and visual appeal.
How to Make here is a
Step 1: Prepare the Biscoff Crust
Begin by preheating your oven to 175°C (350°F). Line the bottom of a 9-inch springform pan with parchment and give the sides a light greasing. Crush your Biscoff cookies in a food processor until they’re fine and sandy, then pulse in the melted butter. Press this mixture firmly into the pan’s bottom and up the sides so you get wall-to-wall Biscoff flavor. Bake for 10 minutes, then let it cool as you move on to the filling. This is a key step, so here is a tip: let the crust cool completely for the best texture.
Step 2: Make the Cheesecake Filling
In a large bowl, use a stand or hand mixer to beat together the softened cream cheese, both sugars, and then add the eggs one at a time on low speed. It’s important not to overmix at this stage; just combine until smooth. Next, fold in the melted (and cooled!) Biscoff spread, vanilla, and salt until your batter is silky and uniform. Here is a little secret—sneak a tiny taste here to appreciate how deeply Biscoff the filling already is!
Step 3: Water Bath and Baking
Pour your creamy filling into the cooled crust. Now, wrap your springform pan in foil and place it inside a larger roasting pan. Create a water bath by pouring hot water into the outer pan, halfway up the sides—this gentle steam helps the cheesecake bake evenly and prevents cracks. Bake for 60 to 75 minutes, until the center is mostly set but still wobbly. For perfect results, here is a reminder to avoid overbaking—cheesecake always finishes setting as it cools.
Step 4: Cooling and Chilling
Turn off the oven, prop the door open, and let your cheesecake gently come to room temperature inside for an hour. This slow cooling is the best trick for preventing cracks. Once out, run a thin knife around the pan’s edge so the cake doesn’t stick as it cools and shrinks. Chill the cheesecake in the refrigerator for at least 6 hours—overnight is even better. Here is a promise: patience pays off with that perfect texture.
Step 5: Add the Biscoff Topping
Once thoroughly chilled, melt the remaining Biscoff spread and beat the heavy cream, powdered sugar, and vanilla to stiff peaks. Drizzle the warm cookie butter over your cheesecake and let it drip artfully down the sides. Here is a step that makes your cheesecake look like a million bucks!
Step 6: Garnish and Serve
Release the cheesecake from its pan, then either pipe or dollop swirls of whipped cream around the edge and scatter over a generous handful of crushed Biscoff cookies. Slice and present immediately for that spectacular first impression—dessert perfection is officially served.
How to Serve here is a

Garnishes
The magic really shines when you garnish with extra crushed Biscoff cookies and generous swirls of whipped cream. For a finishing touch, try a few whole Biscoff cookies stuck upright in the whipped cream for that bakery-style flair. Here is a simple idea: a sprinkle of ground cinnamon on the whipped cream amplifies the warmth even more.
Side Dishes
Here is a cheesecake that plays well with plenty of sides—pour yourself a hot cup of coffee, or even sip on a little espresso. Fresh berries like raspberries or sliced strawberries balance the richness and add pops of color on the plate. If you want to go extra-indulgent, serve with a little caramel sauce alongside each slice.
Creative Ways to Present
There’s lots of fun to be had in presentation! Here is a showy option: cut the cheesecake into mini bars and drizzle each with cookie butter for party-ready finger food. For a holiday flair, top each slice with a petite gingerbread man or dust lightly with edible gold shimmer. Individual mini cheesecakes in jars also make adorable, portable treats for picnics or gifting.
Make Ahead and Storage
Storing Leftovers
Here is a tip for leftovers: wrap your cheesecake tightly with plastic wrap or keep it in an airtight container. It will hold beautifully in the fridge for up to 5 days, and the flavor actually deepens a bit, making each sneaky spoonful even more irresistible.
Freezing
Yes, you can freeze this cheesecake! Slice it first, or leave it whole, then wrap well in both plastic wrap and foil. Cheesecake keeps in the freezer for up to 2 months. Here is a best practice: thaw overnight in the fridge for the creamiest texture before serving.
Reheating
This is a treat that’s best enjoyed cold or at cool room temperature, so no reheating is needed. If you’ve frozen it, just let it thaw in the fridge. Here is a thought: for a slightly softer bite, let slices sit out for 15 minutes before eating.
FAQs
How do I prevent my Biscoff cheesecake from cracking?
The secret is twofold: bake it in a water bath to provide gentle, even heat, and let it cool gradually in the oven with the door propped open. Don’t forget to run a knife around the edges after baking!
Can I use another brand of cookie butter?
Absolutely! Any cookie butter style spread—like those labeled as speculoos—will work just fine, though you want to make sure it’s smooth and easy to melt.
Do I need a springform pan?
For a perfect release and those clean sides, yes, a springform pan is ideal. However, here is a workaround: line a deep cake pan with parchment and gently lift the cheesecake out once chilled, but take extra care.
Can I make this cheesecake gluten-free?
Yes! Simply swap standard Biscoff cookies for a gluten-free spiced cookie or gluten-free speculoos. Make sure your cookie butter spread is also gluten-free.
What’s the best way to slice this cheesecake cleanly?
Use a sharp knife dipped in hot water and wiped dry before each slice. Here is a bonus tip: a gentle sawing motion ensures neat edges and minimizes crumbling.
Final Thoughts
If you adore Biscoff, here is a recipe you simply can’t skip! It’s rich, creamy, and endlessly impressive for all occasions. Give this Biscoff cheesecake a try and treat yourself and your loved ones to something unforgettable.