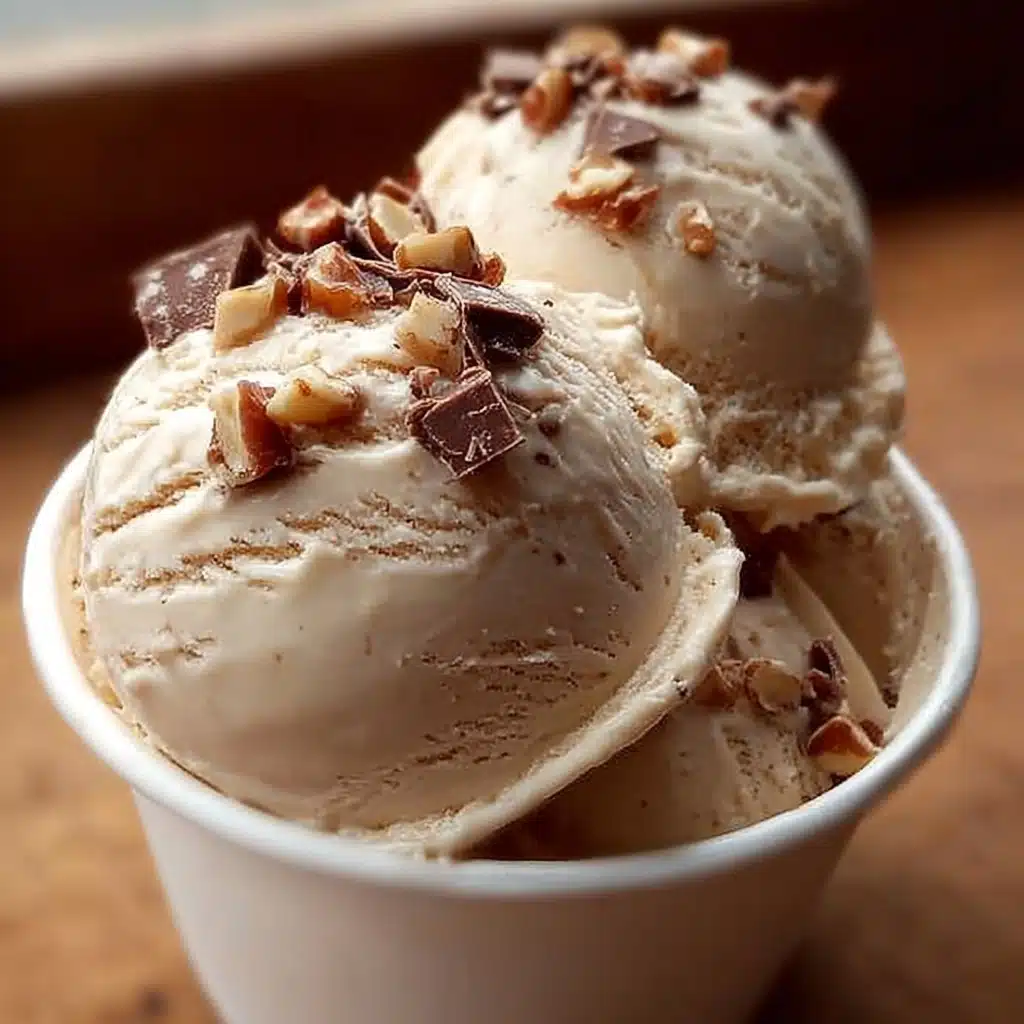
Homemade Butterfinger Ice Cream Recipe
Bold, crunchy, and irresistibly creamy, Homemade Butterfinger Ice Cream is the ultimate treat for candy bar lovers and ice cream aficionados alike. Imagine velvety smooth vanilla ice cream ribboned with chocolatey, peanut-buttery Butterfinger bits in every bite—the kind of dessert that sparks joy with just a single scoop. Whether you’re cooling down on a summer afternoon or wowing friends at a party, this Homemade Butterfinger Ice Cream recipe brings nostalgia and gourmet flair together in the sweetest possible way.
Ingredients You’ll Need
There’s nothing complex about the ingredients, yet they come together to create something truly decadent. Each one plays a starring role, whether it’s for silken texture, craveable sweetness, or that classic Butterfinger crunch.
- Heavy Cream: This is essential for that ultra-creamy mouthfeel and luscious body that sets homemade ice cream apart from store-bought.
- Whole Milk: Balances the richness of the cream, keeping the ice cream scoopable and smooth.
- Granulated Sugar: Sweetens things up just right, while also helping achieve a soft, scoopable texture.
- Vanilla Extract: Adds warmth and depth, creating a delicious backdrop for the Butterfinger flavors.
- Crushed Butterfinger Candy Bars: The star of our Homemade Butterfinger Ice Cream, delivering crunchy, chocolatey, peanut-buttery pockets throughout every bite.
- Salt: Just a pinch, to enhance all the other flavors and keep everything perfectly balanced.
How to Make Homemade Butterfinger Ice Cream
Step 1: Whisk the Base Together
Start by whisking together the heavy cream, whole milk, granulated sugar, vanilla extract, and a pinch of salt in a large bowl. Keep whisking until all the sugar has dissolved—this ensures the base is silky smooth and ready for churning. It should look creamy and glossy, with a tempting aroma from the vanilla.
Step 2: Churn in the Ice Cream Maker
Pour your well-mixed ice cream base into your ice cream maker. Set it up according to the manufacturer’s instructions, usually for about 20 to 25 minutes. You’ll see the mixture go from liquid to creamy soft-serve before your eyes—the perfect time to dream about that first bite of Homemade Butterfinger Ice Cream.
Step 3: Add Butterfinger Pieces
Just as your ice cream finishes churning and thickens to a soft-serve consistency, sprinkle in those gorgeous crushed Butterfinger candy bars. Let the machine churn for just another minute or two—enough to evenly distribute those golden, chocolate-flecked bits without breaking them down too much. You want bright, distinct chunks in every scoop.
Step 4: Freeze Until Firm
Scoop your just-churned Homemade Butterfinger Ice Cream into a freezer-safe container, smoothing it out so it’s even. Cover with a tight-fitting lid or plastic wrap, then pop it in the freezer for at least four hours. This sets up the ice cream so every scoop comes out creamy and firm—pure anticipation in a tub.
Step 5: Scoop and Enjoy
When you’re ready to serve, take your ice cream out of the freezer for about five minutes to soften slightly. Scoop generously, pile high, and don’t forget an extra handful of Butterfinger crumbles on top. Each bowl is a celebration of classic candy bar flavor and homemade comfort.
How to Serve Homemade Butterfinger Ice Cream

Garnishes
With a dessert this fun, toppings are half the adventure! For major Butterfinger bliss, sprinkle extra crushed Butterfinger pieces over each scoop just before serving. You can also add chocolate syrup, a dollop of whipped cream, or even a drizzle of salted caramel for extra indulgence.
Side Dishes
If you want to turn this into a full-blown dessert spread, Homemade Butterfinger Ice Cream pairs beautifully with brownies, chocolate chip cookies, or crisp waffle cones. Serve it alongside a warm chocolate lava cake or even as the surprise inside a creative ice cream sandwich for the ultimate sweet treat experience.
Creative Ways to Present
Let your imagination run wild! Try serving your Homemade Butterfinger Ice Cream in mini mason jars for an adorable single-serve dessert, or layer it with brownie chunks and whipped cream for show-stopping parfaits. For a playful touch at parties, scoop it into sugar cones and dip the edges in melted chocolate and extra Butterfinger bits—it’s pure fun in every bite.
Make Ahead and Storage
Storing Leftovers
Store any leftover Homemade Butterfinger Ice Cream in an airtight, freezer-safe container. Press a piece of plastic wrap directly onto the surface before sealing the lid to keep ice crystals at bay and preserve maximum creaminess.
Freezing
Proper freezing is key to keeping your ice cream as fresh as possible. Freeze at the coldest part of your freezer, and aim to enjoy within two weeks for peak flavor and texture. The Butterfinger pieces will stay deliciously crisp, ready for every late-night craving.
Reheating
Ice cream doesn’t actually need reheating, but do let it sit on the counter for five to ten minutes before scooping if it’s frozen very hard. This softens it just enough without melting, helping those rich, creamy scoops come out perfectly round and irresistible.
FAQs
Can I make Homemade Butterfinger Ice Cream without an ice cream maker?
Absolutely! You can whip the cream to soft peaks, stir in the sweetened condensed milk, vanilla, and Butterfinger pieces, then freeze the mixture in a loaf pan. The texture won’t be identical, but it’ll still be outrageously delicious.
Can I use low-fat milk or cream?
You can substitute lower-fat milk, but you’ll trade some creaminess and rich texture for fewer calories. For the silkiest, most decadent Homemade Butterfinger Ice Cream, stick to heavy cream and whole milk when possible.
How do I crush Butterfingers for this ice cream?
Place the candy bars in a zip-top bag and smash them gently with a rolling pin or mallet. You want some larger chunks and some tiny bits for varied texture throughout your ice cream.
Can I use other candy bars in this recipe?
Definitely! While Butterfinger gives that signature peanut-buttery crunch, you can swap in Heath, Snickers, or even Reese’s Cups for different flavor twists. It’s a fun way to personalize your batch.
How long does Homemade Butterfinger Ice Cream keep in the freezer?
For best quality, enjoy within two weeks. After that, the texture may become icier and the Butterfinger pieces may lose some crispiness—but let’s be honest, it probably won’t last that long!
Final Thoughts
If you’re looking to add a little excitement to your dessert routine, Homemade Butterfinger Ice Cream is the perfect answer. Every batch is a fun, flavorful adventure that’s sure to bring happiness to your freezer and every gathering. I hope you’ll give it a try—you’ll quickly see why it’s one of my all-time favorites!