Homemade Butterfinger Ice Cream Recipe
Craving a cold, creamy treat that packs a sweet and crispy punch? Homemade Butterfinger Ice Cream is your golden ticket. This irresistible dessert is loaded with rich vanilla ice cream swirled with chunks of crushed Butterfinger candy, giving you a blend of smooth, luscious texture and irresistible chocolate-peanut butter crunch. Perfect for summer gatherings or a cozy night in, each spoonful is pure nostalgia and joy. If you’re ready to swap store-bought pints for the magic of a homemade scoop, this crowd-pleaser is bound to win hearts!
Ingredients You’ll Need
You’ll be amazed at just how simple yet essential these ingredients are for Homemade Butterfinger Ice Cream. Each one plays its own crucial part—from silky richness to caramel notes and irresistible crunch—making this recipe truly unforgettable.
- Heavy cream: Provides the decadent, ultra-creamy base that makes this ice cream so luxurious.
- Whole milk: Adds a slightly lighter texture without sacrificing richness or smoothness.
- Granulated sugar: Balances the flavors and lends the perfect sweetness that lets the Butterfinger shine.
- Vanilla extract: Gives your base a depth of flavor and a lovely aroma that brings everything together.
- Crushed Butterfinger candy bars: The star of the show—these add a sensational crunch and that signature chocolate-peanut butter flair.
- Salt: Just a pinch enhances all the other flavors, keeping the sweetness in check.
How to Make Homemade Butterfinger Ice Cream
Step 1: Whisk Up the Ice Cream Base
Start by grabbing a large mixing bowl. Whisk together the heavy cream, whole milk, granulated sugar, vanilla extract, and a pinch of salt. This step only takes a couple of minutes and is key for dissolving the sugar while blending all those vanilla-scented flavors. Your goal is a smooth, creamy base—the foundation of your Homemade Butterfinger Ice Cream.
Step 2: Churn to Perfection
Pour the prepared mixture into your ice cream maker, following the manufacturer’s instructions. Usually, this will take about 20 to 25 minutes to achieve that magical thick, creamy consistency. If you don’t have an ice cream maker, you can pour the mixture into a shallow pan and stir well every 30 minutes while it freezes, but trust me, having a machine makes it ultra creamy!
Step 3: Add the Butterfinger Crunch
About two minutes before the churning finishes, toss in your crushed Butterfinger pieces. This allows the candy to swirl evenly throughout the ice cream without sinking to the bottom or getting soggy. You’ll see bits of orange, chocolate, and crunchy layers throughout—it’s like every bite hides a treasure in this Homemade Butterfinger Ice Cream.
Step 4: Freeze Until Firm
Transfer your freshly churned ice cream into a freezer-safe container, smoothing out the top with a spatula. Place it in the freezer for at least 4 hours, or until the ice cream is firm enough to scoop. The patience pays off: your ice cream will have that perfect scoopable texture, just like from your favorite parlor.
Step 5: Scoop and Serve
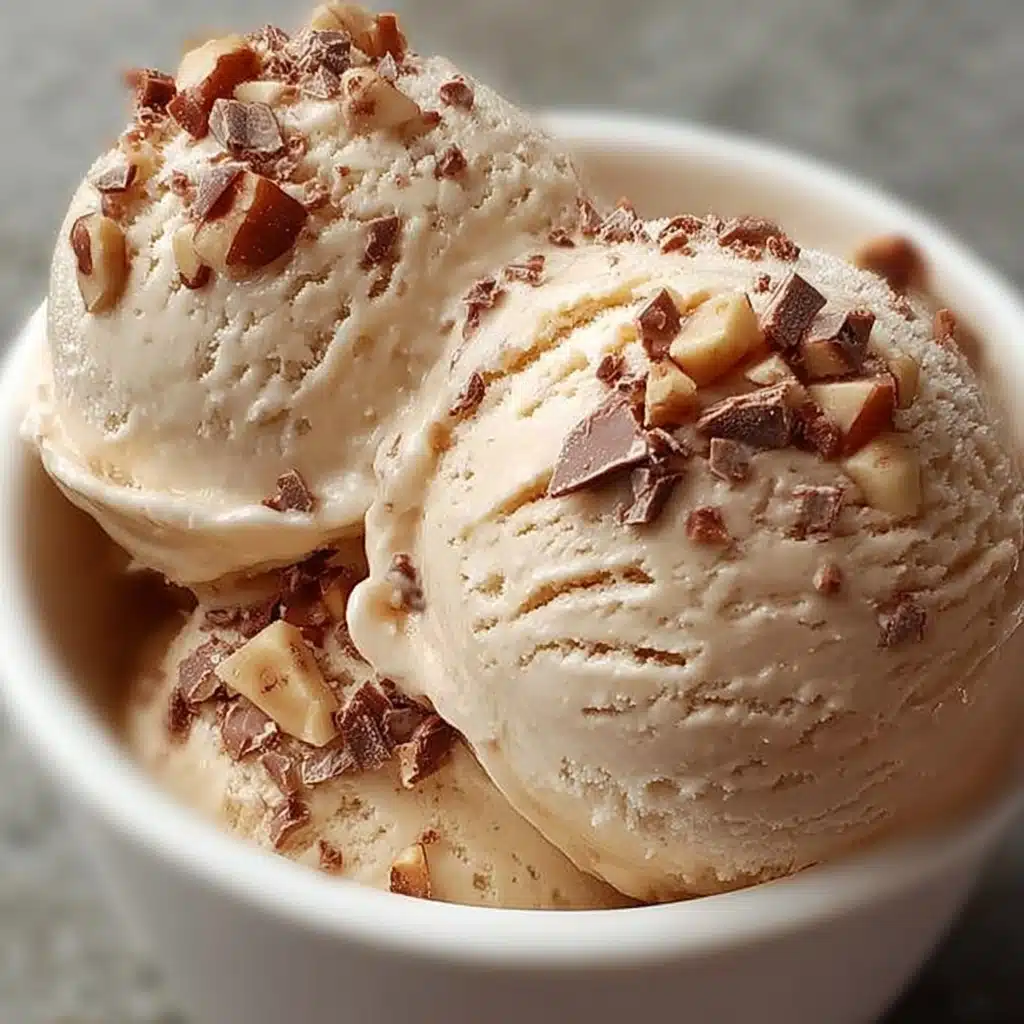
Once the ice cream is set, it’s showtime! Scoop generous mounds into bowls, cones, or fancy dessert dishes. For a little extra pizzazz, sprinkle more crushed Butterfinger on top. Ready to dig in? Every spoonful is creamy, crunchy, and absolutely exhilarating!
How to Serve Homemade Butterfinger Ice Cream

Garnishes
Amp up each serving with a shower of crushed Butterfinger bars, a drizzle of warm caramel sauce, or a fluffy cloud of whipped cream. For a festive twist, mini chocolate chips, chopped peanuts, or orange sprinkles will make your bowl pop with color and flavor.
Side Dishes
Pair your ice cream with freshly baked brownies, gooey chocolate chip cookies, or even a simple slice of pound cake. If you’re feeling adventurous, sandwich a scoop between two cookies for the ultimate Butterfinger ice cream sandwich!
Creative Ways to Present
Transform your Homemade Butterfinger Ice Cream into decadent sundaes layered with fudge sauce and a cherry on top. Try serving it in edible chocolate bowls, mini mason jars for parties, or even atop warm waffles for a playful brunch dessert. The possibilities are only limited by your imagination!
Make Ahead and Storage
Storing Leftovers
Keep any uneaten ice cream in an airtight, freezer-safe container to maintain freshness and prevent those pesky freezer odors from creeping in. For best flavor and texture, use within two weeks (if it lasts that long!).
Freezing
To prevent ice crystals, press a sheet of plastic wrap or wax paper directly on the surface before sealing the container lid. Your Homemade Butterfinger Ice Cream will stay smooth and scoopable, even after several days.
Reheating
Ice cream isn’t something you reheat, but if it’s too hard straight from the freezer, let the container sit at room temperature for 5 to 10 minutes. It’ll soften just enough to scoop those perfect round balls.
FAQs
Can I make Homemade Butterfinger Ice Cream without an ice cream maker?
Absolutely! While an ice cream maker gives the best silky-smooth texture, you can freeze the base in a shallow dish and stir vigorously every 30 minutes until it’s scoopable. Fold in the Butterfinger pieces once it starts to thicken up.
What’s the best way to crush the Butterfinger bars?
Put the Butterfinger bars in a zip-top bag and use a rolling pin or the bottom of a pan to gently crush them. You want a mix of fine crumbles and bigger chunks for texture, but avoid turning them into dust!
Can I use light cream or milk?
You can, but keep in mind that the higher fat content of heavy cream and whole milk is what gives Homemade Butterfinger Ice Cream its ultra-creamy, luscious texture. Using lighter alternatives may result in an icier treat.
Are there mix-ins I can add besides Butterfinger?
Definitely! Try blending in chocolate chips, swirls of peanut butter, or ribbons of caramel alongside the Butterfinger bits. Just be sure not to overload your ice cream so every flavor shines.
How do I prevent my ice cream from getting icy?
The key is a well-balanced mixture of fat and sugar, plus storing it sealed and covered in plastic wrap. Churning helps too, since it incorporates air and keeps everything fluffy and smooth.
Final Thoughts
If you’re hunting for a treat that’s creamy, crunchy, and bursting with nostalgia, look no further than Homemade Butterfinger Ice Cream. Gather your favorite people and unleash your inner ice cream creator—this recipe is sure to become a beloved repeat. Happy scooping!