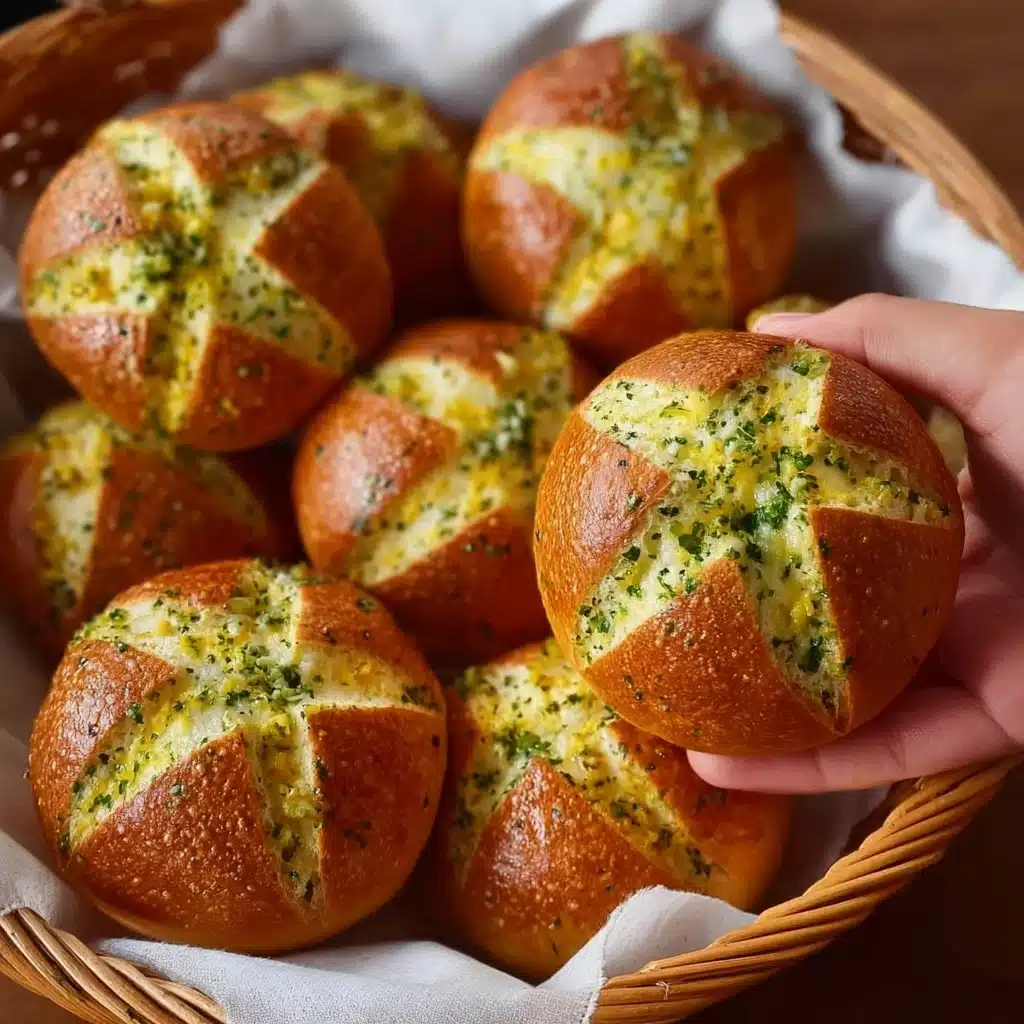
Korean Cream Cheese Garlic Bread Recipe
If you’re on the hunt for a truly unforgettable indulgence, look no further than Korean Cream Cheese Garlic Bread. This iconic street snack magically fuses the warmth of soft, pillowy bread with a lusciously tangy-sweet cream cheese filling, then envelops it all in a garlicky, buttery coating that’s rich with savory goodness. Every bite brings together crackly edges, outrageously creamy centers, and a touch of sweetness that keeps you coming back for more. If comfort food had a global passport, Korean Cream Cheese Garlic Bread would be stamped front and center.

Ingredients You’ll Need
Creating this incredible treat takes just a handful of everyday pantry items, but each ingredient plays a starring role. From the fluffy bread base to the silky cream cheese and addictive garlic butter, every element brings flavor and texture to this irresistible bake.
- All-purpose or Bread Flour: The backbone of the dough, giving your bread structure and a delightfully chewy crumb.
- Sugar: Adds subtle sweetness to both the bread and the garlicky coating, balancing out the savory flavors.
- Salt: Enhances every note of flavor and gives the bread depth.
- Instant Yeast: Makes your dough rise beautifully, ensuring your buns are airy and soft.
- Warm Milk: Enriches the dough and helps activate the yeast.
- Warm Water: Keeps the dough moist and helps integrate all the dry ingredients.
- Egg: One in the dough for softness, another in the coating for richness and shine.
- Unsalted Butter (softened and melted): Adds moisture and incredible flavor to both the dough and the savory garlic coating.
- Cream Cheese: The heart of the filling, providing that creamy, tangy sensation in every bite.
- Powdered Sugar: Makes the cream cheese filling silky smooth and sweet.
- Garlic (finely minced or grated): You can’t make Korean Cream Cheese Garlic Bread without a generous heap of aromatic garlic.
- Milk (for the coating): Loosens the butter mixture so it coats the bread perfectly.
- Mayonnaise: Adds a creamy, slight tanginess to the garlic butter that makes it distinctly Korean.
- Chopped Parsley (fresh or dried): Gives pops of color and a fresh, herbal finish.
How to Make Korean Cream Cheese Garlic Bread
Step 1: Make the Dough
Start by combining your flour, sugar, salt, instant yeast, warm milk, warm water, and an egg in a large mixing bowl. Stir everything until a rough dough forms, then add the softened butter and knead until you have a smooth, elastic ball. If you’re kneading by hand, put on your favorite playlist and give the dough a 10-12 minute workout; if you have a stand mixer, it’s a quick 7-8 minute mix. This step sets the stage for soft, fluffy buns that will carry all that garlicky, creamy goodness.
Step 2: First Rise
Place the dough in a clean bowl, cover it loosely with plastic wrap or a damp kitchen towel, and let it rise at room temperature for about an hour or until doubled in size. This rise is what gives the bread that ethereal lightness—don’t rush it!
Step 3: Shape the Dough
Punch down the risen dough gently to release built-up air. Then, divide it into 6 (or up to 8 smaller) portions. Roll each piece into a smooth ball and arrange them on a parchment-lined baking sheet. Cover again and let rise for another 45 to 60 minutes until they’re visibly puffy—this makes sure your buns bake up tall and tender.
Step 4: Bake the Buns
Preheat your oven to 180°C (356°F). Slide in the tray and bake the buns for 15-18 minutes, until they’re delicately golden brown. The aroma at this point is simply irresistible. Let them cool slightly; they need to be just warm so you can slice and fill them without losing the soft crumb.
Step 5: Prepare the Cream Cheese Filling
While your kitchen fills with the smell of fresh-baked bread, mix the softened cream cheese with powdered sugar until luxuriously smooth and creamy. Spoon the mixture into a piping bag (a sturdy zip-top bag with the corner snipped off works in a pinch)—this will make filling the buns both easy and precise.
Step 6: Prepare the Garlic Butter Mixture
In a medium bowl, blitz together the melted butter, finely grated garlic, milk, sugar, mayonnaise, an egg, and parsley. Stir until everything is fully blended—the result is a thick, aromatic mixture packed with savory depth and herbal freshness.
Step 7: Assemble the Korean Cream Cheese Garlic Bread
When your buns have cooled just enough to handle, carefully slice each one into 6 even wedges (like a pie) but be sure not to cut all the way through—leave the base intact so the segments hold together. Pipe generous ribbons of the cream cheese filling between each wedge, making sure every bite is loaded with tangy sweet cheese. Finally, dunk or brush each bun thoroughly with the garlic butter mixture, coating every nook and cranny. Return the buns to the oven for a brief warm-up, just a few minutes, so everything melds together deliciously.
How to Serve Korean Cream Cheese Garlic Bread
Garnishes
A light sprinkle of extra chopped parsley right before serving instantly brightens the bread—both visually and flavor-wise. For a bit of crunch and color contrast, a dusting of grated Parmesan or a twist of cracked black pepper does wonders.
Side Dishes
Korean Cream Cheese Garlic Bread is rich and satisfying all on its own, but it pairs beautifully with light, refreshing sides. Try serving it with a crisp Asian slaw, a fresh cucumber salad, or even a simple tomato soup. These sides offer a cooling balance to the bread’s savory intensity.
Creative Ways to Present
To turn these into a stunning appetizer platter, make smaller buns and arrange them on a wooden board with shot glasses of tomato gazpacho or tiny bowls of pickled veggies. Or, for a playful spin, serve mini versions as sliders filled with extra cream cheese and fresh herbs. The dramatic “pull-apart” presentation always steals the show at gatherings!
Make Ahead and Storage
Storing Leftovers
If you have any of this addictive bread left (big “if”!), store it in an airtight container in the fridge. It will keep for up to three days, but is always best enjoyed slightly warm within the first day or two for optimal texture and flavor.
Freezing
You can absolutely freeze Korean Cream Cheese Garlic Bread. After baking, let the bread cool completely, then wrap each bun tightly in plastic wrap and place in a freezer-safe bag or container. They’ll stay fresh for up to a month. Thaw overnight in the refrigerator for best results.
Reheating
To bring back that just-baked magic, reheat your bread in a 160°C (320°F) oven for 6-8 minutes until soft and fragrant. Avoid microwaving if you can, as it can make the bread a bit chewy and uneven, but if you’re pressed for time, short 15-second bursts work—just keep a close eye!
FAQs
Can I use store-bought buns instead of homemade?
Absolutely! Brioche or milk bread rolls are especially great for Korean Cream Cheese Garlic Bread if you’re short on time. Just slice, fill, and coat as you would with homemade dough—your secret is safe.
Is there a way to make this less sweet?
Definitely. Simply reduce the sugar in both the cream cheese filling and garlic butter coating to your taste, or skip the powdered sugar in the filling altogether for a more savory treat.
Can I prep everything ahead and assemble later?
Yes! Both the buns and the cream cheese filling can be made a day ahead. Store them separately and assemble right before serving to keep the bread soft and the filling fresh.
Does this work with gluten-free flour?
Many gluten-free bread flours work well in this recipe, though you might need a touch more liquid and a slightly longer proofing time. The texture will be a bit different, but still tasty and indulgent!
What’s the best way to get the garlic flavor just right?
Use fresh garlic and make sure it’s very finely minced or grated—this way, the flavor infuses the butter evenly. For a gentler aroma, you can sauté the garlic briefly in butter before mixing, which sweetens its bite beautifully.
Final Thoughts
If you’ve been looking for something show-stopping, comforting, and downright fun to bake at home, Korean Cream Cheese Garlic Bread is your new go-to. It’s one of those recipes that makes both the cook and the lucky eaters incredibly happy—so don’t hesitate, invite a friend over, and enjoy the magic together!