Miso Mango Meringue Clouds Recipe
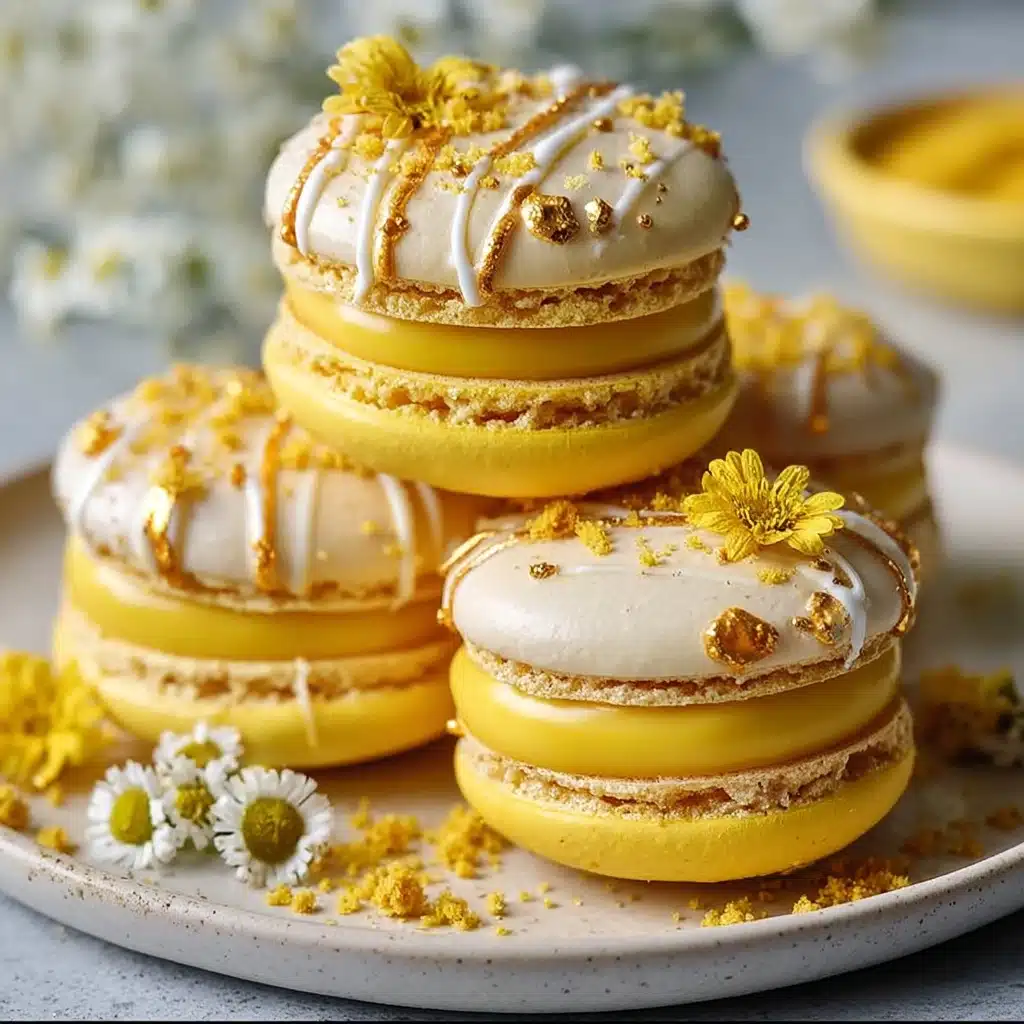
If you’re searching for a dessert that’s equal parts elegant, surprising, and bursting with sunshine, these Miso Mango Meringue Clouds will sweep you off your feet. Imagine crisp, feather-light meringue shells, sandwiched around a luscious, silky curd made from juicy mango and savory white miso. This playful twist on classic meringues dances on your tongue with sweet, salty, tangy, and tropical notes. Whether you’re impressing guests or treating yourself to something special, these clouds are guaranteed to spark joy and conversation!
Ingredients You’ll Need
Every ingredient in this recipe brings something crucial to the table, from the structure of the meringue to the velvety richness of the curd. Gather these simple items, and you’ll see just how effortless it is to create the stunning flavor profile and dazzling appearance of Miso Mango Meringue Clouds.
- Egg Whites: The backbone of meringues, whipped into airy clouds for structure and chew.
- Granulated Sugar: Provides sweetness and stabilizes the meringue, giving it that signature crisp shell.
- White Vinegar: A dash helps set the meringue, ensuring beautifully glossy, stiff peaks.
- Vanilla Extract: Lends delicate warmth and rounds out the flavors in the meringue.
- Salt: Just a pinch keeps all the sweet notes in harmony and deepens flavors.
- Yellow Gel Food Coloring (Optional): For an extra sunny pop, a little color makes these clouds as gorgeous as they are delicious.
- Ripe Mango (Purée): Juicy, fragrant, and sweet, mango brings bold, tropical flavor to the curd.
- Egg Yolks: These transform the filling into a thick, silky curd for the perfect sandwich.
- White Miso Paste: The ingredient that transforms everything; it offers a subtle, savory undertone that perfectly balances the fruit’s sweetness.
- Lemon Juice: Adds brightness and a welcome tang, keeping the filling lively.
- Sugar: Sweetens the curd and helps it set beautifully.
- Unsalted Butter: Stirred in at the end for richness and smooth texture.
- Crushed Freeze-Dried Mango (Optional): Adds texture, color, and an extra burst of flavor on top.
- Flaky Salt (Optional): Each flake offers a delightful, salty crunch to highlight the miso.
- Edible Petals (Optional): For an ultra-special finish, these make your Miso Mango Meringue Clouds look truly magical.
How to Make Miso Mango Meringue Clouds
Step 1: Whip the Meringue
Start by preheating your oven to a gentle 95°C (200°F). In a super-clean bowl, whisk the egg whites with vinegar and salt until they’re foamy and cloudlike. Gradually sprinkle in the sugar, continuing to beat until you reach glossy, stiff peaks that hold their shape. Blend in vanilla extract and a dab of yellow gel coloring, if you’re adding that extra splash of sunshine. This is where your Miso Mango Meringue Clouds get their signature lift and crispiness!
Step 2: Form and Rest the Shells
Using a piping bag or just a spoon, create small, 3–4 cm mounds on a parchment-lined baking sheet. Leave a little space between each for good air circulation. Once all your rounds are formed, let them rest for 20 minutes to develop a protective skin. This little pause ensures your clouds bake up smooth and crack-free.
Step 3: Bake Low and Slow
Bake the shells for 1.5 hours in your low oven until they’re firm, matte, and dry to the touch. Resist the urge to open the oven door! Once the time’s up, turn off the heat and let your meringues cool completely inside—the slow temperature drop keeps them beautifully crisp with that melt-in-your-mouth center.
Step 4: Prepare the Mango-Miso Curd
While the meringues are baking, make your irresistible filling. Combine mango purée, egg yolks, miso, lemon juice, and sugar in a saucepan. Set it over medium-low heat, whisking constantly until the mixture thickens into a luscious curd (about 5 minutes). Off the heat, stir in butter until glossy and smooth. Let the curd cool completely—it needs to be nice and thick before sandwiching.
Step 5: Assemble Your Clouds
When everything is cool, gently pair meringue halves by size. Spoon or pipe a generous mound of mango-miso curd onto the bottom shell, then crown with a second meringue. Press lightly; you want to create a pillowy sandwich without cracking the delicate shells. These Miso Mango Meringue Clouds are almost ready to dazzle!
Step 6: Decorate and Chill
For the finishing touch, dust the tops with crushed freeze-dried mango, a few flakes of sea salt, or scatter on edible petals for a whimsical look. Chill your assembled clouds for at least 30 minutes before serving. This helps the flavors meld, and the curd gets even more luxurious sandwiched between those airy shells.
How to Serve Miso Mango Meringue Clouds
Garnishes
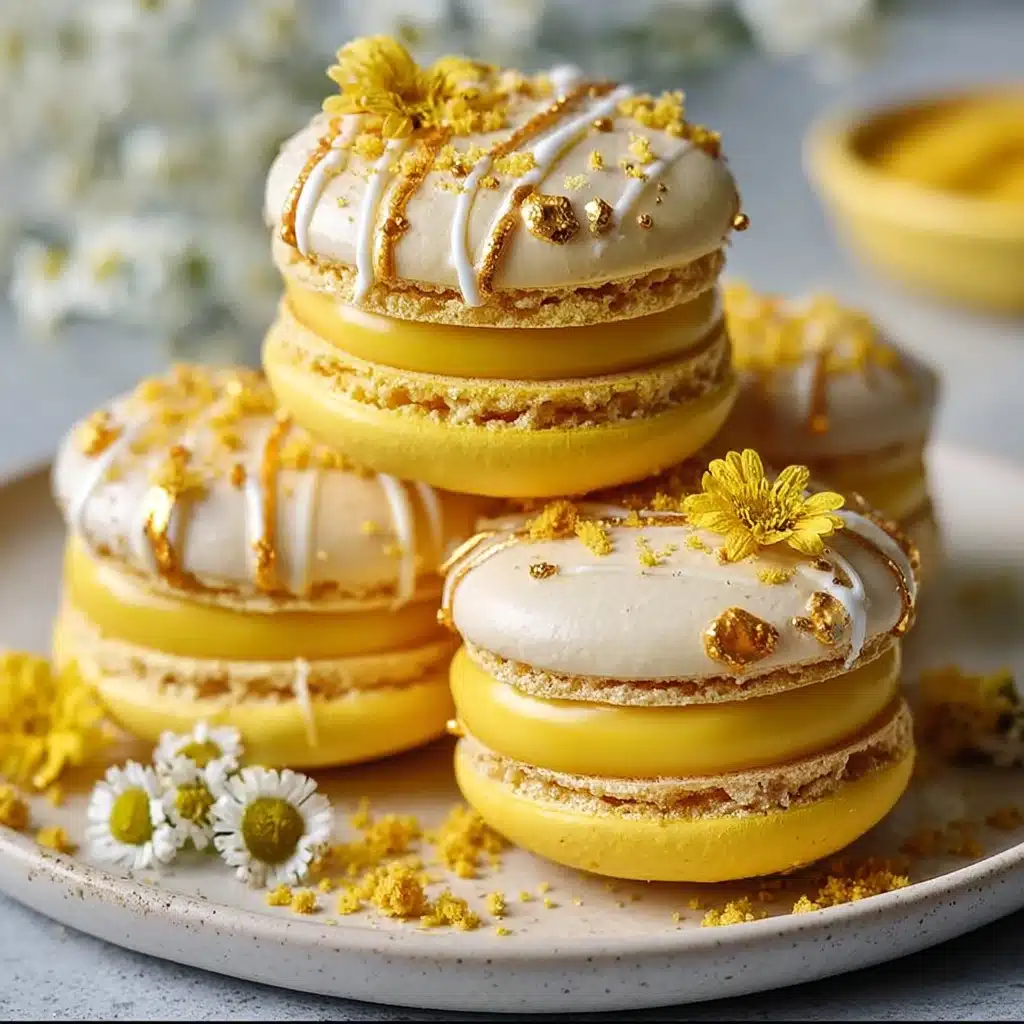
A playful mix of garnishes lifts these Miso Mango Meringue Clouds from beautiful to breathtaking. Try a sprinkle of tart freeze-dried mango for extra fruitiness, a pinch of flaky salt to amplify the savory miso, or edible petals to make each one a little work of art. You can even combine all three for maximum visual (and flavorful) impact!
Side Dishes
Miso Mango Meringue Clouds are delightfully light, so they pair beautifully with fresh fruit—think berries or sliced kiwi—for a bright finish. For a more decadent spread, offer mini glass cups of coconut sorbet or a spoonful of Greek yogurt alongside each cloud. These complementary sides keep your dessert table both colorful and refreshingly balanced.
Creative Ways to Present
If you’re serving at a celebration, pile the Miso Mango Meringue Clouds on a tiered cake stand or arrange them in a circle like a cloud wreath. For something extra memorable, nestle each cloud in a cupcake liner or small box as an edible party favor. Not only do they look precious, but they also travel well for picnics or tea parties.
Make Ahead and Storage
Storing Leftovers
Store assembled Miso Mango Meringue Clouds in an airtight container in the fridge for up to 2 days. The meringues will gradually absorb a little moisture from the curd, becoming chewier over time—but you’ll still get that wonderful sweet-salty harmony!
Freezing
If you’d like to get ahead, freeze the plain meringue shells in a well-sealed, dry container for up to a month. For best texture, freeze the curd separately in a freezer-safe jar. When ready to serve, thaw everything in the refrigerator, assemble, and garnish just before eating.
Reheating
Miso Mango Meringue Clouds are best enjoyed cold or at room temperature. If you’ve stored them in the fridge and want to perk up their texture, let them sit out for 20–30 minutes before serving. Avoid microwaving, as heat will soften the meringue and spoil their special crunch.
FAQs
Can I use a different fruit instead of mango?
Absolutely! While mango lends a distinct tropical note, you can swap in passionfruit, pineapple, or even peach purée. Adjust sugar and lemon juice as needed to balance sweetness and acidity for your ideal cloud filling.
What if I don’t have white miso paste?
White miso brings gentle saltiness and depth, but if you can only find yellow or sweet miso, those will work too—just use a bit less, as the flavor is stronger. Avoid red miso, which is too robust for this delicate dessert.
My meringues cracked—what went wrong?
Cracking usually means the oven was too hot or the shells cooled too quickly. Be sure to keep the baking temperature low and let the meringues cool completely in the turned-off oven for best results. Even if a few crack, they’ll still taste dreamy!
Is there a vegan option for Miso Mango Meringue Clouds?
Yes—try using aquafaba (the brine from canned chickpeas) instead of egg whites, and make a vegan curd with plant-based butter and a little cornstarch to thicken. The result is just as stunning and delicious.
Can I make the curd in advance?
Definitely! Mango-miso curd can be made up to three days ahead and kept chilled in a jar. Just give it a good stir before assembling your clouds; this makes day-of prep a breeze!
Final Thoughts
I can’t wait for you to experience the magic of these Miso Mango Meringue Clouds. Give them a try, and don’t be surprised if they become your new go-to when you crave something truly special! Whether you make them for friends or as a treat for yourself, you’ll fall head over heels for their flavor, texture, and cheerful spirit. Happy baking!

