No-Bake Blackberry Ube Cream Cake Recipe
If you adore bold flavors and vibrant colors, the No-Bake Blackberry Ube Cream Cake is about to become your new go-to dessert! This playful, show-stopping cake brings together rich, nutty ube and sweet-tart blackberries, all nestled in a buttery vanilla cookie crust — and there’s not a hot oven in sight. Creamy layers and a luscious swirl of blackberry jam make each bite pure joy, and the make-ahead, freezer-friendly factor means you’ll be savoring celebration-worthy slices whenever the craving hits.

Ingredients You’ll Need
You only need a handful of simple, accessible ingredients to build incredible flavors and texture in this No-Bake Blackberry Ube Cream Cake. Each ingredient plays a special role in creating those unmistakable layers of creamy goodness and berry brightness.
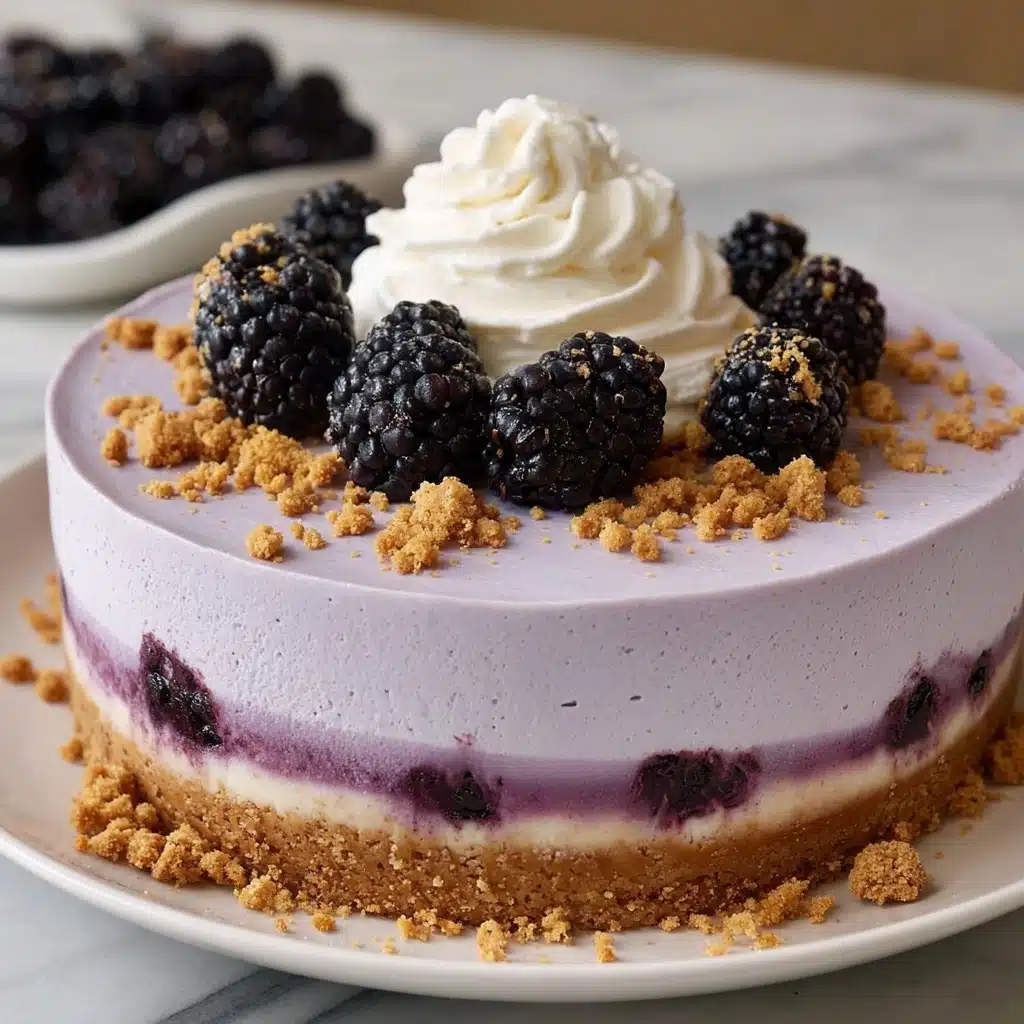
- Ube ice cream: Brings vibrant purple color and a unique, earthy-sweet flavor — let it soften slightly first for easy spreading.
- Crushed vanilla cookies or grahams: Adds satisfying crunch and acts as the sweet, sturdy base for your cake.
- Melted butter: Gives the crust richness and helps it hold together beautifully when chilled.
- Blackberry jam: Introduces sweet-tart fruitiness and vibrant color in every layer, plus makes stunning swirls.
- Whipped topping: Lends a creamy, cloud-like finish that ties all the flavors together, making the cake luscious and light.
- Optional garnish: Fresh blackberries, mint leaves, or ube bits: These little extras provide sparkle and a touch of elegance on top.
How to Make No-Bake Blackberry Ube Cream Cake
Step 1: Prepare the Pan
Line an 8-inch round cake pan with parchment paper, leaving a little extra over the sides for easy lifting later. This simple step guarantees that your creamy creation will pop out like a dream when you’re ready to serve—no fuss, no sticking.
Step 2: Build the Cookie Crust
Mix the crushed vanilla cookies or grahams with melted butter until the crumbs are evenly moistened. Pour this mixture into your prepared pan and press it down firmly with the back of a spoon or the bottom of a glass, forming an even layer. The crust should feel compact and help anchor all the creamy layers above.
Step 3: Layer the Ube Ice Cream
Scoop out the ube ice cream and let it sit for a few minutes, just until it softens. Spread it gently and evenly over the cookie crumb base, creating a gorgeous, thick layer of purple-hued richness. You want it smooth, but don’t worry if it’s not perfect—everything will look stunning in the final result.
Step 4: Add and Swirl the Blackberry Jam
Dollop blackberry jam all over the ube ice cream layer. Take a butter knife and gently swirl the jam throughout, creating luscious ribbons of blackberry running through the cake. It’s not just about looks—these swirls deliver tangy-sweet flavor in every bite.
Step 5: Top with Whipped Topping
Carefully spread the whipped topping over the top, completely covering the swirled fruit layer. Use a spatula for smooth, even coverage, or make gentle swoops for a textured, homemade look. This creamy finish makes the No-Bake Blackberry Ube Cream Cake irresistible and ready for its final touch.
Step 6: Freeze Until Firm
Pop the assembled cake into your freezer and let it chill for 4 to 6 hours, or until it’s completely firm. This step is the secret to those clean slices and perfect layers. Don’t rush it—patience pays off with each beautiful piece!
Step 7: Slice and Garnish
When you’re ready to serve, lift the cake from the pan by the parchment edges and slice with a sharp, warm knife. Have fun decorating with fresh blackberries, mint leaves, or ube bits for extra color and a hint of freshness.
How to Serve No-Bake Blackberry Ube Cream Cake
Garnishes
Elevate each slice of No-Bake Blackberry Ube Cream Cake with a crown of fresh blackberries, a sprinkle of ube bits, or a few pretty mint leaves. These garnishes add a pop of color and a burst of freshness, making each serving feel just a bit more magical and festive.
Side Dishes
This creamy cake pairs beautifully with light accompaniments. Try a sparkling berry mocktail or a cold glass of coconut milk on the side. If you’re hosting brunch, offer a crisp salad of citrus fruits to balance out the sweet richness of the cake.
Creative Ways to Present
Bring extra flair by slicing the cake into petite bars for a dessert tray at parties, or use individual ramekins to make adorable mini versions. Drizzle extra blackberry jam on serving plates for a restaurant-worthy presentation, or scatter some edible flowers for a truly stunning effect.
Make Ahead and Storage
Storing Leftovers
Store any leftover No-Bake Blackberry Ube Cream Cake tightly covered in the freezer. Wrap slices well or keep the whole cake in an airtight container to prevent freezer odors from sneaking in, and enjoy within one week for the freshest taste and best texture.
Freezing
No-Bake Blackberry Ube Cream Cake is born to be frozen, so you can make it well in advance. For ultimate convenience, slice the cake, arrange pieces between parchment sheets, and freeze in a sealed box. Grab a slice whenever you need a sweet pick-me-up.
Reheating
Since this is a frozen delight, there’s no need for reheating, but it’s best to let your slice sit at room temperature for 5 to 10 minutes before serving. This brief wait softens the layers just enough for creamy spoonfuls and full-on flavor.
FAQs
Can I use homemade ube ice cream for this recipe?
Absolutely! Homemade ube ice cream will give the No-Bake Blackberry Ube Cream Cake even more flavor and a truly personal touch. Just make sure it’s creamy and not icy for the best texture.
What if I can’t find blackberry jam?
If blackberry jam isn’t available, feel free to substitute with raspberry or blueberry jam. Both work beautifully and add their own twist to the fruity flavor profile.
How long does the cake need to thaw before slicing?
For picture-perfect slices, let the cake sit out for about 5 to 10 minutes after removing from the freezer. This softens it just enough for a clean cut, while keeping the shape intact.
Can I make this in a different pan size?
You can! An 8-inch springform gives the classic cake look, but you can use a 9-inch pan for thinner layers, or even a loaf pan for a fun shape. Just adjust the thickness of each layer accordingly.
Is it possible to make the No-Bake Blackberry Ube Cream Cake dairy-free?
Definitely. Use a dairy-free ube ice cream and a coconut-based whipped topping to keep everything vegan and allergy-friendly, without sacrificing color or flavor.
Final Thoughts
If you’re looking for a dessert that wows with flavor, color, and ease, the No-Bake Blackberry Ube Cream Cake is calling your name. I hope you’ll give it a try and share a spectacular slice or two with your favorite people — it’s just too good to keep to yourself!