No Bake Oreo Balls Recipe
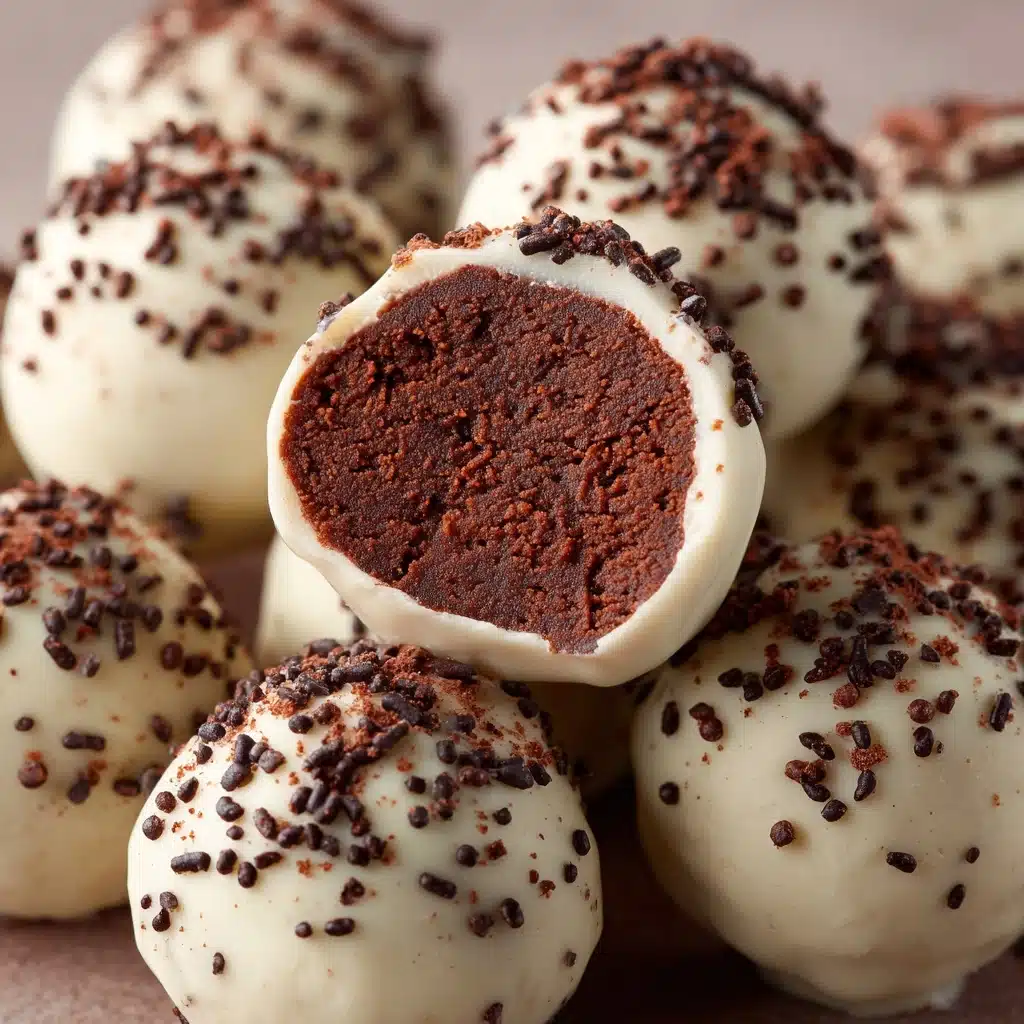
No Bake Oreo Balls are the ultimate bite-sized indulgence you never knew you needed until now! These rich, chocolatey treats blend the iconic flavor of Oreo cookies with creamy, dreamy cream cheese, all wrapped up in a silky chocolate coating. They’re just as fun to make as they are to eat, and the best part? There’s no oven involved! Whether you need a crowd-pleasing dessert for a party or an afternoon pick-me-up, these delightful morsels will always steal the spotlight.
Ingredients You’ll Need
Ingredients You’ll Need
The beauty of No Bake Oreo Balls lies in their simplicity—a mere handful of classic ingredients, each contributing something special. With just a few pantry staples, you’ll create a treat that’s decadently creamy, crunchy, and chocolatey.
- Oreo cookies (about 36 cookies): The superstar ingredient, providing deep chocolate cookie crunch and that signature Oreo flavor.
- Cream cheese (8 ounces, softened): This adds irresistible creaminess and helps bind the mixture for a truffle-like texture.
- Chocolate chips (1 bag, milk or dark): The smooth, glossy shell that locks in all the magic—use your favorite chocolate for a personalized twist.
- Sprinkles (optional): The easiest way to add a pop of color and a hint of whimsy to your No Bake Oreo Balls.
How to Make No Bake Oreo Balls
Step 1: Crush the Oreo Cookies
Grab a food processor for the quickest route, or channel some stress relief by sealing the cookies in a zip-top bag and using a rolling pin. You want to pulse or crush until you have fine, almost sandy crumbs. This helps the cream cheese blend in easily for that perfect consistency.
Step 2: Combine with Cream Cheese
In a mixing bowl, add the softened cream cheese to your Oreo crumbs. Get in there with a sturdy spoon or your hands—mix until everything is evenly combined, and the result is a luscious, slightly sticky dough. Don’t be afraid to taste-test (just once or twice)!
Step 3: Roll the Mixture into Balls
Scoop out generous tablespoonfuls and roll them between your palms to form 1-inch balls. Place each one onto a parchment-lined baking sheet. Try to keep the size consistent for even chilling and a neater look when you dip them in chocolate.
Step 4: Chill the Oreo Balls
Refrigerate the tray for about 30 minutes. This step is crucial—chilling helps the Oreo balls firm up, making them much easier to handle when it’s time to dip into the warm, melted chocolate.
Step 5: Melt the Chocolate Chips
While the Oreo balls chill, pour your chocolate chips into a microwave-safe bowl. Heat in short bursts, stirring well after each, until you have a glossy, pourable pool of chocolate. If you prefer, a double boiler on the stovetop works too—just be careful not to overheat.
Step 6: Dip and Decorate
Using a fork or skewer, dip each chilled ball into the melted chocolate. Let any excess drip off before returning them to the parchment. While the coating is still soft, shower with sprinkles for extra flair! Repeat until all the No Bake Oreo Balls are dressed up and ready.
Step 7: Final Chill
Pop the tray back into the refrigerator for 15 to 20 minutes. This final chill sets the chocolate and firms up the filling for a beautifully crisp bite through the shell, revealing that fudgy, Oreo-studded center.
How to Serve No Bake Oreo Balls
Garnishes
Sprinkles are the all-time easiest way to make your No Bake Oreo Balls sparkle, but don’t stop there! Try a drizzle of white chocolate, a dusting of cocoa powder, or even a tiny pinch of flaky sea salt for a grown-up twist. Each garnish brings its own personality, turning every bite into a mini celebration.
Side Dishes
Think beyond dessert platters—these Oreo balls pair beautifully with fresh berries, a hot cup of coffee, or a scoop of vanilla ice cream. They’re small but mighty, so they’re ideal alongside lighter desserts or fruit for a balanced finish after dinner.
Creative Ways to Present
Pile No Bake Oreo Balls high on a festive cake stand, tuck them into mini cupcake liners, or even skewer them onto lollipop sticks for a playful Oreo pop. For parties, arrange them in neat rows on a tray, or box up a dozen for adorable edible gifts—everyone loves a homemade treat!
Make Ahead and Storage
Storing Leftovers
Transfer any leftover No Bake Oreo Balls into an airtight container and store them in the refrigerator. They’ll stay wonderfully fresh and creamy for up to a week, making them a ready-to-eat delight whenever a chocolate craving strikes.
Freezing
These treats freeze beautifully! Place the finished Oreo balls in a single layer on a baking sheet, freeze until solid, then transfer to a freezer-safe bag or container. They’ll keep for up to 3 months. Just let them come to room temperature for 10-15 minutes before serving for the best texture.
Reheating
No reheating required for these chilly bites of bliss! If you do want to enjoy them a little softer, simply let them sit out at room temperature for a few minutes before serving. But keep any leftovers chilled to preserve that creamy, dreamy center.
FAQs
Can I use a different flavor of Oreo?
Absolutely! Golden Oreos, peanut butter, or any seasonal variety add a fun twist to traditional No Bake Oreo Balls. Just swap them in using the same quantity for endless flavor possibilities.
Do I have to use cream cheese, or are there substitutes?
Cream cheese gives the classic creamy texture, but you could try mascarpone or even a dairy-free cream cheese for different dietary needs. Keep in mind, each substitute may slightly alter the taste and texture.
How do I keep the chocolate smooth when dipping?
Be sure to stir the chocolate chips frequently while melting, and avoid letting any water get in the bowl (moisture can cause the chocolate to seize). Adding a teaspoon of coconut oil can also make the chocolate even silkier for dipping.
Can I make No Bake Oreo Balls in advance?
Definitely! In fact, these No Bake Oreo Balls are the perfect make-ahead treat. Prepare and dip them a day or two before your event, then store them in the fridge until you’re ready to serve.
Why are my Oreo balls falling apart?
If your mixture is crumbly, make sure the cream cheese is fully softened and blended in. Chilling the formed balls before dipping in chocolate is also essential—if they’re too warm, they might not hold together as well during the chocolate dip.
Final Thoughts
I can’t wait for you to experience how simple and satisfying it is to whip up a batch of No Bake Oreo Balls. They’re rich, shareable, and endlessly customizable—the hardest part will be not eating them all yourself! Give them a try, and let them become your new favorite sweet treat.