No-Bake Oreo Cheesecake Recipe
If you’re searching for a dessert that’s as irresistible as it is easy to make, look no further than No-Bake Oreo Cheesecake. This heavenly treat combines the classic flavors of rich cream cheese and those iconic chocolatey Oreo cookies in a silky, creamy form, all without ever having to turn on your oven. With its luscious texture, indulgent taste, and playful cookie crunch, this cheesecake is guaranteed to steal the show at any gathering—or even just satisfy your own sweet tooth after dinner!
Ingredients You’ll Need
The beauty of this No-Bake Oreo Cheesecake lies in its simplicity: just a handful of everyday ingredients come together to create pure dessert magic. Each one plays a special role in delivering that crave-worthy flavor and cloud-like texture. Here’s what you’ll need and why each is essential:
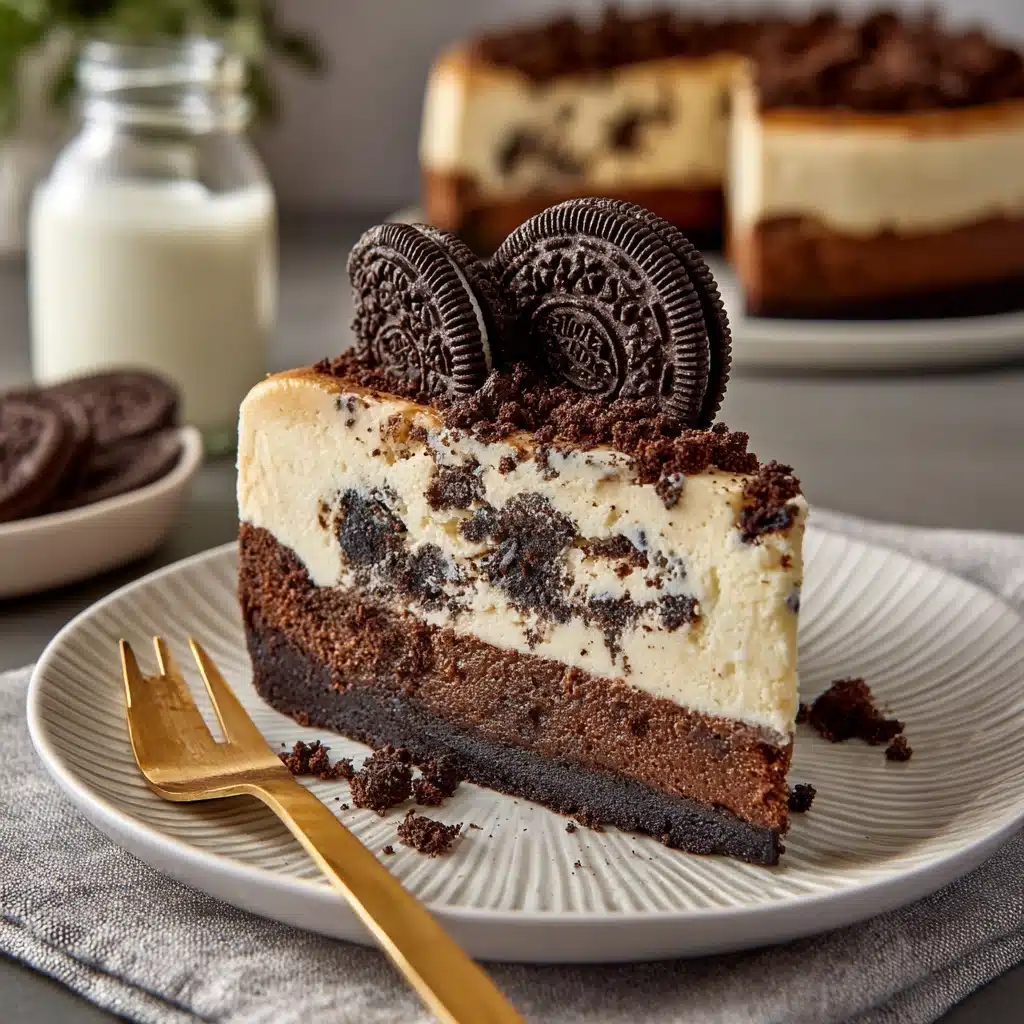
- Crushed Oreo cookies: The crushed Oreos create that unmistakable cookie base and add a delightful crunch throughout the dessert.
- Melted butter: Butter brings the cookie crumbs together and helps the crust set up beautifully in the pan.
- Cream cheese, softened: This is the backbone of your cheesecake—smooth, creamy, and full of rich flavor.
- Powdered sugar: Powdered sugar adds just the right amount of sweetness, blending seamlessly into the filling without any grittiness.
- Vanilla: A splash of vanilla rounds out the flavors, making the cheesecake taste even more luxurious.
- Whipped heavy cream: Fluffy whipped cream lightens up the texture, making every bite airy yet decadent.
- Milk: A little milk loosens the filling so it’s perfectly creamy without being too dense.
- Mini Oreos or chocolate shavings (optional for garnish): These finishing touches add extra flair and make every slice look just as good as it tastes.
How to Make No-Bake Oreo Cheesecake
Step 1: Make the Oreo Crust
Start by mixing your crushed Oreos and melted butter in a medium bowl. You want every crumb to be thoroughly coated so your crust sticks together. Once you have a sandy, damp mixture, press it firmly into the base of a lined springform pan, making sure it’s evenly distributed. Pop it in the fridge to chill—this sets the stage for the rest of your cheesecake.
Step 2: Prepare the Cheesecake Filling
In the same bowl, beat your softened cream cheese with powdered sugar and vanilla until the mixture is super smooth and creamy. Smoothness is key here; take a few extra seconds to make sure the sugar and cream cheese are perfectly blended so your finished treat tastes luxurious, not lumpy.
Step 3: Fold in Whipped Cream
Now, gently fold in the whipped heavy cream, adding it gradually until the mixture becomes thick and luscious. Add the milk a splash at a time if you want to loosen the texture—you’re aiming for a glossy, thick batter that’s easy to spread but still holds its shape.
Step 4: Assemble Your Cheesecake
Once your filling is ready, pour it over the prepared crust in your pan. Use a spatula to smooth the top—don’t rush this part, as a silky, even surface will make your finished cheesecake look extra tempting!
Step 5: Garnish and Chill
Time to make things fun: sprinkle extra crushed Oreos over the top for a dramatic cookie effect. You can also add mini Oreos or chocolate shavings for a bit more pizzazz. Place your cheesecake in the refrigerator for four to six hours (or overnight, if you can wait that long!) until it’s perfectly set.
Step 6: Slice and Serve
When you’re ready to dig in, simply run a warm knife around the edges and release your cheesecake from the pan. Slice into generous wedges and serve this irresistibly silky No-Bake Oreo Cheesecake straight from the fridge to savor every creamy, crunchy mouthful.
How to Serve No-Bake Oreo Cheesecake

Garnishes
The right garnish transforms any cheesecake from simple to truly special. Sprinkle a handful of extra crushed Oreos over the top for a rustic look, arrange mini Oreos around the edge for whimsical charm, or shave some dark chocolate curls for a touch of elegance. Whipped cream swirls added just before serving will make your No-Bake Oreo Cheesecake even more inviting.
Side Dishes
This dessert is definitely the star, but if you want to serve it alongside something, think about a light fruit salad, a scoop of vanilla ice cream, or even a glass of cold milk. A simple cappuccino never hurts either and nicely balances the cheesecake’s sweetness.
Creative Ways to Present
If you want to wow your guests, try serving mini No-Bake Oreo Cheesecakes in individual jars or clear cups. Layer cookie crumbs and cheesecake filling for an adorable, grab-and-go dessert. For parties, consider cutting the cheesecake into bite-sized cubes and topping each with a mini Oreo for a fun, interactive dessert bar.
Make Ahead and Storage
Storing Leftovers
Any leftover No-Bake Oreo Cheesecake should be covered tightly and stored in the refrigerator. It’ll stay fresh and delicious for up to four days, though you’ll likely find it disappears much sooner! The chilled environment helps the filling stay firm and dreamy.
Freezing
This cheesecake freezes beautifully. To freeze, wrap individual slices (or the whole cheesecake) tightly in plastic wrap followed by aluminum foil. Place in a freezer-safe container and enjoy within one month for the best quality. Just thaw overnight in the fridge before enjoying.
Reheating
No need to reheat—this dessert is best served cold! If it’s been frozen, let it defrost slowly in the fridge to retain its smooth, luscious texture. Avoid microwaving, as that can compromise the creamy filling and make the crust soggy.
FAQs
Can I use low-fat cream cheese in this No-Bake Oreo Cheesecake?
Yes, you can substitute low-fat or even whipped cream cheese if you like, though the filling may be a touch less rich. The texture should still be satisfyingly smooth and creamy.
Does the cheesecake need gelatin to set?
Nope! Thanks to the combination of whipped cream and chilling time, this No-Bake Oreo Cheesecake sets up perfectly on its own without any need for gelatin or extra stabilizers.
Can I use store-bought whipped topping instead of whipped cream?
Yes, store-bought whipped topping (like Cool Whip) is a convenient swap and will yield a stable, fluffy cheesecake filling. Just fold it in gently as you would with homemade whipped cream.
How do I get clean slices when serving?
Run a sharp knife under hot water and dry it off between each cut. This helps achieve those picture-perfect slices and keeps the creamy filling from sticking to your knife.
Is it possible to make this cheesecake gluten-free?
Absolutely! Simply use gluten-free chocolate sandwich cookies for the crust and topping, and the rest of the recipe remains the same. You’ll still get all the classic flavor without the gluten.
Final Thoughts
This No-Bake Oreo Cheesecake is a dreamy combination of classic cookies and luscious cream cheese that no one can resist—plus, it’s blissfully easy to make. Whether you’re a time-crunched baker or just craving something sweet without the fuss, I can’t wait for you to try this recipe and see just how quickly it disappears from the table!