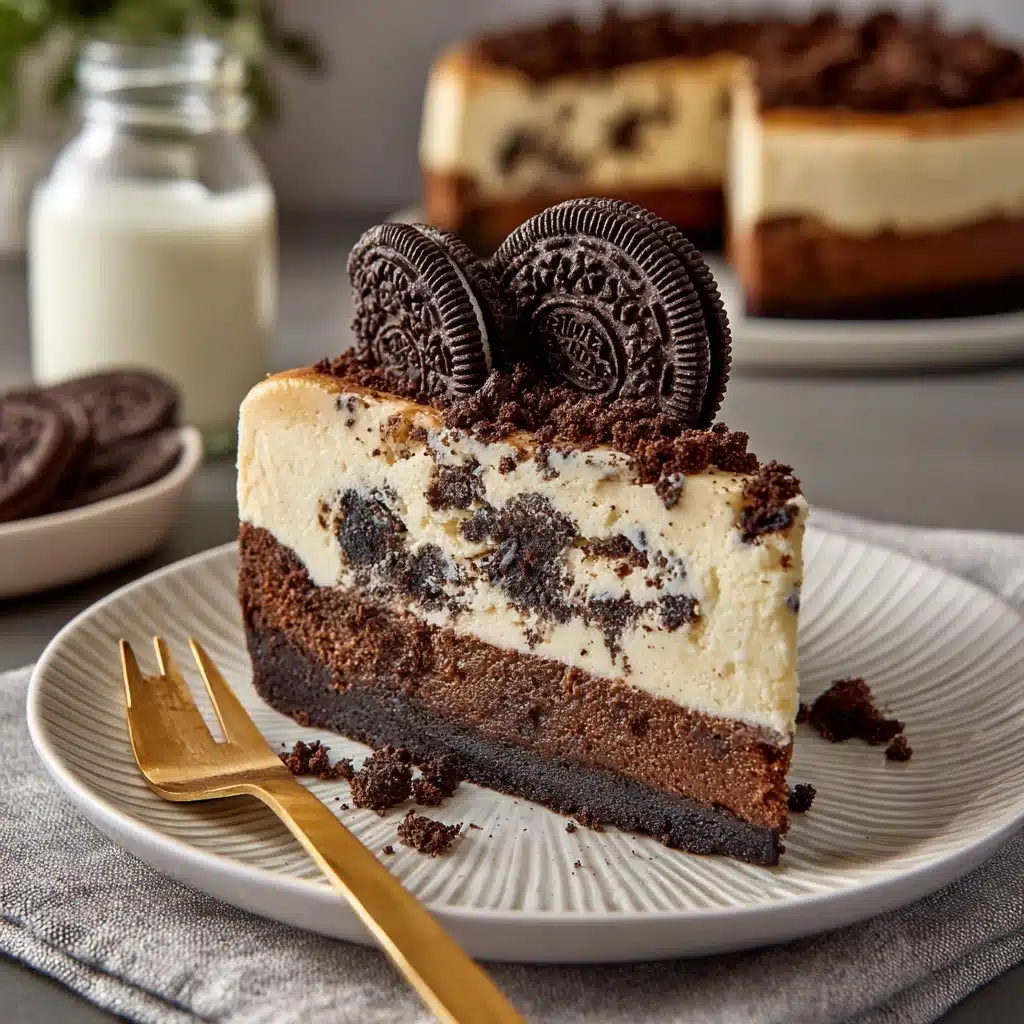
No-Bake Oreo Cheesecake Recipe
If you’re craving the ultimate dessert with zero oven time, the No-Bake Oreo Cheesecake is about to become your new favorite sweet treat. Luxuriously creamy with a chocolatey Oreo crust and a melt-in-your-mouth filling, this dessert is a total crowd-pleaser that never fails to impress guests (or satisfy your late-night cravings). Even better: you’ll only need a handful of easy-to-find ingredients and a few simple steps, making it perfect for bakers of all skill levels. Whether you’re hosting a party or treating yourself, No-Bake Oreo Cheesecake delivers rich flavor and showstopping looks with minimal effort!
Ingredients You’ll Need
Every ingredient in this No-Bake Oreo Cheesecake works overtime to create just the right balance of flavor, texture, and irresistible charm. Here’s why each one matters, along with quick tips to help you get the best results.
- Crushed Oreo cookies: These form the iconic crust layer and add a satisfying chocolate crunch to every bite.
- Melted butter: Acts as the binding magic for your crust, yielding that perfectly firm texture once chilled.
- Cream cheese: The heart of the filling—go for full-fat, softened cream cheese for ultimate silkiness and tang.
- Powdered sugar: Lends sweetness and ensures the filling is smooth and lump-free.
- Vanilla: Just a splash heightens all the flavors and adds that cozy undertone.
- Whipped heavy cream: Whipping your own gives unbeatable fluff and lightness—think dreamy, airy cheesecake!
- Milk: Just a little loosens the filling, striking the perfect creamy balance.
- Optional mini Oreos or chocolate shavings: For garnish, because who can resist a little extra flair up top?
How to Make No-Bake Oreo Cheesecake
Step 1: Build the Oreo Crust
Start by combining your crushed Oreo cookies with melted butter in a medium bowl. Make sure every crumb is well coated for that signature chocolatey base. Press this mixture firmly into the bottom of a lined springform pan—use the bottom of a measuring cup for a smooth, even crust! Pop the pan into the fridge to set while you make the filling.
Step 2: Whip Up the Cream Cheese Mixture
In a fresh bowl, beat together the softened cream cheese, powdered sugar, and vanilla extract. This is the creamy core of your No-Bake Oreo Cheesecake, so mix until super smooth. No lumps allowed—the smoother your base, the silkier your finished dessert will be.
Step 3: Fold in Whipped Cream
Gently fold in the whipped cream, a little at a time, until the mixture becomes thick, billowy, and totally irresistible. Add splashes of milk as needed to reach that just-right creamy texture. Take care not to overmix—you want to keep as much fluffiness as possible!
Step 4: Layer and Smooth the Filling
Spoon the creamy cheesecake filling over your chilled Oreo crust. Smooth the top with a spatula, creating soft swirls or a crystal-like finish. It’s the step where your No-Bake Oreo Cheesecake really starts to look like a showstopper!
Step 5: Garnish and Chill
Scatter extra crushed Oreos generously over the top (go wild, there’s no such thing as too many Oreos!). Pop the whole thing in the fridge and let it chill for at least 4–6 hours, or until beautifully firm and sliceable.
Step 6: Slice and Serve
Run a knife around the inside edge of the springform pan to loosen, then release and admire your masterpiece. Slice, serve, and savor every dreamy bite straight from the fridge—it’s creamy, chocolatey, and destined to disappear fast.
How to Serve No-Bake Oreo Cheesecake

Garnishes
A little garnish goes a long way! Sprinkle extra crushed Oreos on top for texture and that irresistible cookies-and-cream look. For an elegant touch, add a handful of mini Oreos or a light shower of chocolate shavings. Drizzling a little chocolate or caramel sauce across each slice is always a hit, too.
Side Dishes
No-Bake Oreo Cheesecake pairs beautifully with a mug of rich coffee, cold milk, or even a scoop of vanilla ice cream. To balance the sweetness, try serving it alongside a bowl of fresh berries or a tangy fruit compote—the tartness of raspberries or strawberries is a magical match!
Creative Ways to Present
This cheesecake isn’t just delicious, it’s also a joy to present. Make individual servings in mason jars or cute ramekins for a fun party twist. Or, cut the chilled cheesecake into bite-sized squares and serve as part of a dessert platter. You can even layer slices in trifles for a playful (and totally decadent) treat.
Make Ahead and Storage
Storing Leftovers
If you’re lucky enough to have leftovers, just cover the cheesecake tightly (use plastic wrap or pop it into an airtight container) and keep it in the fridge. It stays perfectly fresh and creamy for up to 4 days—ideal for those blissful sweet snack moments.
Freezing
No-Bake Oreo Cheesecake freezes surprisingly well! Wrap the whole cheesecake or individual slices in plastic wrap, then foil to lock in freshness. Store in the freezer for up to two months. Thaw overnight in the fridge before serving for a texture that’s nearly as perfect as fresh.
Reheating
This dreamy dessert is meant to be enjoyed cold, so skip the reheating. If your cheesecake has been frozen, all it needs is an overnight thaw in the fridge to regain its creamy magic. Serve chilled straight from the fridge for that classic, velvety bite.
FAQs
Can I use store-bought whipped topping instead of whipping cream?
Absolutely! Store-bought whipped topping works well in a pinch and gives the cheesecake plenty of fluff. However, freshly whipped heavy cream often makes the texture a touch richer and more decadent.
Do I need to remove the cream from the Oreos before crushing?
No need to scrape! Crush the whole cookies, cream filling and all—it adds extra moisture and flavor to your crust, making it even more delicious.
What if I don’t have a springform pan?
No worries—just press your crust into any square or rectangular dish lined with parchment. You’ll end up with bars instead of wedges, but they’ll taste just as dreamy.
How long does No-Bake Oreo Cheesecake need to set?
Chilling for at least 4–6 hours is ideal. This gives the filling time to firm up so you get clean slices. Overnight is even better if you can wait—patience is rewarded here!
Can I add other mix-ins or flavors?
Definitely! Swirl in a bit of peanut butter, add a dash of espresso powder, or fold in chocolate chips for a fun twist. No-Bake Oreo Cheesecake is super versatile, so let your creativity shine.
Final Thoughts
If you’ve never tried making No-Bake Oreo Cheesecake, this is your sign to whip one up and see why it always vanishes in a flash. With just a few simple steps and a whole lot of chocolatey-creaminess, it’s a true dessert hero for any occasion. Happy no-baking, and enjoy every bite!