No-Bake Oreo Chocolate Cheesecake Recipe
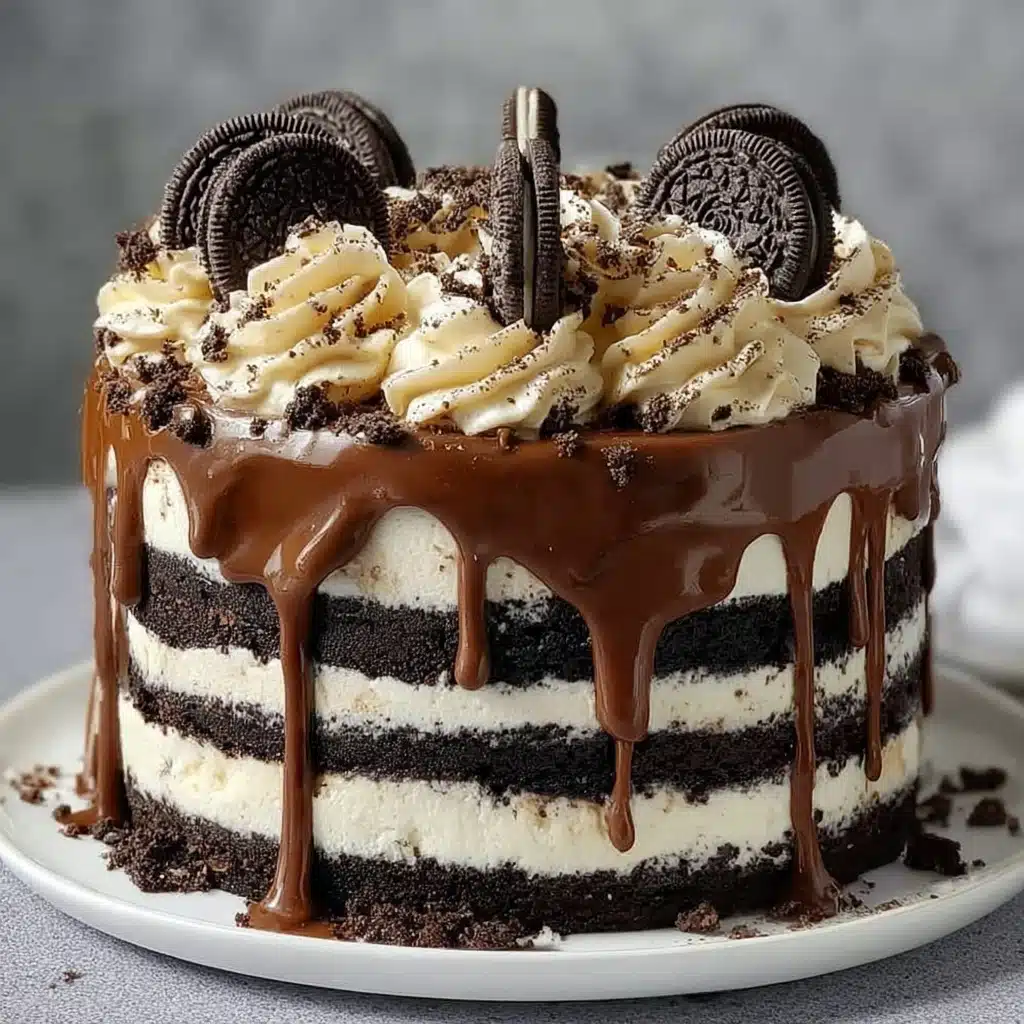
This No-Bake Oreo Chocolate Cheesecake just might steal the spotlight at your next celebration or casual gathering. Imagine a dreamy dessert that layers a rich, chocolatey Oreo crust, a creamy cheesecake flecked with cookie bits, and a glossy chocolate ganache, all requiring zero oven time. Each bite is a delightful combination of silky, crunchy, and downright indulgent flavors. If you’re looking for the ultimate treat to impress friends and family, look no further than this showstopping no-bake Oreo chocolate cheesecake.

Ingredients You’ll Need
The beauty of this recipe lies in its simplicity; every ingredient plays a starring role in creating that iconic flavor and luscious texture. From the signature Oreo cookies to the decadent chocolate ganache, here’s what you’ll need—and a handy tip for each!
- Oreo cookies: These classic cookies are the backbone of both the crust and the filling, delivering a deep chocolate crunch and authentic taste.
- Unsalted butter: Melted butter binds the crushed Oreos for a sturdy, flavorful crust that won’t crumble apart.
- Cream cheese: The smooth, tangy base gives the cheesecake its rich and creamy filling—always use full fat for the best texture!
- Powdered sugar: This creates a sweet, ultra-smooth finish to the filling, without any grittiness.
- Vanilla extract: Just a teaspoon adds warmth and rounds out the flavors of the cream cheese and chocolate.
- Heavy whipping cream: Whipping cream until stiff peaks form gives the cheesecake a light and airy lift, plus it’s used again for the decadent ganache.
- Chopped Oreo cookies: Folding these into the filling means you’ll discover delightful cookie pockets in every slice.
- Semi-sweet chocolate chips: For the ganache, these melt seamlessly into a glossy, pourable topping.
- Whole and half Oreo cookies: For that beautiful, bakery-style garnish that hints at what’s inside.
- Whipped cream: Piped on top, it adds playful height and creamy contrast—use homemade or store-bought.
- Cocoa powder: A finishing dust instantly elevates the drama and richness of each slice.
How to Make No-Bake Oreo Chocolate Cheesecake
Step 1: Build the Ultimate Oreo Crust
Begin by making the Oreo crust: Crush those cookies until you have fine, chocolatey crumbs, then mix in the melted unsalted butter. You want the texture to resemble damp sand, fully coated so the crust holds together. Press this mixture firmly into the bottom and a bit up the sides of a 9-inch springform pan. This step is all about creating a deliciously sturdy base for your no-bake Oreo chocolate cheesecake. Don’t forget to chill it in the freezer for at least 30 minutes—it makes all the difference for that perfect slice later!
Step 2: Whip Up the Cheesecake Filling
In a large bowl, beat the softened cream cheese with the powdered sugar and vanilla extract until luxuriously smooth—no lumps allowed! This is your creamy, tangy core. Next, whip your cold heavy cream until those beautiful stiff peaks form (a power mixer gets the job done in minutes). Gently fold the whipped cream and plenty of chopped Oreo cookies into the cream cheese mixture. This folding keeps things light and fluffy while guaranteeing there’s a cookie crunch in every forkful.
Step 3: Assemble and Chill
Spoon the luscious filling onto your chilled Oreo crust, smoothing it out so every bit of the crust is blanketed to the edges. Pop the whole masterpiece into the refrigerator and let it set for at least 4 hours (overnight if you can stand it!). This patience pays off—a perfectly sliceable no-bake Oreo chocolate cheesecake awaits.
Step 4: Craft the Chocolate Ganache Drip
While your cheesecake chills, prepare the chocolate ganache. Place your chocolate chips in a heatproof bowl. Gently heat the cream until it begins to simmer, then pour it over the chocolate. Let this mixture rest for a few minutes—no stirring yet! After 5 minutes, whisk until you have a gorgeously smooth, shiny ganache. Cool it just enough so it’s thick but still pourable, perfect for drizzling over your cheesecake.
Step 5: Decorate and Wow the Crowd
Release your cheesecake from the springform pan, then slowly pour the cool-but-fluid ganache over the top. The goal: tempting drips that cascade down the sides. Finish with swirls of whipped cream, a crown of whole and halved Oreo cookies, and a dusting of cocoa powder. It’s almost too pretty to slice—almost!
How to Serve No-Bake Oreo Chocolate Cheesecake
Garnishes
This is your chance to make every slice look irresistible! Pipe decorative swirls of whipped cream along the edges, perch whole or halved Oreos on top, and sift a little cocoa powder over everything for that extra bit of flair. These easy touches make the no-bake Oreo chocolate cheesecake totally Instagram-worthy and treats your guests to bakery-style beauty.
Side Dishes
Since the cheesecake is rich and chocolatey, consider offering some fresh raspberries, strawberries, or even a simple fruit salad on the side. Their tartness cuts through the creamy filling, providing a bright contrast that keeps everyone coming back for more.
Creative Ways to Present
If you’re going for extra wow-factor, try serving the no-bake Oreo chocolate cheesecake in individual jars for a picnic, or as mini cheesecakes using a muffin tin (with cupcake liners for easy removal). You can even offer a dessert bar with bowls of extra Oreo pieces, whipped cream, and chocolate shavings for guests to build their own dreamy slice.
Make Ahead and Storage
Storing Leftovers
Wrap your leftover no-bake Oreo chocolate cheesecake tightly in plastic wrap or store it in an airtight container. It’ll keep beautifully in the fridge for up to 4 days, with that silky filling remaining luscious and satisfying. Just be sure to keep it chilled until you’re ready to serve another slice (or two).
Freezing
If you want to save your cheesecake for a special occasion later, you’re in luck! Freeze the undecorated cheesecake (without ganache or toppings) by first chilling it in the fridge until set, then wrapping it in a few layers of plastic wrap followed by foil. It’ll freeze well for up to two months. Just thaw it overnight in the fridge, then add your ganache and garnishes before serving.
Reheating
Great news—no reheating required! This no-bake Oreo chocolate cheesecake is all about those cool, creamy textures that make each bite so refreshing. However, if your cheesecake gets too firm from freezing, let it rest at room temperature for about 20 minutes before serving for the best texture.
FAQs
Can I use reduced-fat cream cheese in this recipe?
While you can use reduced-fat cream cheese, the final texture will be a bit less rich and creamy. For the classic, luxurious feel of the no-bake Oreo chocolate cheesecake, full-fat cream cheese gives the best result.
What’s the best way to crush the Oreo cookies?
Place the cookies in a zip-top bag and gently smash them with a rolling pin, or use a food processor for perfectly even crumbs. Either method works—just be sure not to leave large chunks in the crust!
Can I make this no-bake Oreo chocolate cheesecake ahead of time?
Absolutely! This recipe actually benefits from a good long chill, so feel free to prepare it a day in advance and keep it refrigerated until you’re ready to pour on the ganache and add those finishing touches.
How do I achieve those perfect ganache drips?
Let the ganache cool until it’s thick but still pourable. Spoon it around the edges, letting it drip naturally, then pour the remainder in the center and smooth with a spatula. If it’s too warm, the drips will be thin; too cold, and they won’t drip at all—patience pays off!
Can I add extra toppings or flavor variations?
Definitely! Get creative with mini chocolate chips, chopped nuts, or even a swirl of peanut butter in the filling. No-Bake Oreo Chocolate Cheesecake is wonderfully adaptable to your cravings and favorite flavors.
Final Thoughts
I hope you’re as excited as I am to slice into this no-bake Oreo chocolate cheesecake and share it with your favorite people. With its effortless assembly and utterly decadent flavor, this dessert is about to become your go-to for celebrations big and small—give it a try and prepare for pure cheesecake bliss!