No‑Bake Cookie Bars Recipe
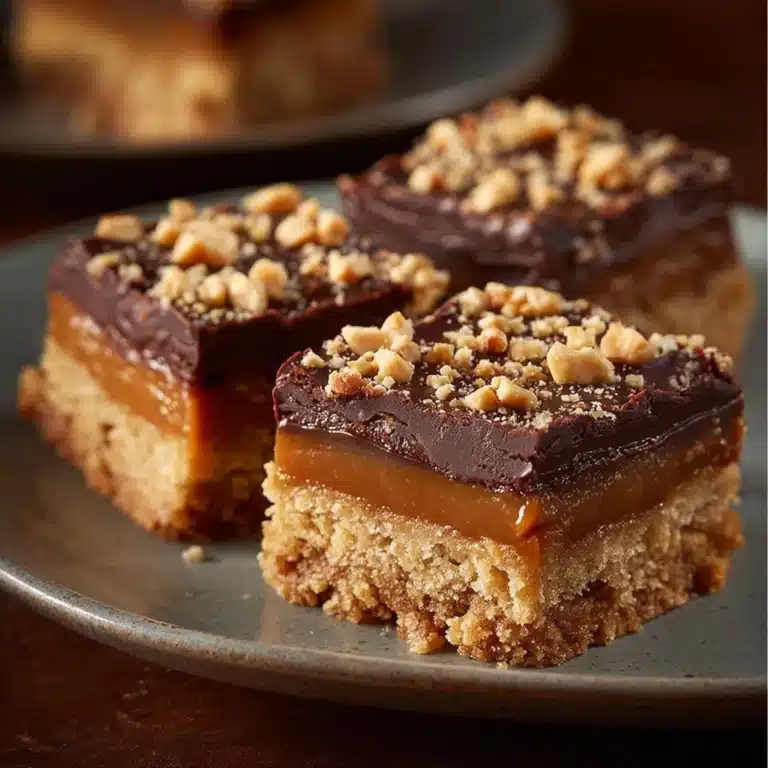
These No‑Bake Cookie Bars are my go-to treat whenever I crave something sweet, chocolatey, and satisfying—without turning on the oven! With just a handful of everyday ingredients, you’ll have thick, fudgy bars that come together in minutes, then set up perfectly in the fridge. They’re rich, chewy, and naturally customizable with all your favorite add-ins. Whether you need an after-school snack, quick dessert, or potluck crowd-pleaser, these No‑Bake Cookie Bars answer every call with effortless charm and flavor.
Ingredients You’ll Need
Let’s talk about how delightfully simple but essential these ingredients are. Each one plays a starring role in creating the luscious texture and irresistible chocolate flavor that make No‑Bake Cookie Bars a staple in any dessert arsenal. You can mix and match, but don’t skip the basics!
- Peanut butter (or almond butter): The creamy base that gives these bars their structure—choose crunchy for extra bite or smooth for a silkier finish.
- Maple syrup or honey: Adds natural sweetness and helps bind everything together—pure maple syrup brings depth, while honey gives a floral undertone.
- Coconut oil or unsalted butter: Melted fat for a rich, melt-in-your-mouth texture—coconut oil adds a hint of tropical flavor, butter deepens the classic cookie taste.
- Unsweetened cocoa powder: Delivers intense chocolate notes without adding extra sugar or heaviness.
- Vanilla extract: A splash rounds out the flavors for that bakery-fresh aroma.
- Quick oats (or rolled oats): The hearty backbone—quick oats make the bars softer, rolled oats provide chew and texture.
- Fine sea salt: Just a pinch wakes up all the flavors and keeps the sweetness in check.
- Optional add-ins (chocolate chips, coconut, nuts, dried fruit): Go wild with your favorite mix-ins for crunch, pops of flavor, or extra indulgence.
How to Make No‑Bake Cookie Bars
Step 1: Prepare Your Pan
Start by lining an 8×8 or 9×9-inch pan with parchment paper—let the ends overhang a bit. This not only makes cleanup a breeze, but also acts as a sling later for easy bar removal. Trust me, you’ll thank yourself when it’s time to slice and serve!
Step 2: Melt and Mix Wet Ingredients
Set a medium saucepan over medium heat and combine the peanut butter, maple syrup (or honey), and coconut oil (or butter). Stir constantly as they warm up and melt into each other, becoming glossy and unified. Once everything is smooth, take the pan off the heat so nothing scorches or separates.
Step 3: Add Cocoa and Vanilla
With the saucepan now off the heat, stir in the cocoa powder and vanilla extract. The heat will help the cocoa dissolve fully, creating a luscious, chocolatey base that smells absolutely heavenly. Make sure there are no lumps, and the mixture is smooth throughout.
Step 4: Fold in Oats and Extras
Tip in your oats and salt, and fold everything together until the oats are well coated. If you’re in the mood for extras like chocolate chips, coconut, chopped nuts, or dried fruit, toss them in now. The mixture will be thick and sticky—that’s exactly what you want!
Step 5: Press and Chill
Spoon the mixture into your prepared pan, then use a spatula (or your hands, lightly oiled) to press it down firmly and evenly. Really pack it in—this helps the bars hold together beautifully. Once set, pop the pan into your fridge or freezer, and chill for at least 1 hour (overnight is even better for dense, fudgy bars).
Step 6: Slice and Enjoy
When you’re ready, lift the slab out using the parchment overhang and place it on a cutting board. Slice into 12 to 16 bars, depending on how large or small you like them. Voilà: your dreamy No‑Bake Cookie Bars are ready to enjoy!
How to Serve No‑Bake Cookie Bars

Garnishes
Dust the tops with extra cocoa powder, sprinkle with flaky sea salt, or drizzle a bit of melted dark chocolate. A handful of toasted coconut or a scatter of mini chocolate chips make these bars look bakery-worthy and add even more flavor.
Side Dishes
Pair these No‑Bake Cookie Bars with a cold glass of almond milk, a hot mug of coffee, or a fruity smoothie for a well-rounded snack. On dessert boards, they play nicely next to fresh berries, sliced apples, or small bowls of yogurt for dipping.
Creative Ways to Present
Cut the bars into bite-sized squares for a potluck platter, use cookie cutters for fun shapes, or layer them between sheets of waxed paper and tie them up for edible gifts. For parties, set out a DIY toppings bar with chopped nuts, mini marshmallows, or melted peanut butter for drizzling. No‑Bake Cookie Bars are a blank canvas—let your creativity shine!
Make Ahead and Storage
Storing Leftovers
Pop any leftover bars into an airtight container and keep them in the fridge, where they’ll stay deliciously fresh for up to a week. Separate layers with parchment paper to prevent sticking. No‑Bake Cookie Bars taste even fudgier on day two!
Freezing
If you’d like to stash some away, layer the bars in a freezer-safe container, again separated by parchment. They’ll keep for up to three months and are perfect for last-minute snack attacks—just let them thaw for a few minutes at room temperature before biting in.
Reheating
These bars are meant to be enjoyed cold or at room temperature, so reheating isn’t necessary. If you prefer a softer bite, leave them out for 5–10 minutes. To mimic a “fresh from the oven” warmth, microwave a bar for 5 seconds (no longer!) for a gooey, melty treat.
FAQs
Can I make these No‑Bake Cookie Bars nut-free?
Absolutely! Simply use sunflower seed butter or tahini in place of peanut or almond butter for a nut-free version that’s just as delicious and creamy.
Do I need to cook the oats first?
Nope, that’s the beauty of no-bake treats! Quick oats and rolled oats are both safe to eat as is, especially after being combined with the warm mixture. They’ll soften up while the bars set.
Can I add protein powder to these bars?
You sure can—just sub in 1–2 tablespoons of your favorite unflavored or chocolate protein powder for part of the oats. This gives the No‑Bake Cookie Bars extra staying power for post-workout snacks.
Why are my bars not setting up?
If your bars are too soft, double-check your ingredient ratios. Too much syrup or oil, or not enough oats, can cause this. Make sure to chill the bars thoroughly—an hour or two in the freezer usually does the trick!
Can I double (or halve) the recipe?
Yes, this recipe is super flexible! Double all the ingredients and use a 9×13-inch pan for a crowd, or halve everything and press into a loaf pan for a small batch of No‑Bake Cookie Bars.
Final Thoughts
There’s just something magical about whipping up a decadent, chocolatey treat in no time—and without even heating up the kitchen! Whether you stick to the classic or get creative with mix-ins, No‑Bake Cookie Bars are destined to become a favorite in your home. I hope they bring as much joy and sweet satisfaction to your table as they have to mine—give them a try soon and don’t forget to share!