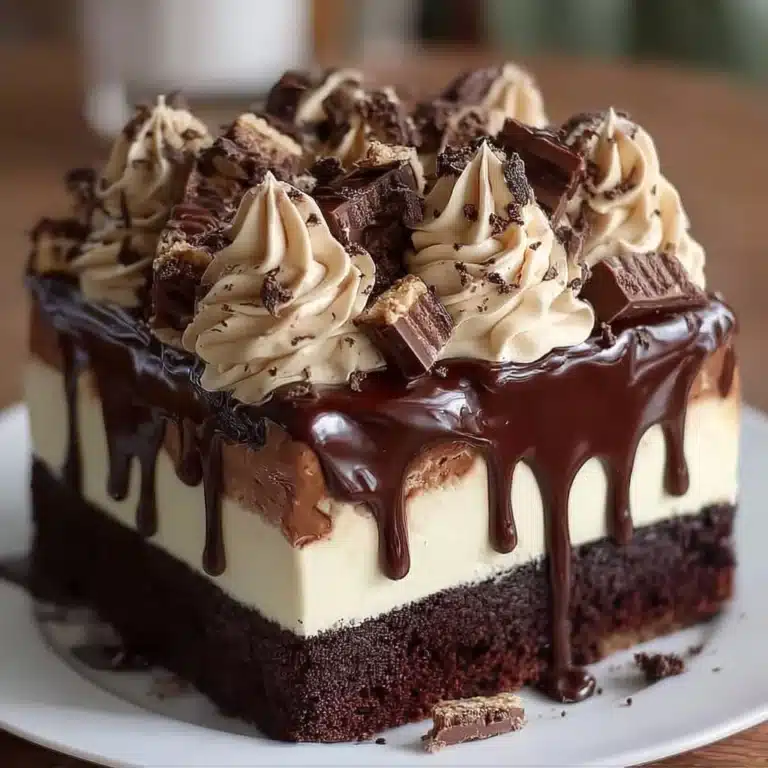
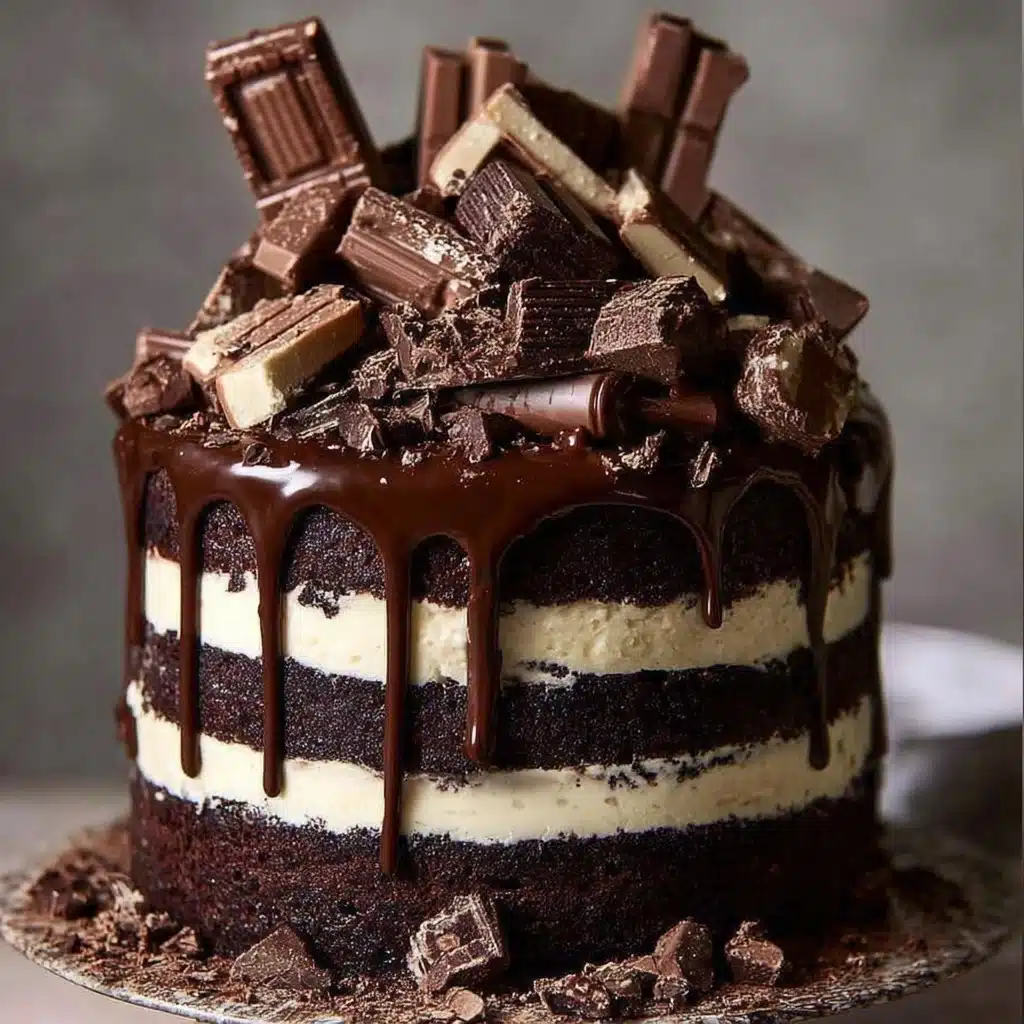
Overload Chocolate Cake Recipe
If you ask me, there’s truly nothing as soul-satisfying as a slice of Overload Chocolate Cake. Imagine impossibly moist layers of chocolate sponge, luscious whipped cream filling, rivers of glossy ganache drip, and a glorious mountain of chocolates crowning the top. This is the dessert your chocolate dreams are made of! Whether you’re celebrating a birthday, entertaining friends, or indulging a weeknight craving, this cake never fails to wow both eyes and taste buds. And the best part? Although it dazzles, the process is approachable and can transform any baker (beginner or pro!) into a rockstar in the kitchen.

Ingredients You’ll Need
Let’s talk about what goes into making the ultimate Overload Chocolate Cake. The ingredient list might look impressive, but every single element plays a vital role—whether it’s achieving the perfect crumb, that ultra-rich chocolate flavor, or a truly decadent finish that makes people reach for seconds.
- All-purpose flour (2 cups/250g): The backbone of our cake’s tender, sturdy structure.
- Granulated sugar (2 cups/400g): Not only sweetens the batter but helps lock in moisture.
- Unsweetened cocoa powder (¾ cup/65g): Use the best quality you can—the deeper, the richer the chocolate flavor.
- Baking powder (2 tsp): Team lift-off! Ensures your cake rises into soft, fluffy layers.
- Baking soda (1½ tsp): Lends extra leavening and helps balance the cocoa’s acidity.
- Salt (1 tsp): A key flavor booster that wakes up the chocolate.
- Whole milk (1 cup/240ml): Delivers richness and keeps the crumb ultra-tender.
- Vegetable oil (½ cup/120ml): Makes every bite moist—even after a day or two!
- Large eggs (2, room temperature): Gives structure and adds silkiness to the batter.
- Vanilla extract (2 tsp): Complements chocolate and adds a subtle aromatic note.
- Boiling water (1 cup/240ml): Deepens the cocoa flavor for that iconic, dark-chocolate look.
- Heavy cream (2 cups/480ml): Whipped into cloud-like filling to lighten every layer.
- Powdered sugar (½ cup/60g): Perfectly sweetens the whipped cream—no gritty texture!
- Vanilla extract (1 tsp, for filling): Rounds out the flavors in your crazy-good cream filling.
- Crushed cookies or chocolate shavings (optional): Adds delightful surprise crunch in the filling.
- Semi-sweet chocolate (8 oz/225g): The star of the ganache drip. Chop it well for easy melting.
- Heavy cream (1 cup/240ml, for ganache): Combines with chocolate for that dreamy, pourable finish.
- Unsalted butter (2 tbsp): Makes your ganache glisten and set with a rich, silky finish.
- Assorted chocolate bars (for decoration): Choose a mix—dark, milk, filled, chunky—whatever makes your heart happy.
- Chocolate truffles, shards, curls, or crumbles: To amp up that dramatic, indulgent finish on top.
- Cocoa powder: For an optional, elegant dusting before serving.
How to Make Overload Chocolate Cake
Step 1: Prep Your Pans and Oven
Preheat your oven to 350°F (175°C). Grease and line three 8-inch (20 cm) round cake pans with parchment paper. This simple prep step ensures your Overload Chocolate Cake layers come out easily and bake evenly every time. Trust me—no one likes a stubbornly stuck cake!
Step 2: Make the Chocolate Cake Batter
In a large bowl, whisk together the flour, granulated sugar, cocoa powder, baking powder, baking soda, and salt. This combines all the dry ingredients, making sure the leaveners are distributed evenly for perfect lift and crumb. Add the milk, vegetable oil, eggs, and vanilla extract, then beat everything until nice and smooth. Now, slowly drizzle in your cup of boiling water. The batter will seem thin (don’t fret, that’s the secret to moistness!).
Step 3: Bake the Cake Layers
Evenly pour the luscious batter into your prepared pans. Pop them into the oven and bake for 28 to 32 minutes, or until a toothpick inserted into the centers comes out clean (a few moist crumbs are fine). Let the cakes cool in their pans for about 10 minutes, then invert onto wire racks to finish cooling completely. Cool layers are a must—warm cake and whipped filling are notorious for sliding around!
Step 4: Whip Up the Creamy Filling
While your cakes cool, get started on the dreamy filling. Beat the heavy cream, powdered sugar, and vanilla extract until stiff peaks form. For extra pizzazz (and crunch), gently fold in some crushed cookies or chocolate shavings. Keep the filling chilled until you’re ready for assembly—it spreads best when cold.
Step 5: Prepare the Ganache Drip
Place chopped semi-sweet chocolate in a heat-safe bowl. Warm the heavy cream in a small saucepan just until it’s about to boil (don’t let it actually boil). Pour the hot cream over the chocolate and let it stand for 2 to 3 minutes—this helps melt everything evenly. Add in the butter, then stir until velvety smooth. Allow the ganache to cool and thicken, keeping it pourable but not runny.
Step 6: Assemble and Decorate
Place the first cake layer on your serving plate or cake stand. Spread an even layer of whipped cream filling, then repeat with the remaining layers, ending with cake on top. Pour the slightly cooled ganache over the cake, encouraging it to drip dramatically down the sides. Pile on assorted chocolate bars, truffles, shards, curls—go wild! Finish with a light dusting of cocoa powder for that irresistible, bakery-style touch. Your Overload Chocolate Cake is officially ready to steal the spotlight!
How to Serve Overload Chocolate Cake
Garnishes
Don’t hold back with the finishing touches! A glorious cascade of chocolate bars, truffles, and shards looks stunning and adds multiple textures for every bite. A sprinkle of cocoa powder brings a refined finish, while some edible gold flakes or sprinkles can make your Overload Chocolate Cake fit for the fanciest celebration.
Side Dishes
A thick slice of this decadent cake is pure delight on its own, but if you want to create the ultimate dessert spread, serve it alongside fresh raspberries, macerated strawberries, or a scoop of vanilla ice cream. Coffee or a glass of cold milk is classic for those who love a perfect pairing. Your guests will swoon—the contrasts in flavor and temperature make every forkful extra special.
Creative Ways to Present
Turn each slice into an occasion! Drizzle extra ganache over the plate, sprinkle crushed cookies for crunch, or stack mini chocolate bars playfully around the cake. For parties, try turning this Overload Chocolate Cake into individual mini cakes with the same decadent layers. No matter how you serve it, drama and indulgence are guaranteed.
Make Ahead and Storage
Storing Leftovers
If you somehow have leftovers (miracles do happen!), store slices or the whole Overload Chocolate Cake in an airtight container in the fridge for up to 3 days. The flavors actually deepen as the cake sits, and the filling stays delightfully fluffy. Just let each piece sit at room temperature for 10 to 15 minutes before serving for the best texture.
Freezing
Want to plan way ahead? You can freeze fully-assembled slices—just place them on a baking sheet to firm up, then wrap tightly in plastic wrap and foil. They’ll keep well for up to 2 months. For the freshest taste, you might also freeze the unfilled cake layers, thaw, then fill and decorate when you’re ready to impress!
Reheating
Chocolate cake is magical at room temperature, but if you crave the sensation of a slightly warm slice, you can microwave an individual piece for 10 to 12 seconds. Just enough to soften the ganache and heighten the chocolate aroma without melting the whipped cream. Bring on the cozy factor!
FAQs
Can I make Overload Chocolate Cake ahead of time?
Absolutely! You can bake the cake layers up to two days in advance. Wrap them tightly in plastic wrap and keep them at room temperature or even freeze them for longer storage. Assemble and decorate on the day you plan to wow your guests for the freshest results.
Is there a substitute for heavy cream in the filling?
If you can’t find heavy cream, try using well-chilled whipping cream with a fat content of at least 30 percent. Avoid lighter creams, as they won’t whip up to stiff peaks or hold up as a filling for the Overload Chocolate Cake.
How do I get the perfect chocolate ganache drip?
The trick is letting your ganache cool just enough so it’s thick but still runs off a spoon. Test a drip down the side of a bowl before pouring on the cake. If it slides off too fast, let it sit a few minutes more; if it’s too stiff, gently reheat for a few seconds. You’ll be a drip master in no time!
Can I make this cake gluten-free?
Yes! Substitute your favorite gluten-free all-purpose flour blend in place of regular flour. Be sure to check that your cocoa powder and chocolate decorations are also gluten-free if you need the entire Overload Chocolate Cake to be safe for all guests.
What’s the best way to cut neat slices?
Use a long, sharp knife dipped briefly in hot water and wiped dry for each slice. This helps you glide cleanly through the rich layers and decadent toppings with minimal mess—showcasing all that gorgeous cake in every piece!
Final Thoughts
There’s something magical about sharing a homemade Overload Chocolate Cake. It’s the kind of unforgettable dessert that turns any gathering into a celebration. So gather your favorite chocolates, roll up your sleeves, and dive into baking bliss—you’ll be making memories (and new traditions!) with every bite. Give this recipe a try and get ready to fall in love.