Roasted Pears with Blue Cheese and Walnuts Recipe
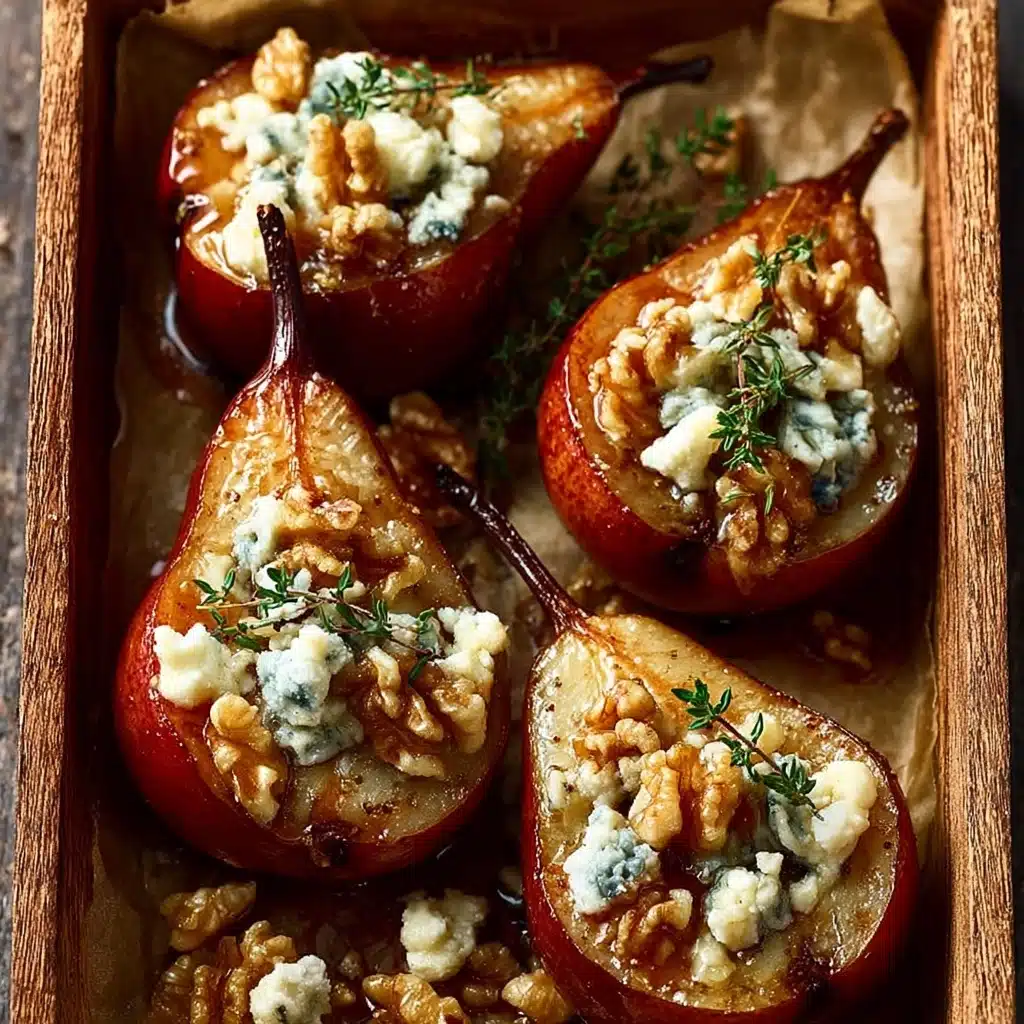
If you’re looking to impress with a dish that is as elegant as it is simple, you have to try Roasted Pears with Blue Cheese and Walnuts. This delightful recipe brings together the natural sweetness of ripe pears, the bold tanginess of blue cheese, and the satisfying crunch of toasted walnuts in a combination that feels both comforting and gourmet. Ideal for a cozy dinner party or a special treat at home, this dish is bursting with layers of flavor and texture that will keep you coming back for more.

Ingredients You’ll Need
These ingredients might seem straightforward, but each one plays a crucial role in building the flavor, texture, and color that make Roasted Pears with Blue Cheese and Walnuts so memorable. From the juicy pears to the aromatic honey and crunchy walnuts, every element shines through.
- 4 ripe but firm pears: Choose pears that are ready to eat but still hold their shape well during roasting.
- 2 tbsp honey: Adds a natural sweetness that caramelizes beautifully in the oven.
- 1 tbsp olive oil or melted butter: Helps the pears roast evenly and adds a subtle richness.
- ½ tsp cinnamon (optional): Introduces a gentle warmth and depth of flavor.
- ½ cup crumbled blue cheese: Provides a creamy, tangy contrast that elevates the pears.
- ¼ cup walnuts, toasted and chopped: Adds a satisfying crunch and nutty aroma.
- 1–2 tsp fresh thyme leaves (optional): A fresh herbaceous note that balances the richness.
How to Make Roasted Pears with Blue Cheese and Walnuts
Step 1: Preheat Your Oven
Start by preheating your oven to 375°F (190°C). Lining a baking sheet with parchment paper ensures easy cleanup and prevents the pears from sticking as they roast to perfection.
Step 2: Prepare the Pears
Slice your pears in half and carefully core them to remove the seeds. Brush each half generously with olive oil or melted butter – this not only promotes beautiful caramelization but also enriches the flavor. Then, drizzle honey over the cut sides and, if you love a bit of spice, sprinkle cinnamon for an extra cozy touch.
Step 3: Roast the Pears
Arrange the pears cut side up on the prepared baking sheet. Roast them for about 20 to 25 minutes until they soften and develop that gorgeous golden caramel hue. The heat coaxing out their natural sugars is a real magic moment.
Step 4: Add Blue Cheese and Walnuts
Once the pears are tender, pull the tray from the oven and scatter the crumbled blue cheese and toasted, chopped walnuts over each half. Return them to the oven for another 3 to 5 minutes. This brief roasting allows the cheese to soften just enough, melting slightly into the juicy pears while the walnuts stay delightfully crisp.
Step 5: Garnish and Serve
Finish your Roasted Pears with Blue Cheese and Walnuts with a sprinkle of fresh thyme leaves if you’re using them. This lovely herb adds brightness that perfectly cuts through the richness. Serve these warm, and get ready for all the compliments!
How to Serve Roasted Pears with Blue Cheese and Walnuts
Garnishes
Fresh thyme leaves are a classic garnish, but you can also consider adding a drizzle of extra honey or a few more walnuts on top for added texture and sweetness. A light sprinkle of cracked black pepper can add a subtle kick that enhances the blue cheese’s flavor.
Side Dishes
Serve these pears alongside a crisp green salad dressed with lemon vinaigrette to balance the richness. They also work beautifully as an appetizer paired with crusty bread or as a unique dessert served next to a scoop of vanilla ice cream or a dollop of whipped cream.
Creative Ways to Present
For a stunning presentation, serve the Roasted Pears with Blue Cheese and Walnuts on a rustic wooden board with clusters of fresh herbs and a small bowl of honey for drizzling at the table. You can also halve the recipe and serve individual portions in elegant white dishes to keep things intimate and polished.
Make Ahead and Storage
Storing Leftovers
If you have any leftovers, place them in an airtight container and store in the refrigerator. They will keep well for up to 2 days, allowing you to enjoy this heavenly dish again without any fuss.
Freezing
While pears don’t always freeze with their best texture intact, you can freeze them if absolutely necessary. Place cooled pears with toppings in a freezer-safe container, separating layers with parchment paper. Keep in mind that thawed pears may become softer, so they are best used in warm dishes after freezing.
Reheating
To reheat, warm your leftover Roasted Pears with Blue Cheese and Walnuts gently in a 350°F (175°C) oven for about 10 minutes or until heated through. This will help restore some of the roasted texture and re-melt the blue cheese beautifully.
FAQs
Can I use other types of cheese instead of blue cheese?
Absolutely! While blue cheese offers a distinctive tang, creamy goat cheese or feta can also pair wonderfully with the sweetness of the pears.
What kind of pears work best for this recipe?
Firm, ripe pears like Bartlett, Bosc, or Anjou are perfect since they hold their shape well when roasted but still have that lovely sweetness.
Is it necessary to toast the walnuts?
Toasting walnuts is highly recommended because it enhances their nutty flavor and adds that satisfying crunch, making the dish even more delicious.
Can I make this recipe vegan?
Yes! Substitute blue cheese with a creamy vegan cheese alternative and use olive oil instead of butter, plus a plant-based honey substitute or maple syrup for a vegan-friendly version.
How long can I prepare this dish ahead of time?
You can prepare the pears and toast the walnuts a day in advance. Add the blue cheese and briefly broil just before serving to keep everything fresh and flavorful.
Final Thoughts
There’s something utterly special about Roasted Pears with Blue Cheese and Walnuts that makes any meal feel like a celebration. Easy enough for a weeknight yet impressive enough for entertaining, this recipe shows how simple ingredients can come together in the most delicious way. Honestly, once you try it, it’s hard not to want to make it again and again. Give it a go—you won’t regret it!