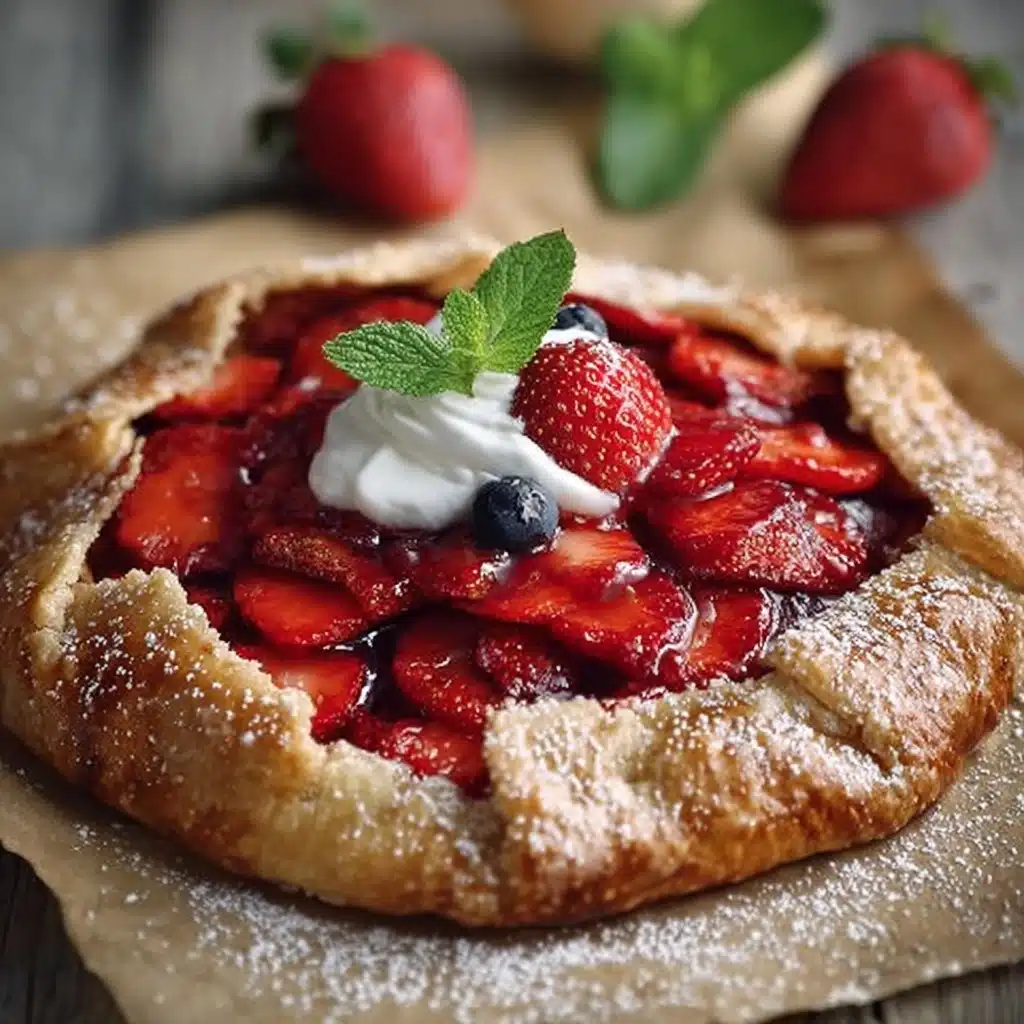
Strawberry Galette Recipe
If you’re in the mood for a dessert that’s rustic, charming, and bursting with sweet fruit flavor, this Strawberry Galette is about to become your new obsession. With a buttery, golden crust enveloping juicy strawberries kissed with vanilla and lemon, every bite tastes like strawberry season at its very best. This galette is as delightful for a festive gathering as it is for a cozy weeknight treat—homemade magic made entirely from scratch, but simple enough for even beginner bakers!
Ingredients You’ll Need
The beauty of this Strawberry Galette lies in its straightforward list of ingredients. Each one plays an important role, working together to create a dessert that’s flaky, bright, and lusciously sweet, with just the right balance of richness and fruit-forward goodness.
- All-purpose flour: This is the base of your crust, giving it structure and that perfect tender bite.
- Salt: Just a touch enhances every flavor and keeps the richness from feeling flat.
- Granulated sugar (for crust & filling): Sweetens both your pastry and strawberries for balanced flavor.
- Cold unsalted butter: Essential for those signature pockets of crisp, flaky pastry.
- Ice water: Keeps the butter from melting and helps the dough come together gently.
- Fresh strawberries: The star of the show—make sure they’re ripe and juicy for the best flavor burst.
- Cornstarch: Thickens the filling so it’s juicy but not runny.
- Lemon juice: Brightens the strawberries and heightens their natural flavor.
- Vanilla extract: Adds warmth and depth to the fruit filling.
- Egg (for egg wash): Brushed on the crust for that irresistible golden shine.
- Coarse sugar: Sprinkled over the crust, it brings sparkle and a wonderful crunch.
- Vanilla ice cream or whipped cream (optional): For serving, adding a cool, creamy finish to each slice.
How to Make Strawberry Galette
Step 1: Make the Galette Crust
Start by combining your flour, salt, and sugar in a large mixing bowl. Add the cold, cubed butter, and use your fingertips or a pastry blender to work it in until the butter is in small, pea-sized pieces throughout the flour—think coarse crumbs, but still a little shaggy. Drizzle in ice water one tablespoon at a time, tossing gently after each addition, until the dough just comes together. It shouldn’t be sticky. Quickly form the dough into a disk, wrap it snuggly in plastic, and chill in the fridge for at least 1 hour. This rest is key for those flaky layers!
Step 2: Prepare the Fresh Strawberry Filling
While your dough chills, toss your sliced strawberries in a bowl with sugar, cornstarch, lemon juice, and vanilla extract. Make sure all the berries are well coated—the cornstarch works magic by thickening the juices as they bubble in the oven, so every slice of Strawberry Galette is beautifully set (not soggy!). Set aside and let those flavors come together.
Step 3: Assemble Your Strawberry Galette
Preheat your oven to 400°F (200°C) and line a baking sheet with parchment paper. On a lightly floured surface, roll out the chilled dough into a rough 12-inch circle; don’t worry if it’s not perfectly round, that’s part of the galette’s rustic charm! Gently transfer it to your prepared baking sheet. Pile the strawberry mixture in the center of the dough, leaving a 2-inch border all the way around. Now, fold those edges up and over the filling, pleating the dough as you go to create a ruffled effect—let the fruit peek out from the center.
Step 4: Add Finishing Touches and Bake
Brush the exposed edges of the crust with your beaten egg for a gorgeous golden hue, then sprinkle generously with coarse sugar for sparkle and extra crunch. Slide the pan into your preheated oven and bake for 35 to 40 minutes, or until the crust is deeply golden and the strawberry filling bubbles merrily at the edges. Let it cool just enough to set slightly—though warm slices are irresistible!
Step 5: Serve and Enjoy
Slice your Strawberry Galette and serve warm, topped with a scoop of vanilla ice cream or a billow of whipped cream if you like. The mix of warm, jammy strawberries and cool, creamy topping is pure dessert bliss.
How to Serve Strawberry Galette

Garnishes
A simple dusting of powdered sugar right before serving gives your galette a bakery-style finish. Fresh mint leaves add a beautiful pop of green and a hint of herbal freshness. If you’re feeling extra, a drizzle of honey or a scatter of chopped pistachios will make your Strawberry Galette feel downright decadent.
Side Dishes
This galette shines on its own, but for brunch, pair it with a lightly dressed green salad and some fresh lemonade to balance the sweetness. For dessert, serve alongside a bowl of mixed summer berries, or offer a cheese plate with mild, creamy cheeses that complement the tart-sweet strawberries.
Creative Ways to Present
Try cutting your Strawberry Galette into small wedges for a finger-food dessert buffet, or serve individual mini galettes if you’re hosting a crowd. You can even top each slice with a scoop of homemade strawberry ice cream for a double-strawberry experience that’s sure to wow your guests.
Make Ahead and Storage
Storing Leftovers
Keep any leftover Strawberry Galette loosely covered at room temperature for up to one day. Beyond that, store it in the refrigerator, wrapped tightly in plastic or foil, where it will keep for about 3 days—though the crust is always at its crispiest when enjoyed fresh!
Freezing
If you want to prep ahead, freeze the fully assembled but unbaked galette on a baking sheet until firm, then wrap well and store in a freezer bag for up to 2 months. Bake straight from frozen, just adding a few more minutes to the baking time. You can also freeze baked slices: wrap each in plastic and tuck them into a freezer-safe container.
Reheating
To bring back that just-baked texture, reheat slices of Strawberry Galette in a 350°F (175°C) oven for 10 to 15 minutes. The crust crisps up again and the filling becomes perfectly jammy. Avoid microwaving, as it can make the crust limp.
FAQs
Can I make this Strawberry Galette with frozen strawberries?
Yes, you can use frozen strawberries, but thaw them first and drain off excess juice to prevent the galette from getting soggy. You may also want to increase the cornstarch slightly to account for extra moisture.
How do I keep the bottom crust from getting soggy?
Rolling your dough just thick enough (about 1/8-inch), using a parchment-lined baking sheet, and adding the fruit filling as the last step helps prevent sogginess. The cornstarch also helps bind the juices as the galette bakes!
Do I have to chill the dough for an hour?
Chilling is highly recommended as it ensures the butter stays cold, resulting in the flakiest crust. If you’re pressed for time, 30 minutes may do, but an hour is ideal for best texture and ease of rolling.
What should I do if I don’t have coarse sugar for sprinkling?
Regular granulated sugar works well in a pinch, but turbinado or demerara sugar gives a standout crunch and sparkle. Don’t skip this step—it really boosts the final presentation!
Can I use this recipe for other fruits?
Absolutely! The same process works beautifully with peaches, blueberries, raspberries, or a mix of seasonal fruits. Just adjust sugar and thickener as needed depending on how juicy your chosen fruits are.
Final Thoughts
There’s something so special about baking a Strawberry Galette from scratch—it’s easy, endlessly adaptable, and brings pure summer joy to your table any time of year. Give this recipe a try, and don’t be surprised if it becomes your new favorite way to savor strawberries!