Summer White Chocolate Mousse Cheesecake Slice Recipe
If there’s ever been a dessert that completely captures the spirit of a sunny afternoon, it has to be the Summer White Chocolate Mousse Cheesecake Slice. This chilled, no-bake treat brings together silky white chocolate, cloud-like mousse, tangy cream cheese, and the bright burst of summer berries for a creamy, refreshing, and absolutely irresistible slice that’s somehow both decadent and light. Imagine pulling a tray of these cheesecake slices from the fridge on a hot day—each piece is cool, fluffy, and vibrant, perfect for sharing at a picnic, summer party, or just as the ultimate self-care snack. Trust me, one bite and you’ll understand why the Summer White Chocolate Mousse Cheesecake Slice is my sunny-season obsession!

Ingredients You’ll Need
What I love most about this recipe is how straightforward the ingredient list is—which means each flavor gets its moment to shine. Nothing hard-to-find, nothing fussy; just a few delicious components working together for dessert magic.
- Graham crackers (200g, crushed): The crunchy, honeyed base that sets the stage for all that creamy goodness above.
- Melted butter (½ cup): This transforms the crumbs into a golden crust with just the right amount of richness.
- Cream cheese (300g, softened): Tangy, smooth, and the backbone of every truly great cheesecake.
- Sugar (½ cup): Keeps everything in perfect sweet/savory harmony without overpowering the subtle chocolate.
- Vanilla extract (1 tsp): A splash of pure vanilla for an extra layer of warmth and depth.
- White chocolate (200g, melted & cooled): Brings that dreamy sweetness and melt-in-your-mouth silkiness to the mousse.
- Heavy cream (1 ½ cups, whipped to soft peaks): This is what gives the cheesecake its mousse-like lift.
- Lemon zest (zest of 1, optional): For a fresh, citrusy note that brightens the whole dessert—highly recommended in summer!
- Fresh berries (for topping): Strawberries, raspberries, blueberries, or any juicy summer berry you love for a pop of color and tartness.
- White chocolate curls: For a touch of elegance and a little extra indulgence on top.
- Berry coulis (optional): A drizzle of quick berry sauce to take it totally over the top.
How to Make Summer White Chocolate Mousse Cheesecake Slice
Step 1: Create the Perfect Graham Cracker Base
Start off by combining your crushed graham crackers with melted butter until every crumb glistens and clumps together. Firmly press this mixture into a lined square or rectangular pan to form an even, compact layer. Chill it in the fridge while you whip up the filling—the butter will firm up, making the crust deliciously sturdy and pleasantly crunchy beneath all that creamy cheesecake mousse.
Step 2: Whip Up the Cheesecake-Mousse Filling
In a mixing bowl, beat the softened cream cheese, sugar, and vanilla extract until the mixture is creamy, smooth, and free of lumps. Gradually mix in the cooled, melted white chocolate—this step is where the magic starts! If you’re using lemon zest, now’s the time to add it in for that pop of freshness. The result? A lusciously velvety base with hints of citrus and white chocolate.
Step 3: Fold in the Whipped Cream
This is the secret to that dreamy, mousse-like texture. Gently fold the whipped heavy cream into the cream cheese mixture, working slowly so you don’t deflate all that airy goodness. You’re aiming for a cloud-like, billowy filling that feels rich but not dense. Once combined, the mixture should look light and fluffy—get ready for some serious spoon-licking temptation.
Step 4: Assemble and Chill
Spoon the mousse filling over your prepared crust and smooth the top with a spatula. Be sure to spread it out to the edges so every bite has the right mix of base and creaminess. Now it’s patience time: cover and refrigerate for at least 4 to 6 hours, or overnight if you can resist. This chilling step lets the Summer White Chocolate Mousse Cheesecake Slice set to the perfect sliceable consistency.
Step 5: Slice, Top, and Serve
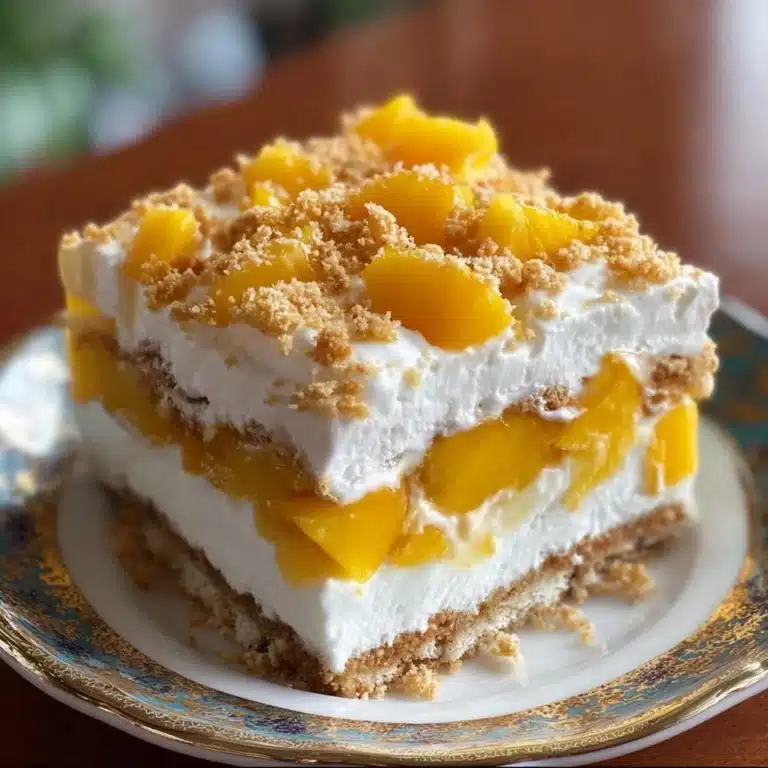
When you’re ready to serve, lift the dessert from the pan and cut it into generous squares or rectangles. Pile on the fresh berries, scatter over white chocolate curls, and if you’re feeling fancy, drizzle a little berry coulis over each slice. Serve them up ice-cold for the most refreshing, melt-in-your-mouth summer treat around!
How to Serve Summer White Chocolate Mousse Cheesecake Slice

Garnishes
You can let your creativity shine here! I love topping each Summer White Chocolate Mousse Cheesecake Slice with a generous handful of plump, vibrant berries and a scattering of white chocolate curls. A little swirl of berry coulis or a sprinkle of extra lemon zest will add a pop of color and zing that perfectly balances the creamy filling.
Side Dishes
Pairing this cheesecake slice with a simple fruit salad or a big bowl of freshly sliced peaches and nectarines adds to the summery vibe. For something a little more decadent, serve alongside a scoop of lemon sorbet or vanilla ice cream to really lean into that chilled, refreshing dessert mood.
Creative Ways to Present
If you want to impress, try assembling individual cheesecake jars using small glasses or mason jars—perfect for picnics or parties! Or, turn each Summer White Chocolate Mousse Cheesecake Slice into dessert bars by cutting smaller portions and arranging them on a colorful platter with edible flowers and herbs for a really festive look.
Make Ahead and Storage
Storing Leftovers
If, by some miracle, you have leftovers, simply cover the pan tightly with plastic wrap or transfer the slices to an airtight container. The Summer White Chocolate Mousse Cheesecake Slice will stay wonderfully fresh for up to four days in the fridge—just make sure the berries are added right before serving for best texture.
Freezing
This dessert actually freezes beautifully! After slicing, layer parchment between each piece and tightly wrap everything in foil or a freezer-safe container. The cheesecake slices keep for up to two months; just thaw them overnight in the fridge before serving. Wait to add fresh berries or coulis until you’re ready to eat for the prettiest presentation.
Reheating
No reheating needed for this no-bake treat—just let the Summer White Chocolate Mousse Cheesecake Slice sit at room temperature for about 10 minutes if it’s coming straight from the fridge or half an hour if it’s been frozen. That way, the texture softens back to creamy perfection without sacrificing that blissfully cold bite.
FAQs
Can I use a different type of cookie or biscuit for the crust?
Absolutely! Digestive biscuits, vanilla wafers, or even shortbread make fantastic alternatives to graham crackers, each tweaking the flavor in a delicious way. Just be sure to use the same quantity and process for crushing and mixing with butter.
Is it possible to make this cheesecake filling without white chocolate?
While the white chocolate really gives the mousse its signature silkiness and sweet flavor, you could replace it with high-quality cream for a plainer cheesecake bar. Just keep in mind the result will be less mousse-like and less rich.
How do I know when the cheesecake slice is set and ready to cut?
Gently press the top with your finger—if it feels firm and doesn’t stick, it’s ready! Chilling for at least 4–6 hours (or overnight) is important for perfect clean slices that hold their shape but still melt in your mouth.
Can I make these slices gluten-free?
Definitely! Swap the graham crackers for a gluten-free cookie or biscuit and check that your white chocolate is certified gluten-free. You won’t miss out on any of the luscious taste or texture, I promise.
What’s the best way to cut neat slices?
For bakery-quality presentation, dip a sharp, thin knife in hot water and wipe it dry between cuts. This helps make each Summer White Chocolate Mousse Cheesecake Slice picture-perfect with clean, smooth edges every time.
Final Thoughts
If you’re searching for a show-stopping, fuss-free summer dessert, the Summer White Chocolate Mousse Cheesecake Slice is genuinely as lovely to eat as it is to look at. Light, creamy, and bursting with fresh flavors, I hope you’ll give it a try—and maybe even make it your new summer tradition too!

