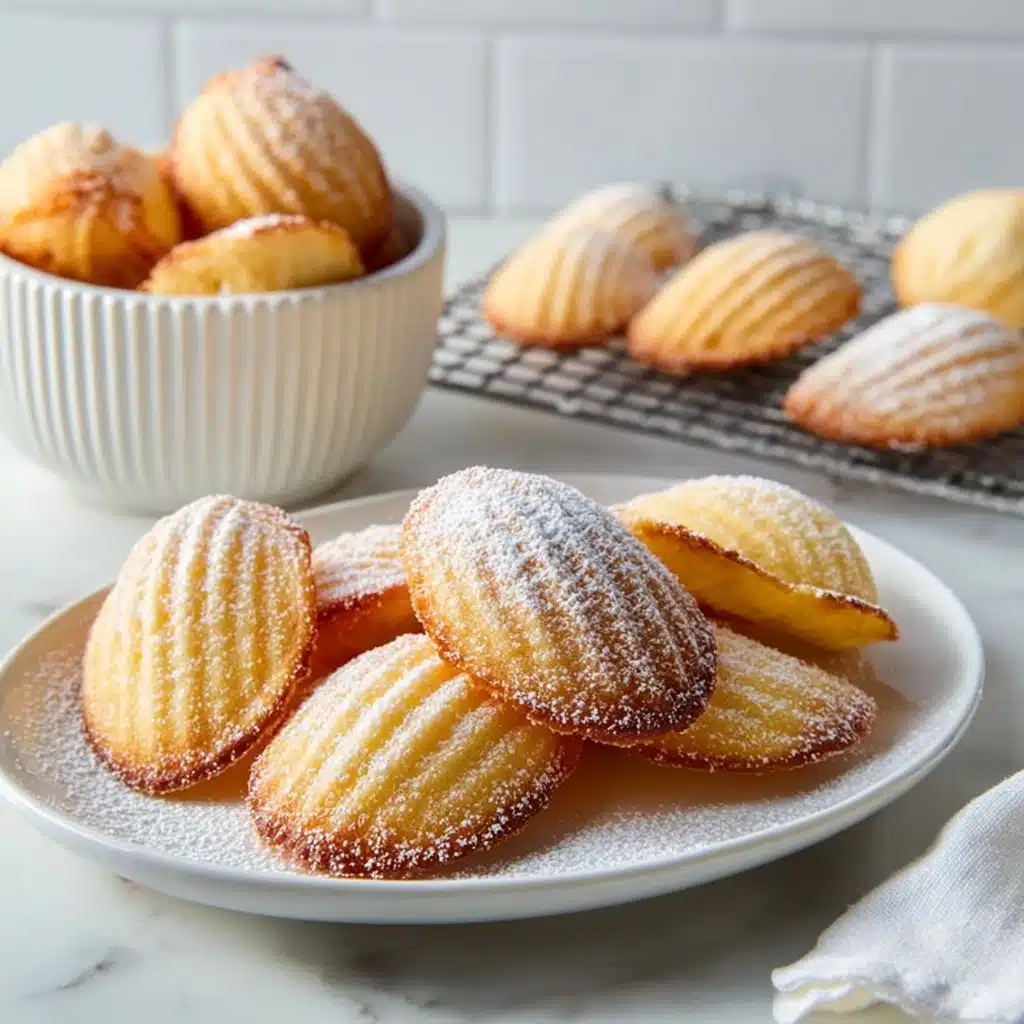
Traditional Butter Madeleines Recipe
If you’ve ever wished for a tea-time treat that feels like a warm hug, then Traditional Butter Madeleines are here to charm your taste buds. These delicate, shell-shaped cakes are light, buttery, and just the right touch sweet, boasting a tender crumb infused with a bright hint of lemon zest. Every bite melts effortlessly, delivering that classic French patisserie experience right in your own kitchen. Whether you’re a seasoned baker or trying madeleines for the first time, this recipe makes the simple act of baking feel like a celebration of time-honored flavors and comforting textures.

Ingredients You’ll Need
The magic of Traditional Butter Madeleines lies in a handful of simple yet essential ingredients that work harmoniously together. Each one plays its part in creating the perfect combination of fluffy crumb, buttery richness, and that irresistible golden color you want to see in every bite.
- Unsalted butter (½ cup / 115g): Melted and cooled, it gives madeleines their signature rich, tender texture and buttery flavor.
- Large eggs (2): Provide structure and help create the light, airy crumb.
- Granulated sugar (½ cup / 100g): Sweetens subtly while aiding in the batter’s volume when whipped with the eggs.
- Vanilla extract (1 teaspoon): Adds a warm, inviting aroma that complements the butter beautifully.
- All-purpose flour (1 cup / 120g): The foundation that holds everything together while keeping the texture tender.
- Baking powder (1 teaspoon): Gives the little lift that turns these cakes tender and perfectly risen.
- Pinch of salt: Enhances flavors and balances out the sweetness.
- Lemon zest (from 1 lemon): Infuses a fresh, bright citrus note that keeps the bites lively and refreshing.
How to Make Traditional Butter Madeleines
Step 1: Prepare Your Oven and Pan
Start by preheating your oven to 375°F (190°C). It’s important to get that temperature right because a hot oven helps create the delicate crisp edges these madeleines are famous for. Then, generously grease your madeleine pan with butter — this will ensure every little shell-shaped cake comes out perfectly without sticking.
Step 2: Whip Eggs and Sugar
In a mixing bowl, whisk together your eggs and granulated sugar until the mixture becomes pale, thick, and slightly fluffy. This process incorporates air, which is key for the light texture in your finished madeleines. Taking your time here really pays off in the final bake.
Step 3: Add Vanilla and Lemon Zest
Next, gently stir in the vanilla extract and lemon zest. This step infuses your batter with wonderful floral and citrus notes that elevate each bite beyond a simple butter cake into something truly special.
Step 4: Sift and Fold in Dry Ingredients
Sift together the flour, baking powder, and salt to ensure no lumps will interfere with the batter’s silky smoothness. Carefully fold these dry ingredients into the egg mixture. Folding rather than stirring aggressively keeps all the air you just worked to build inside that batter, so don’t rush this!
Step 5: Incorporate the Melted Butter
Now, slowly pour in your cooled melted butter, folding it into the mixture until everything is just combined. The butter binds everything with richness, giving the madeleines their tender crumb and that melt-in-your-mouth quality.
Step 6: Chill the Batter
For best results, cover the batter and chill it in the refrigerator for at least 30 minutes. This resting time helps the flour hydrate and allows the butter to solidify slightly, which leads to those coveted “humps” rising when baked.
Step 7: Bake to Golden Perfection
Spoon the chilled batter into the prepared madeleine molds, filling each about three-quarters full. Pop the pan into your oven and bake for 10 to 12 minutes until the madeleines turn beautifully golden brown around the edges and spring back lightly when touched.
Step 8: Cool and Dust
Once baked, remove the madeleines from the oven and let them cool in the pan for a few minutes before gently transferring to a wire rack. When they’re just warm, dust the tops with powdered sugar for that classic touch of elegance and sweetness.
How to Serve Traditional Butter Madeleines
Garnishes
Traditional Butter Madeleines look charming simply dusted with powdered sugar, but feel free to experiment. A light drizzle of melted chocolate or a sprinkle of finely chopped toasted almonds can add texture and a bit of extra indulgence. Fresh berries or a sliver of candied lemon peel also complement these treats beautifully.
Side Dishes
These little cakes shine when paired with a warm cup of Earl Grey tea or your favorite coffee blend. For brunch or special occasions, serve alongside clotted cream or a dollop of homemade lemon curd for an irresistible bite that balances sweetness and tang.
Creative Ways to Present
Display your Traditional Butter Madeleines on a pretty tiered stand or rustic wooden board to highlight their quaint shape and golden hue. You can also sandwich them with a smear of jam or pastry cream for a delightful twist that’s perfect for celebrations or afternoon get-togethers.
Make Ahead and Storage
Storing Leftovers
Leftover madeleines stay fresh at room temperature in an airtight container for up to 2 days. Keeping them sealed prevents them from drying out and ensures that that tender crumb stays lovely for every bite.
Freezing
You can freeze madeleines by placing them in a single layer on a baking sheet until solid, then transferring them to an airtight container or freezer bag. They’ll keep beautifully for up to 2 months, making it easy to enjoy this classic treat anytime.
Reheating
When you’re ready to enjoy frozen madeleines, gently warm them in a 300°F (150°C) oven for 5 to 7 minutes. This refreshes their delicate texture without drying them out. Avoid microwaving as it can make them rubbery quickly.
FAQs
Can I use salted butter instead of unsalted?
While you can substitute salted butter, unsalted butter is preferred for Traditional Butter Madeleines so you can control the salt level precisely. Using salted butter might make the finished cakes taste too salty.
Why does the batter need to chill before baking?
Chilling the batter firms up the butter and allows the flour to fully hydrate. This resting time helps achieve the iconic hump and tender crumb that make Traditional Butter Madeleines so special.
Can I make this recipe gluten-free?
Yes, you can substitute the all-purpose flour with a gluten-free flour blend. Just make sure your blend includes xanthan gum or another binder to help maintain the texture.
What causes madeleines to have their characteristic hump?
The hump forms due to the temperature contrast when cold batter hits a hot oven. Chilling the batter and baking at the right temperature encourages steam and air pockets to rise, creating that beautiful dome.
How long do madeleines last after baking?
Freshly baked Traditional Butter Madeleines are best enjoyed within 1–2 days as they tend to dry out quickly due to their delicate texture.
Final Thoughts
Making Traditional Butter Madeleines at home is a truly rewarding experience that fills your kitchen with the most irresistible aromas and pure joy. They’re simple to whip up, yet the result feels luxurious and timeless—perfect for sharing with loved ones or savoring quietly with your favorite cup of tea. Give this recipe a go and treat yourself to a little piece of French baking magic right in your own oven.