*Ultimate Chocolate Layer Cake** Recipe
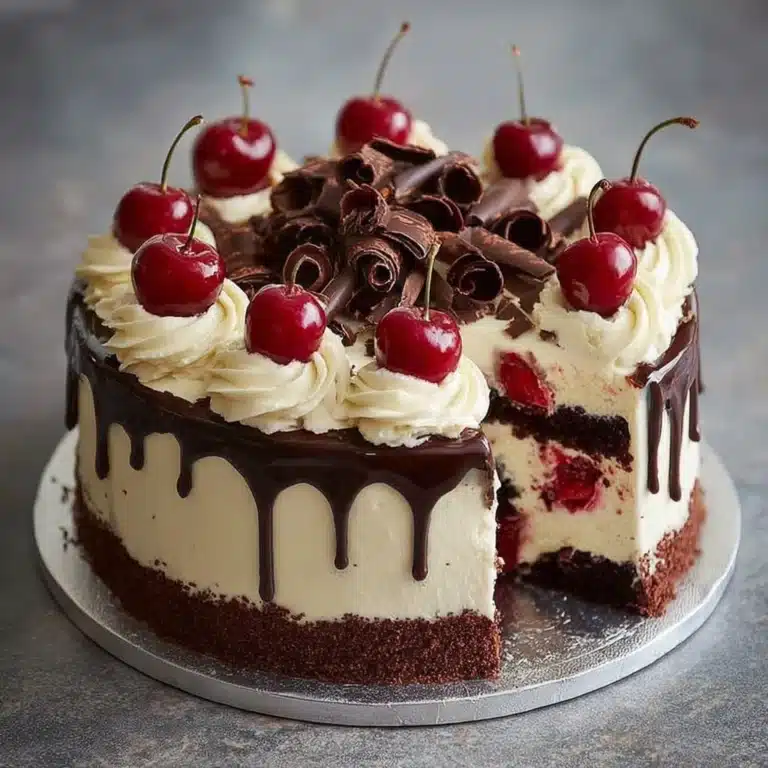
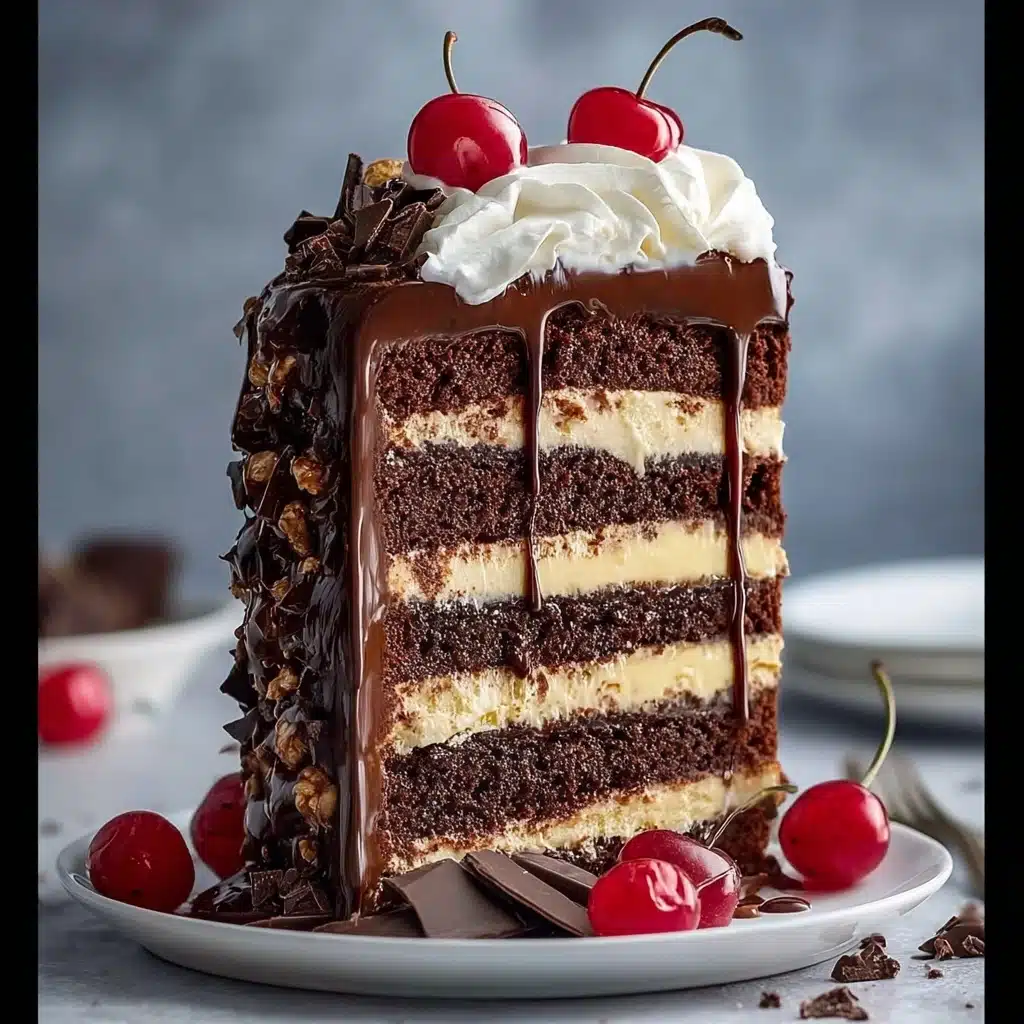
Prepare to fall head over heels for the Ultimate Chocolate Layer Cake! This showstopper blends scrumptiously moist chocolate cake, rich chocolate mousse, and a lusciously smooth cream cheese filling, all crowned with a glossy chocolate ganache and finished with a flourish of whipped cream, juicy cherries, and chocolate shavings. It’s the ultimate lavish treat for birthdays, special gatherings, or simply anytime you need an edible celebration. If you’re a chocolate lover—or know someone who is—this cake is destined to be your new favorite indulgence.
Ingredients You’ll Need
Each component of this cake uses straightforward, real ingredients that work together in perfect harmony. From the deep cocoa notes in the cake to the creamy, tangy fillings, every ingredient brings its own special magic to the table for a dessert that really delivers.
- All-purpose flour: This cake’s base—provides structure while keeping each bite tender.
- Granulated sugar: Adds just the right touch of sweetness to balance the cocoa and fillings.
- Unsweetened cocoa powder: Key to that intensely chocolaty flavor; use a good-quality cocoa for the best results.
- Baking soda and baking powder: These leaveners make sure the cake bakes up light, fluffy, and tall.
- Salt: Just a little brings all the flavors to life and keeps the sweetness in check.
- Buttermilk: The secret ingredient for plush, moist crumb and a slight tang to offset all that richness.
- Hot brewed coffee: Amplifies the chocolate flavor—don’t worry, it won’t taste like coffee.
- Vegetable oil: Locks in moisture so your cake stays soft and luscious for days.
- Eggs: Essential for lift and for binding the batter together.
- Vanilla extract: Gives warmth and depth, making the chocolate flavor even bigger and bolder.
- Heavy cream: Whipped into the mousse, lightened for the ganache, and crucial for creamy textures.
- Semi-sweet chocolate: The star of both the mousse and the ganache—choose a high-quality bar for luxury in every forkful.
- Powdered sugar: Keeps all of the fillings smooth and sweet without any grittiness.
- Cream cheese: Adds tang and silkiness to the signature frosting layer.
- Unsalted butter: Softened and blended for a rich, creamy texture in the filling.
- Whipped cream: Beautiful for piped finishing touches and even more decadence.
- Fresh cherries: Their vibrant pop brightens up the look and taste.
- Chocolate shavings: Simple but elegant, they turn this treat into a true showpiece.
How to Make Ultimate Chocolate Layer Cake
Step 1: Bake the Chocolate Cake Layers
Preheat your oven to 350°F (175°C). Grease and flour two 9-inch round cake pans so nothing sticks. In a large bowl, whisk together the flour, sugar, cocoa powder, baking soda, baking powder, and salt. In a separate bowl, combine the buttermilk, hot coffee, oil, eggs, and vanilla. Pour the wet mixture into the dry and stir just until it all comes together—don’t overmix! Divide the batter evenly between both pans and bake for 30–35 minutes, until a toothpick comes out mostly clean. Let the cakes cool completely, then carefully slice each cake horizontally so you have four cake rounds in total. This is the secret to those stunning layers in the Ultimate Chocolate Layer Cake!
Step 2: Chocolate Mousse Magic
While the cakes are cooling, make the chocolate mousse filling. In a large bowl, beat the heavy cream until it forms stiff peaks; this gives the mousse that dreamy, cloudlike texture. Gently fold in the cooled, melted semi-sweet chocolate with the powdered sugar and vanilla. You want to keep it airy, so take your time during this step. The result is a light, mousse-like filling that will melt into every bite.
Step 3: Cream Cheese Dream Filling
Next, in a stand mixer, beat together the softened cream cheese and butter until they form a smooth, cohesive blend. Add the powdered sugar, vanilla, and heavy cream, then whip everything until it becomes thick, billowy, and ultra-luxurious. This filling is the decadent glue between layers, balancing the richness of the cake and mousse with a slight tang.
Step 4: Silky Chocolate Ganache
For the ganache, place your chopped semi-sweet chocolate in a medium bowl. Heat the cream just until it begins to simmer, then immediately pour it over the chocolate. Let this sit undisturbed for five minutes, so the chocolate melts fully. Then whisk until glossy and smooth. Divide the ganache—half for a pourable, shiny topping, half to let cool for a slightly thicker drizzle between the layers of your Ultimate Chocolate Layer Cake.
Step 5: Assembly Time!
Time to build your masterpiece! Start by placing one cake layer on your serving plate, then pipe a thick ring of cream cheese filling around the edge. This barrier holds the mousse in place. Fill the center with chocolate mousse. Add a second cake layer and repeat, alternating the fillings: ring of cream cheese, center of mousse, etc., until you use all the layers. Finish with the final cake layer on top. It’s a labor of love, but you’ll see why each step matters once you slice into those beautiful layers.
Step 6: The Crumb Coat Chill
Spread a thin layer of cream cheese filling all around the outside of the cake to create a crumb coat—this seals in any loose crumbs and ensures a flawless finish. Chill the whole cake for at least 30 minutes; it helps set the fillings and makes the final toppings a breeze to apply.
Step 7: Ganache and Gorgeous Finishes
After the crumb coat is set, pour the shiny ganache you reserved for the topping over the chilled cake, letting some drip enticingly down the sides. For the grand finale, pipe swirls of whipped cream around the top, nestle on fresh cherries, and sprinkle with chocolate shavings. Ta-da! Your Ultimate Chocolate Layer Cake is ready to wow everyone lucky enough to enjoy it.
How to Serve Ultimate Chocolate Layer Cake
Garnishes
This is the moment for all your cake decorating dreams! I absolutely love piping soft peaks of whipped cream around the top edge, then dotting each one with a glistening cherry. Fresh cherries not only add color, but also a natural sweetness. Finish with chocolate shavings—use a vegetable peeler to create dramatic curls right from a bar of chocolate. If you want to get extra fancy, a dusting of edible gold leaf takes your Ultimate Chocolate Layer Cake totally over the top.
Side Dishes
A slice of this cake is indulgent enough to stand alone, but a dollop of vanilla bean ice cream or a cup of fresh berries on the side can be heavenly. For a grown-up twist, serve with espresso or a pour of ruby port. Even a glass of cold milk turns every bite into nostalgic bliss. The key is to keep the sides simple, letting your Ultimate Chocolate Layer Cake be the undeniable star.
Creative Ways to Present
If you’re making this for a party, try mini versions: assemble in mason jars or cupcake-sized portions so each guest gets their own jaw-dropping treat. For a dramatic centerpiece, serve the whole cake on a pedestal stand and slice at the table—the layers look breathtaking! If you want to personalize, sprinkle colorful sprinkles, toasted hazelnuts, or edible flowers on top. Every occasion deserves its own Ultimate Chocolate Layer Cake flair.
How to Serve

Serve this delicious recipe with your favorite sides.
Make Ahead and Storage
Storing Leftovers
If you have leftovers, wrap individual slices or the remaining whole cake tightly in plastic wrap and store in an airtight container in the refrigerator. It will stay wonderfully moist and delicious for up to five days. Each forkful seems to taste even better after the flavors have had a chance to meld.
Freezing
The Ultimate Chocolate Layer Cake is surprisingly freezer-friendly! For best results, slice the cake and wrap each piece in two layers of plastic wrap and a layer of foil before freezing. Thaw slices in the fridge overnight before serving, so the mousse and cream cheese fillings return to their perfect texture. It’s a smart way to have a celebration-ready treat on hand for surprise guests or late-night cravings.
Reheating
This cake is best enjoyed chilled or at cool room temperature, but if you want a warm touch, try microwaving a slice for 10–15 seconds. The ganache gets a little gooier and that chocolate aroma will fill your kitchen all over again. Just be careful not to overheat, as you don’t want the fillings to liquefy.
FAQs
Can I make the Ultimate Chocolate Layer Cake ahead of time?
Absolutely! You can bake the cake layers and prepare the fillings a day in advance. Assemble and frost the cake up to a day before serving, then keep it chilled in the fridge. The flavors actually come together even more beautifully overnight.
What kind of cocoa powder should I use?
For best results in the Ultimate Chocolate Layer Cake, use a good-quality unsweetened, Dutch-processed cocoa powder. It delivers a deep, smooth chocolate taste and a rich, dark color that really brings this cake to life.
Can I substitute the coffee in the cake recipe?
If you’re not a fan of coffee or want to keep things totally caffeine-free, just substitute the hot brewed coffee for hot water. The coffee simply helps highlight the chocolate flavor and won’t leave a coffee taste behind.
Is there a nut-free version of the Ultimate Chocolate Layer Cake?
Great news: The recipe as written is nut-free! Just make sure that your chocolate and cocoa are manufactured in nut-free facilities if cross-contamination is a concern.
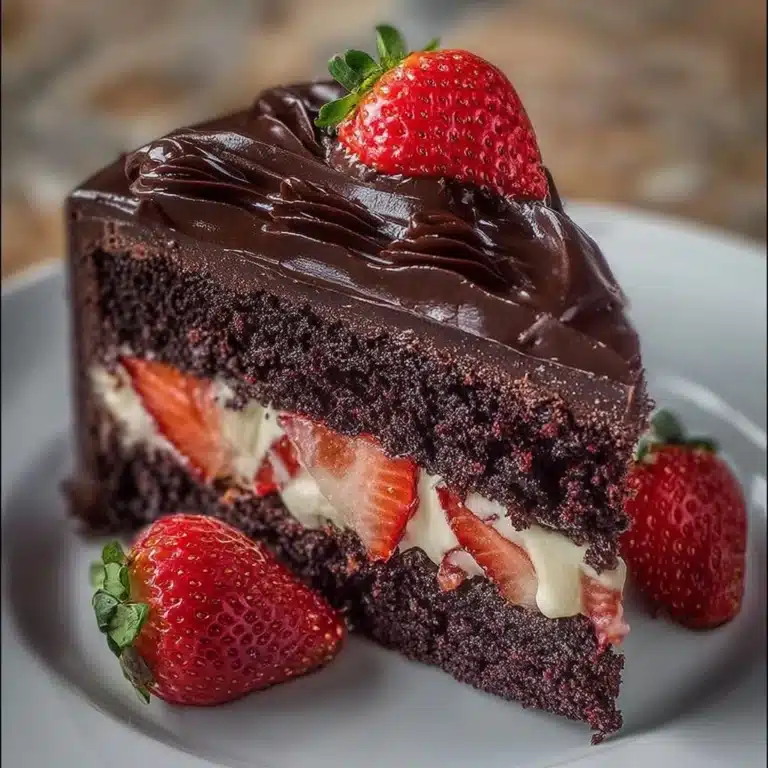
What’s the best way to slice the cake neatly?
Use a long, sharp serrated knife, dipped in hot water and wiped clean before each cut. This helps you slice through the layers cleanly, creating those beautiful, bakery-worthy wedges without smearing the luscious fillings.
Final Thoughts
I truly hope you’ll give this Ultimate Chocolate Layer Cake a try, whether for your next celebration or just because you’re in the mood for something decadent. Every luscious bite feels special enough to celebrate all on its own. Happy baking and sharing!